
Introduction to Cherry Slab Pie
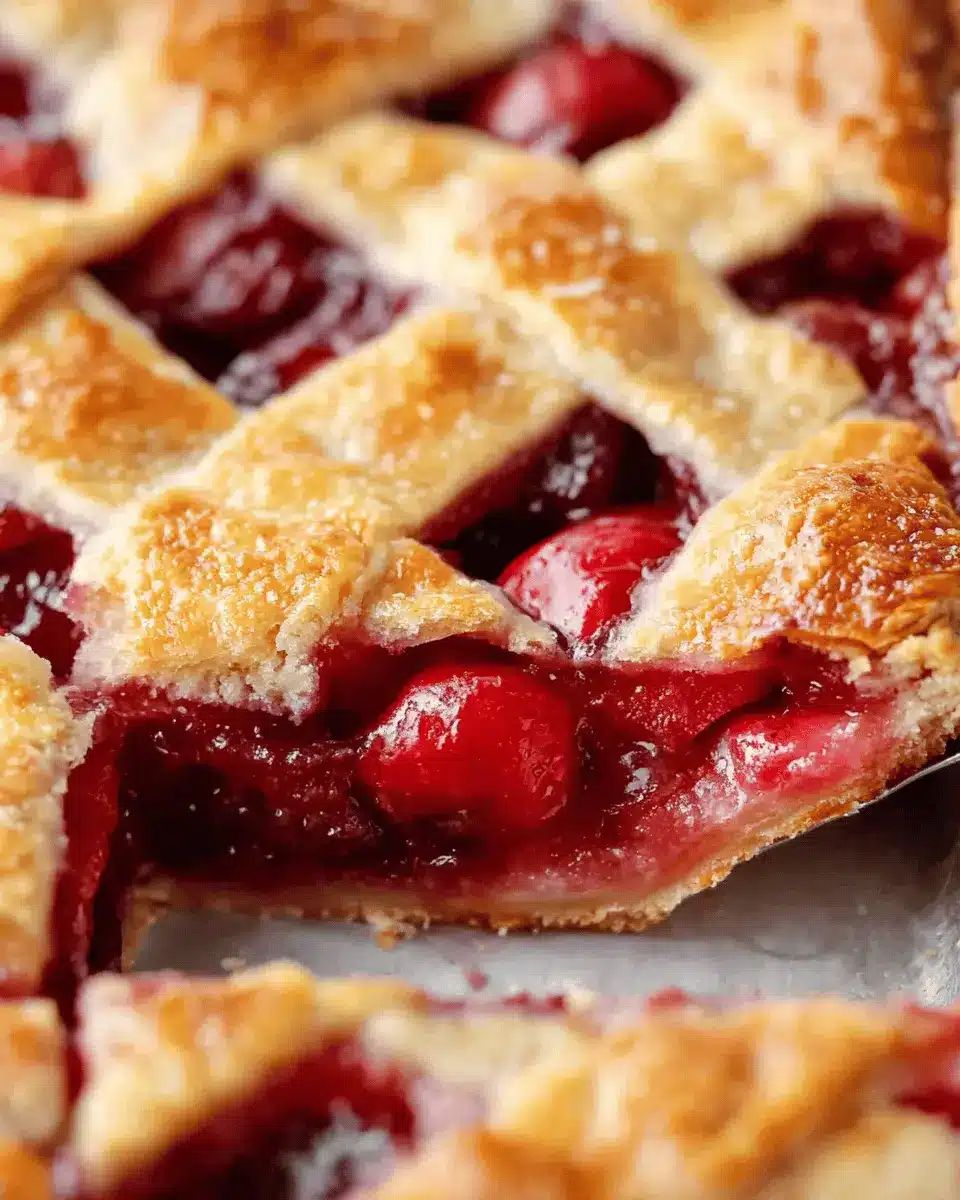
If you’ve ever craved the delightful juiciness of cherry pie but needed an option that serves a crowd, look no further than Cherry Slab Pie! This unique dessert takes all the goodness of traditional cherry pie and spreads it into a generous sheet pan, making it ideal for gatherings, parties, or even just a cozy night in with friends.
Why Cherry Slab Pie is the Ultimate Dessert
Imagine serving vibrant, bubbling cherries nestled between flaky, buttery crusts—sounds incredible, right? Not only is this pie a feast for the eyes, but it also offers a simple way to indulge in the nostalgic flavors of summer. Whether you’re a baking novice or a seasoned pro, this recipe shines with approachable steps and minimal fuss. Plus, with its ability to yield 18-24 slices, it’s the perfect solution for potlucks or get-togethers.
What’s more, the vibrant color and sweet aroma fill your kitchen, creating an inviting atmosphere that's hard to resist. If you love cherries, you might want to explore more about their health benefits. According to health experts, cherries are packed with antioxidants that can promote overall wellness, making Cherry Slab Pie not just a treat, but also a delightful way to incorporate more fruit into your diet.
Ready to dive into the recipe? Let’s create some pie magic together!

Ingredients for Cherry Slab Pie
Making a delicious Cherry Slab Pie is a breeze when you gather the right ingredients. Let’s break it down by sections to simplify your baking experience!
Key Ingredients for the Crust
For the perfect flaky crust, you'll need:
- 4 cups of all-purpose flour
- 2 teaspoons of salt
- 1 ¼ cups of shortening
- ½ cup of cold butter, cut into small cubes
- 1 tablespoon of vegetable oil
- ¾ cup of milk
- 1 tablespoon of lemon juice
These components come together to create a tender yet sturdy base for your cherry filling.
Essential Ingredients for the Cherry Filling
The heart of our Cherry Slab Pie is the filling, so you can't go wrong with:
- 3 cans of 21 oz. cherry pie filling
This convenient option saves time while ensuring a sweet and tangy flavor profile, perfect for pie lovers!
Topping and Egg Wash Ingredients
To finish up your pie, you’ll need a few extras for that golden top:
- 2 tablespoons of all-purpose flour
- 2 tablespoons of sugar (for a sprinkle of sweetness)
- 1 egg, beaten (for that lovely golden hue)
- 1 tablespoon of water (to mix with the egg)
These simple toppings elevate the pie, making it look as good as it tastes!
Now that you have your ingredients ready, you’re just one step away from baking an unforgettable dessert. Happy baking! For more tips and tricks, check out sources like King Arthur Baking.
Preparing Cherry Slab Pie
Creating a Cherry Slab Pie is a delightful baking adventure that yields a delicious dessert perfect for gatherings, picnics, or any occasion that calls for a sweet treat. Follow these simple steps to ensure your slab pie turns out beautifully every time!
Step 1: Prepare the Pie Crust
The crust is the foundation of a great pie, and preparing it is easier than you may think! Begin by mixing 4 cups of all-purpose flour with 2 teaspoons of salt in a large bowl. Use a pastry cutter or your fingers to cut in 1 ¼ cups of shortening and ½ cup of cold butter, creating a mixture that resembles small peas. In a separate bowl, mix ¾ cup of milk with 1 tablespoon of lemon juice, then add this mixture along with 1 tablespoon of vegetable oil to your flour blend. Stir until a soft dough forms; don’t hesitate to use your hands to bring the mix together. Once ready, divide the dough into two equal parts, flatten them into discs, wrap in plastic, and refrigerate for about 30 minutes to allow them to chill.
Step 2: Make the Cherry Filling
While the dough chills, it's the perfect time to create the luscious filling for your Cherry Slab Pie. For this recipe, you’ll need three 21 oz. cans of cherry pie filling. If you're feeling ambitious, you can also opt for homemade cherry filling using fresh or frozen cherries, sugar, and a touch of cornstarch to thicken. So delicious!
Step 3: Roll Out and Assemble the Slab Pie
After you’ve chilled the dough, preheat your oven to 400°F. Roll out one portion of the dough on a lightly floured surface into a rustic 13x18-inch rectangle, about ⅛ inch thick. Place this into a 10x15-inch jelly roll pan, letting the excess hang over the edges. Sprinkle the bottom with a mix of 2 tablespoons sugar and 2 tablespoons flour as a protective layer before gently pouring in the cherry filling. Roll out the second piece of dough into a similar rectangle and place it on top. Fold and tuck the edges of both crusts together, crimping them for an appealing finish. Don’t forget to slice vents in the top crust!
Step 4: Bake the Cherry Slab Pie
Your Cherry Slab Pie is almost ready to go! Brush the top crust with an egg wash (1 beaten egg mixed with 1 tablespoon of water) and sprinkle with sugar to enhance the crust's golden color. Bake for 30 minutes, then tent with foil and continue baking for an additional 20-25 minutes or until the crust is golden and the filling is bubbling.
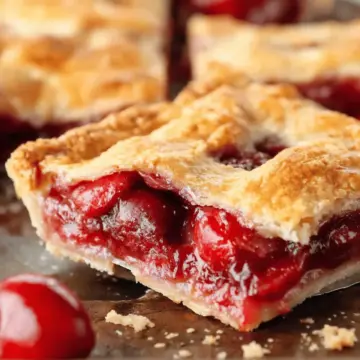
Step 5: Cool and Serve
Once your pie has baked to perfection, let it cool for at least 2 hours to set the filling. This cooling time not only makes slicing easier but also amps up the flavor. Serve this delightful slab pie warm or at room temperature, and watch it disappear from your dessert table! If you're looking for more pie inspiration, check out resources like The Kitchn for other creative pie ideas.
Now, gather your friends, slice up your delicious Cherry Slab Pie, and enjoy!
Variations on Cherry Slab Pie
Cherry Almond Variation
If you're a fan of almond flavor, try adding a splash of almond extract to your cherry filling. This twist will elevate your Cherry Slab Pie to a whole new level, creating a delightful blend of tart and nutty flavors. For extra flair, sprinkle sliced almonds on top before baking. The nutty aroma combined with the cherry will have everyone coming back for a second slice!
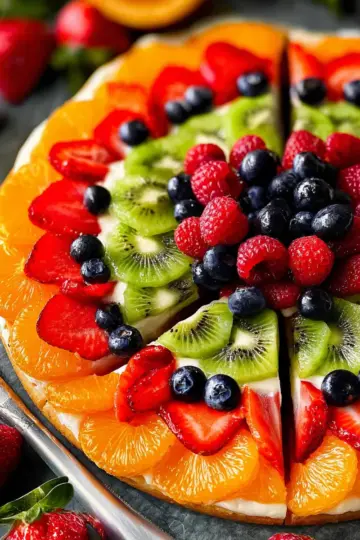
Mixed Berry Slab Pie
Want to mix it up a bit? Create a Mixed Berry Slab Pie by swapping out some or all of the cherry filling for a combination of blueberries, raspberries, and strawberries. Fresh or frozen berries work beautifully, adding a colorful hue and a refreshing taste. Not only does this variation add a medley of flavors, but it also provides a great way to use seasonal fruits, making this slab pie a versatile option year-round!
Baking Tips for Cherry Slab Pie
Importance of Chilling the Dough
Chilling your dough is key to achieving a flaky Cherry Slab Pie. When the dough is cold, it helps maintain its structure and creates those irresistible layers we all love. By refrigerating it for at least 30 minutes, the fats stay firm, preventing the crust from shrinking during baking. If you have a little extra time, consider chilling it longer for even better results!
Oven Temperature Considerations
Getting your oven temperature just right is crucial for baking. Preheat your oven to 400°F, and if you have a pizza stone, pop it in to help with even heat distribution. Using a light-colored baking sheet can also prevent over-browning. For best results, keep an eye on your pie after the first 30 minutes and make necessary adjustments to ensure a perfectly golden crust!
For more tips on achieving the perfect pie crust, consider checking out sources like Serious Eats or Bon Appétit. Happy baking!

Serving Suggestions for Cherry Slab Pie
Pairing with Ice Cream
There’s nothing quite like indulging in a slice of Cherry Slab Pie alongside a generous scoop of vanilla ice cream. The creamy texture beautifully complements the tart cherry filling. Want to mix it up? Try a scoop of almond or coconut ice cream for a unique twist. For added decadence, drizzle some chocolate or caramel sauce on top—your guests will be raving about this delightful pairing!
Creative Presentation Ideas
Make your Cherry Slab Pie a showstopper by presenting it on a rustic wooden board, garnished with fresh mint leaves. You can also serve individual slices on colorful plates, adding a dollop of whipped cream for an extra touch. Consider using a powdered sugar shaker to dust the top before serving; it adds an elegant finish that looks as good as it tastes!
For more inspiration, check out this presentation guide.
Time Breakdown for Cherry Slab Pie
Preparation Time
Get ready to roll with about 45 minutes of preparation. This includes mixing the pie crust, preparing the cherry filling, and assembling your delicious creation.
Baking Time
Bake the Cherry Slab Pie for a total of 55 minutes—first for 30 minutes uncovered, then an extra 20-25 minutes covered, ensuring a golden-brown crust and bubbling filling.
Cooling Time
Patience is key! Let your pie cool for at least 2 hours before slicing. This helps the filling set beautifully, making each slice a delightful treat to savor.
Enjoy crafting this delightful pie, perfect for sharing with friends and family! For more amateur bakers tips, you can check out King Arthur Baking for great insights.
Nutritional Facts for Cherry Slab Pie
Calories per Slice
With each slice of Cherry Slab Pie containing approximately 226 calories, you can indulge without too much guilt. This dessert is rich in flavor, making it a delightful treat for gatherings or a cozy night in.
Key Nutritional Information
Alongside its caloric content, Cherry Slab Pie offers diverse nutrition:
- Carbohydrates: 19g
- Protein: 3g
- Fat: 16g, including healthy monounsaturated fats
- Fiber: 1g
For the full nutritional breakdown, visit the USDA Nutrient Database for more insights. Consider this treat a sweet way to boost your spirits while sharing it with friends!
FAQs about Cherry Slab Pie
Can I use fresh cherries instead of canned?
Absolutely! Fresh cherries can be a delightful alternative to canned ones. Simply pit and slice them before using. You'll want to add a bit of sugar and cornstarch to thicken the filling, as fresh cherries have more moisture. This can elevate your Cherry Slab Pie with a burst of fresh flavor.
How do I store leftover Cherry Slab Pie?
Storing your leftovers is easy! Keep the pie in the pan, loosely covered with plastic wrap, and it will stay fresh for up to three days. If you want to maintain that crumbling crust, consider reheating individual slices in the oven for a few minutes before serving!
Can I freeze Cherry Slab Pie?
Yes, you can! To freeze, allow the pie to cool completely, then wrap it tightly in plastic wrap followed by aluminum foil. Freeze for up to three months. When you're ready to enjoy, just thaw it in the refrigerator overnight and reheat for a delicious slice of summer.
Feel free to check out How to Store Pie Properly for more tips on pie preservation!
Conclusion on Cherry Slab Pie
In summary, Cherry Slab Pie is a delightful, crowd-pleasing dessert that's ideal for gatherings. With its easy-to-follow recipe and generous servings, it combines convenience and taste effortlessly. So, gather your friends, slice it up, and enjoy the sweetness of summer with every bite! Happy baking!
Cherry Slab Pie
Equipment
- Jelly roll pan
- large bowl
- small bowl
- Pizza stone
- rolling pin
Ingredients
PIE CRUST
- 4 cups all-purpose flour
- 2 teaspoons salt
- 1.25 cups shortening
- 0.5 cups COLD butter cut into small cubes
- 1 Tbsp. vegetable oil
- 0.75 cups milk
- 1 Tbsp. lemon juice
CHERRY FILLING
- 3 21 oz. cans cherry pie filling
CRUST DUST
- 2 Tbsp. all-purpose flour
- 2 Tbsp. sugar
EGG WASH
- 1 egg beaten
- 1 Tbsp. water
Instructions
Instructions
- Mix flour and salt in a large bowl. Cut in shortening and butter until the particles are the size of small peas.
- Combine milk and lemon juice together in a small bowl.
- Add oil and milk/lemon mixture to the flour mixture and stir until a soft dough forms. You may need to use your hands to form the mixture into a dough.
- Divide the dough into two equal portions. Flatten into a disc and wrap with plastic. Refrigerate 30 minutes.
- Preheat the oven to 400 degrees. If you have a pizza stone, place it on the oven rack to preheat.
- Roll pie crust on a lightly floured surface. Keep rolling until it is a 13x18" rustic-looking rectangle (about ⅛" thick).
- Place the rectangle into a 10x15" jelly roll pan, allowing the excess to hand over the edge of the pan.
- Sprinkle crust dust (a combination of 2 Tbsp. sugar and 2 Tbsp. flour) over the pie crust bottom.
- Pour cherry filling over the bottom crust.
- Roll the second crust out into a rustic-looking 13x18" rectangle.
- Place on top of the pie.
- Fold the edges of the top and bottom crust back and tuck into the pan.
- Use your fingers to pinch and crimp the edges of the pie (or use a fork to crimp).
- Cut slits into the top of the pie to allow steam to vent while baking.
- Brush the crust lightly with egg wash then sprinkle with sugar.
- Bake slab pie for 30 minutes.
- Cover/tent loosely with foil and bake for an additional 20-25 minutes.
- The top should be GOLDEN and the filling should be bubbling.
- Allow the pie to cool for at least 2 hours before slicing.


Leave a Reply