
Easy Banana Pudding: A Nostalgic Treat
Why Banana Pudding Brings Back Memories
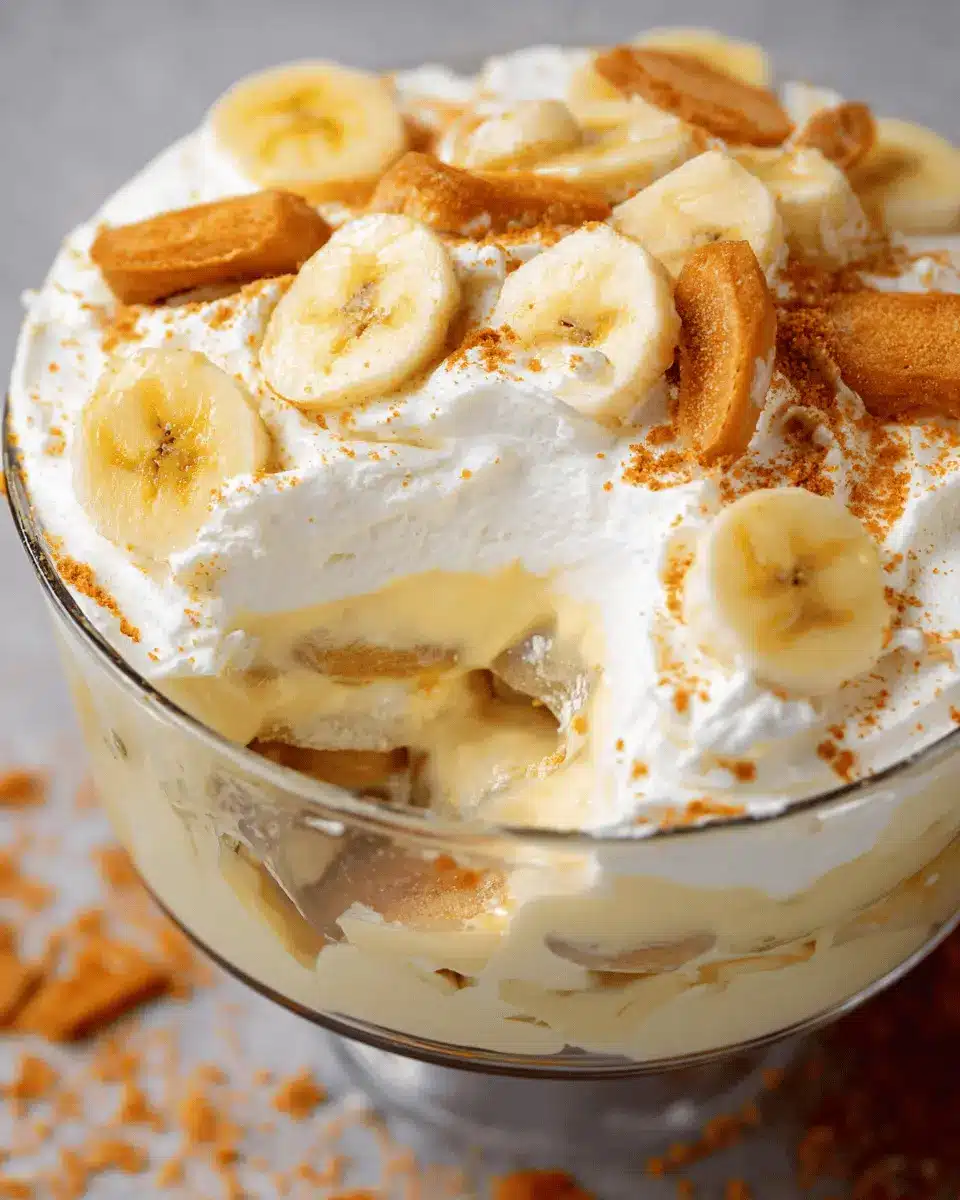
If you grew up in the U.S., chances are easy banana pudding was a staple at family gatherings, birthday parties, or holiday dinners. The moment you take a bite of this creamy delight, you might find yourself transported back to your childhood.
Many of us remember how our grandmothers would whip up this classic dessert, layering Nilla wafers and ripe bananas while expertly mixing up that silky pudding. The combination of flavors—sweetness from the bananas, crunch from the wafers, and that dreamy texture—captures a nostalgic essence few desserts can match.
Banana pudding isn’t just about taste; it’s about the memories it evokes. According to a survey from the American Baking Association, over 75% of participants cited desserts from their childhoods as their favorites, linking food with cherished memories. So, whether you make it for a crowd or just for yourself, this treat not only satisfies your sweet tooth but also brings a comforting wave of nostalgia.
Ready to relive those delightful moments with the easy banana pudding recipe? Let’s dive into the simple steps to recreate this beloved dessert!

Ingredients for Easy Banana Pudding
Essential ingredients for the perfect banana pudding
Creating a delectable easy banana pudding starts with a handful of essential ingredients. Gather these for a creamy and flavorful dessert that will be the highlight of any gathering:
- Two 3.2 oz packages of instant vanilla pudding: This is the base of your pudding, offering that signature vanilla flavor.
- 4 cups of cold milk: Helps achieve a smooth and silky texture that pairs beautifully with the other ingredients.
- 11 oz box of Nilla wafers: These iconic cookies add a delightful crunch and complement the bananas wonderfully.
- 6-8 medium bananas, peeled and sliced: Fresh bananas provide the fruity goodness that makes this dessert so appealing.
- 8 oz of Cool Whip: This adds a light and airy finish, giving your pudding that perfect whipped topping.
Optional ingredients for customization
Want to mix things up? Here are a few optional ingredients that can add unique twists to your easy banana pudding:
- Peanut butter: A spoonful mixed into the pudding can add rich, nutty flavor.
- Chocolate chips: Sprinkle some between layers for an indulgent touch.
- Coconut flakes: A hint of tropical flavor can elevate your pudding to a new level.
Feel free to explore and adapt your easy banana pudding with these fun additions! For more tips on customizing desserts, check out this article.
Step-by-step Preparation of Easy Banana Pudding
Making a delicious easy banana pudding is not just about the outcome; it’s also about the joy of creating something wholesome and delightful. Let’s walk through the process step by step, ensuring it’s as simple and enjoyable as possible.
Gather your tools and bowls
First things first—get organized! Gather your essential kitchen tools:
- Glass Mixing Bowl: A sturdy bowl for mixing ingredients.
- Spatula: Perfect for folding ingredients together.
- Serving Dish: Whether it’s a trifle bowl for that eye-catching presentation or a 9x13 inch dish for practicality, have it ready!
- Whisk: Essential for mixing the pudding and milk thoroughly.
Having all your tools on hand helps streamline the process and keeps the fun going. Plus, it’s always nice to have a clean workspace!
Mix the pudding and milk
In a medium mixing bowl, combine two 3.2 oz packages of instant vanilla pudding with 4 cups of cold milk. Whisk them together for about two minutes. As you whisk, you might start to see the magic happen as the mixture thickens. Once done, place your pudding mixture in the fridge for about 10 minutes to set properly—that’s the secret for achieving that luscious texture.
For a deeper dive on choosing the right pudding mix, you can check resources like Real Simple which offers excellent insights into pantry staples.
Incorporate the cool whip
After your pudding is set, it’s time to elevate it with some Cool Whip! Stir in one-third of an 8 oz container of Cool Whip into the pudding mixture gently. This is where you add that nice fluffiness we all love in banana pudding. Remember, the goal is to fold, not stir vigorously, to keep that airy texture intact.
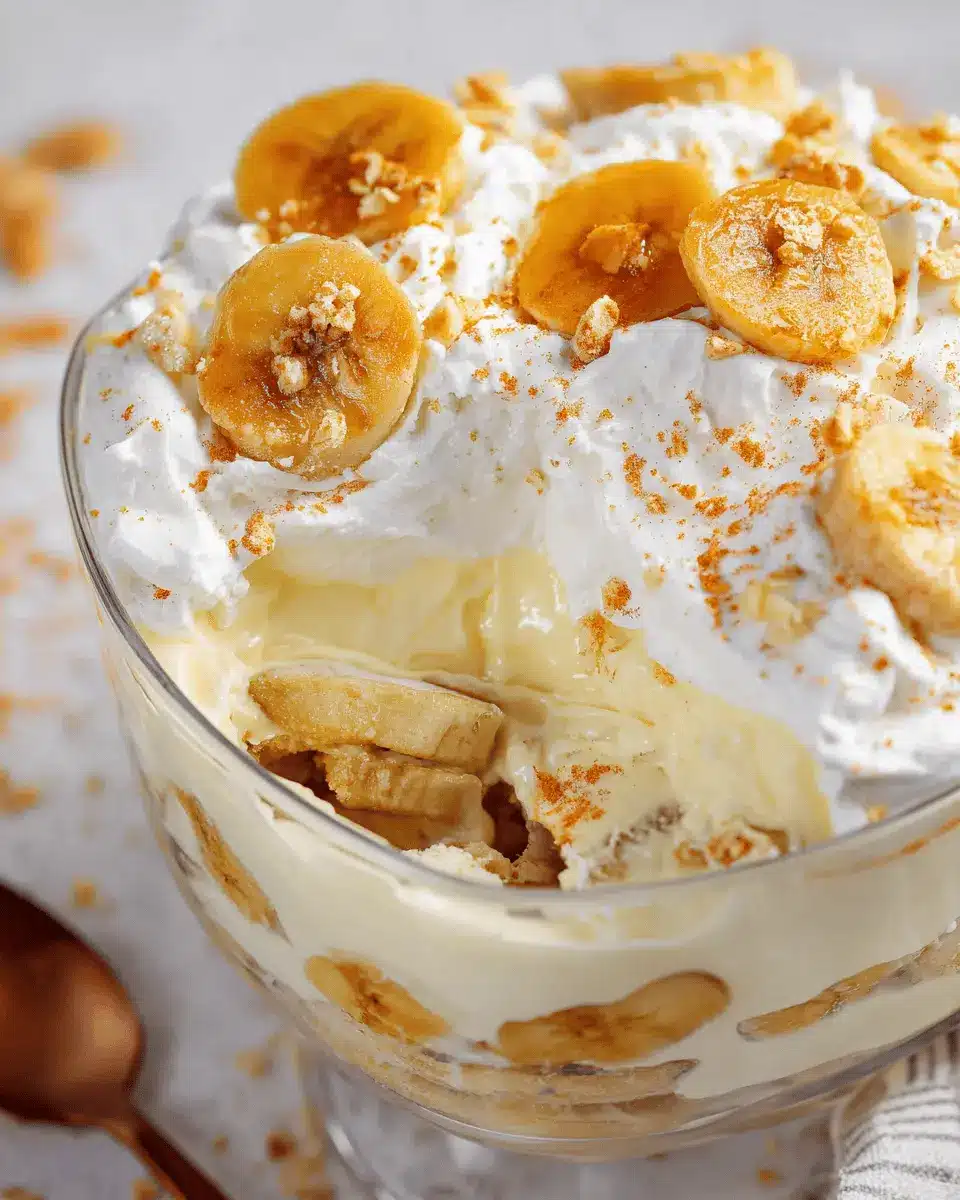
Layer the ingredients in your chosen dish
Now, it’s the fun part—layering! In your trifle bowl or 9x13 dish, start by creating a layer of Nilla Wafers. For a trifle, this is followed by ¼ of the pudding mixture, then a layer of sliced bananas (approximately 6-8 medium bananas). Repeat these layers until you reach the top. If you're using a 9x13 dish, add half of the pudding, then a layer of bananas, followed by more wafers, and repeat with the remaining pudding.
You can get creative here! Feel free to add extra flavors or top it off with crushed Nilla Wafers for a little crunch.
Chill before serving
To achieve the best flavor and consistency, don’t skip this crucial step! Cover your dish with plastic wrap and refrigerate for at least 2 hours, or even better, overnight. Waiting not only improves the taste but also allows those flavors to meld beautifully.
By the end of this chilling period, you’ll have an easy banana pudding that’s not only visually appealing but also bursting with flavor. Just before serving, you can add some extra sliced bananas and a sprinkle of crushed Nilla Wafers on top to make it truly stunning!
And that's it! Enjoy your delicious creation with friends and family, and watch it disappear as everyone goes back for seconds (or thirds!). Happy cooking!
Variations on Easy Banana Pudding
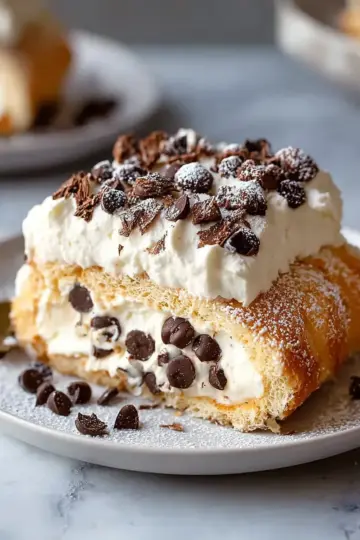
Chocolate Banana Pudding Twist
If you're a chocolate lover, this variation on easy banana pudding is a game-changer! Simply swap out half of the vanilla pudding mix with chocolate pudding. Follow the same layering technique and add some chocolate shavings or a drizzle of chocolate syrup between layers for an extra touch. This indulgent dessert combines the creaminess of banana pudding with rich chocolate flavor—what’s not to love?
Healthier Banana Pudding with Greek Yogurt
For a lightened-up version, try using Greek yogurt in place of some or all of the cool whip. Greek yogurt adds a delicious tang and boosts the protein content, making it a healthier option without sacrificing flavor. Combine it with a splash of vanilla extract to keep that classic taste. You can further enhance it by adding nuts or using whole grain wafers for extra crunch and wholesome goodness. This twist ensures you can enjoy dessert guilt-free!
Explore these variations to keep easy banana pudding fresh and exciting, perfect for gatherings or a cozy night in!
Cooking Tips and Notes for Easy Banana Pudding
Key Tips for Achieving the Best Texture
To ensure your easy banana pudding has that perfect creamy texture, try to let your pudding mix sit in the fridge long enough—at least 10 minutes is crucial to achieve a thick consistency. Folding the cool whip gently into the pudding preserves airiness, so it remains light and fluffy. For an extra layer of indulgence, consider using homemade whipped cream instead of cool whip!
Storage Tips to Keep It Fresh
To keep your easy banana pudding fresh, always store it in an airtight container to prevent the bananas from browning too quickly. If possible, add the banana slices right before serving. This will maintain their freshness and avoid any mushiness. For detailed storage guidelines, check out resources from the USDA to ensure you keep your desserts at their best!
Serving Suggestions for Easy Banana Pudding
Perfect Pairings for a Delightful Dessert Experience
When serving your easy banana pudding, consider pairing it with a cup of rich coffee or a warm cup of tea—both complement the pudding's creaminess beautifully. For a lighter pairing, fresh berries add a touch of tartness that balances the sweetness of the dish. You might even want to serve it alongside a scoop of vanilla ice cream for a delightful twist!
Creative Serving Ideas for Parties
For your next gathering, don’t just serve easy banana pudding in a traditional way. Try using mini mason jars for individual servings, adding a personal touch that guests will love. You could also create a banana pudding bar with toppings like crushed nuts, chocolate chips, and shredded coconut, allowing everyone to customize their dessert. For an extra flair, garnish with mint leaves for that aesthetically pleasing finish!
Explore more serving ideas at Food Network and Bon Appétit.
Time Breakdown for Easy Banana Pudding
Preparation Time
For this easy banana pudding, you'll need about 30 minutes. This includes mixing the pudding, slicing the bananas, and layering the ingredients.
Chilling Time
After preparing, let your pudding chill in the fridge for at least 2 hours. This helps the flavors meld beautifully!
Total Time
In total, you’re looking at approximately 2 hours and 30 minutes from start to finish. It's a small investment for a dessert that's sure to impress!
Nutritional Facts for Easy Banana Pudding
When indulging in a bowl of easy banana pudding, it helps to know what you’re enjoying! Here’s a quick look at its nutritional profile:
Calories
Each serving contains approximately 178 calories, making it a satisfying treat without overindulging.
Sugar Content
You can find around 20 grams of sugar in every serving. While delicious, it's a good reminder to enjoy in moderation.
Protein
Surprisingly, this dessert offers about 5 grams of protein. It’s a sweet way to get a bit of protein alongside your dessert!
Overall, this easy banana pudding balances enjoyment and nutrition, perfect for a delightful dessert! For more insights into healthy eating, check out resources from the USDA or Healthline.
FAQs about Easy Banana Pudding
Can I use fresh bananas instead of Nilla Wafers?
While fresh bananas are a key ingredient in easy banana pudding, they cannot replace the Nilla Wafers. The wafers provide that delightful crunch and contrast to the smooth, creamy pudding. If you're looking to switch things up, consider adding a layer of graham crackers or a gluten-free alternative like crushed rice cakes for a fun twist.
What’s the best way to store leftover banana pudding?
To keep your easy banana pudding fresh, cover it tightly with plastic wrap or transfer it to an airtight container. Store it in the refrigerator, where it can last for about 2-3 days. Just remember, bananas might brown over time, so enjoy it soon for the best flavor and presentation!
How can I make this banana pudding recipe gluten-free?
Making this easy banana pudding gluten-free is simple! Just swap out traditional Nilla Wafers for gluten-free wafers or cookies. You can also explore options like almond or coconut flour cookies, which will add unique flavor and texture to your dessert.
For more tips on ingredient substitutions, check out resources like Gluten-Free Living.
Conclusion on Easy Banana Pudding
Making easy banana pudding at home is a wonderful way to connect with nostalgia while impressing your friends and family. Not only is it delightful in flavor, but the recipe is also straightforward and quick to prepare. Treat yourself to this classic dessert and enjoy the smiles it brings!
Why You Should Try Making Banana Pudding at Home
Bringing the joy of banana pudding into your kitchen is worth it for several reasons:
- Customization: You can adjust the sweetness and texture to your liking, ensuring it's just how you prefer it.
- Cost-Effective: Homemade desserts often cost less than store-bought options, and you control the ingredients.
- Quality Time: Preparing this dessert can be a fun activity to enjoy with family or friends, creating cherished memories.
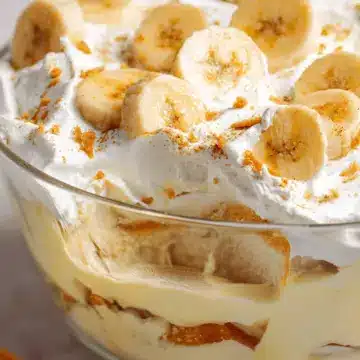
- Impressive Presentation: Layering your pudding in a trifle dish not only tastes great but looks stunning on any table.
Curious to learn more or want some variations? Check out other recipes on Food Network for inspiration!
Easy Banana Pudding
Equipment
- Glass Mixing Bowl
- Kitchen Scale
Ingredients
Pudding Base
- 2 packages instant vanilla pudding 3.2 oz each
- 4 cups cold milk 946ml
- 8 oz cool whip
Banana and Wafer Layers
- 11 oz nilla wafers
- 6-8 medium bananas peeled and sliced
Instructions
Trifle Method
- Whisk together the pudding mix and milk in a medium mixing bowl for 2 minutes. Place in the fridge for 10 minutes.
- Fold in ⅓ of the cool whip to the pudding.
- Add a layer of nilla wafers to the bottom of a trifle bowl. Add ¼ of the pudding mixture on top of the wafers, then top that with banana slices. Repeat these layers until you fill the trifle bowl.
- Spread the remaining cool whip on top. Refrigerate for at least 2 hours or overnight. Before serving, add crushed nilla wafers and banana slices to the top.
9x13 Dish Method
- Whisk together the pudding mix and milk in a medium mixing bowl for 2 minutes. Place in the fridge for 10 minutes.
- Fold in ⅓ of the cool whip to the pudding.
- In a 9x13-inch dish, arrange a single layer of nilla wafers to cover the bottom. Pour half of the prepared pudding over the wafers and spread evenly. Arrange a single layer of sliced bananas on top of the pudding.
- Add another single layer of nilla wafers over the bananas. Pour the remaining pudding over the second layer of wafers and spread evenly. Arrange the remaining sliced bananas on top of the pudding.
- Spread the remaining cool whip evenly over the entire dish, ensuring all layers are covered. Refrigerate for at least 2 hours or overnight. Before serving, add crushed nilla wafers and banana slices to the top.


Leave a Reply