
Introduction to Yaki Onigiri
Why Yaki Onigiri is the Perfect Homemade Meal
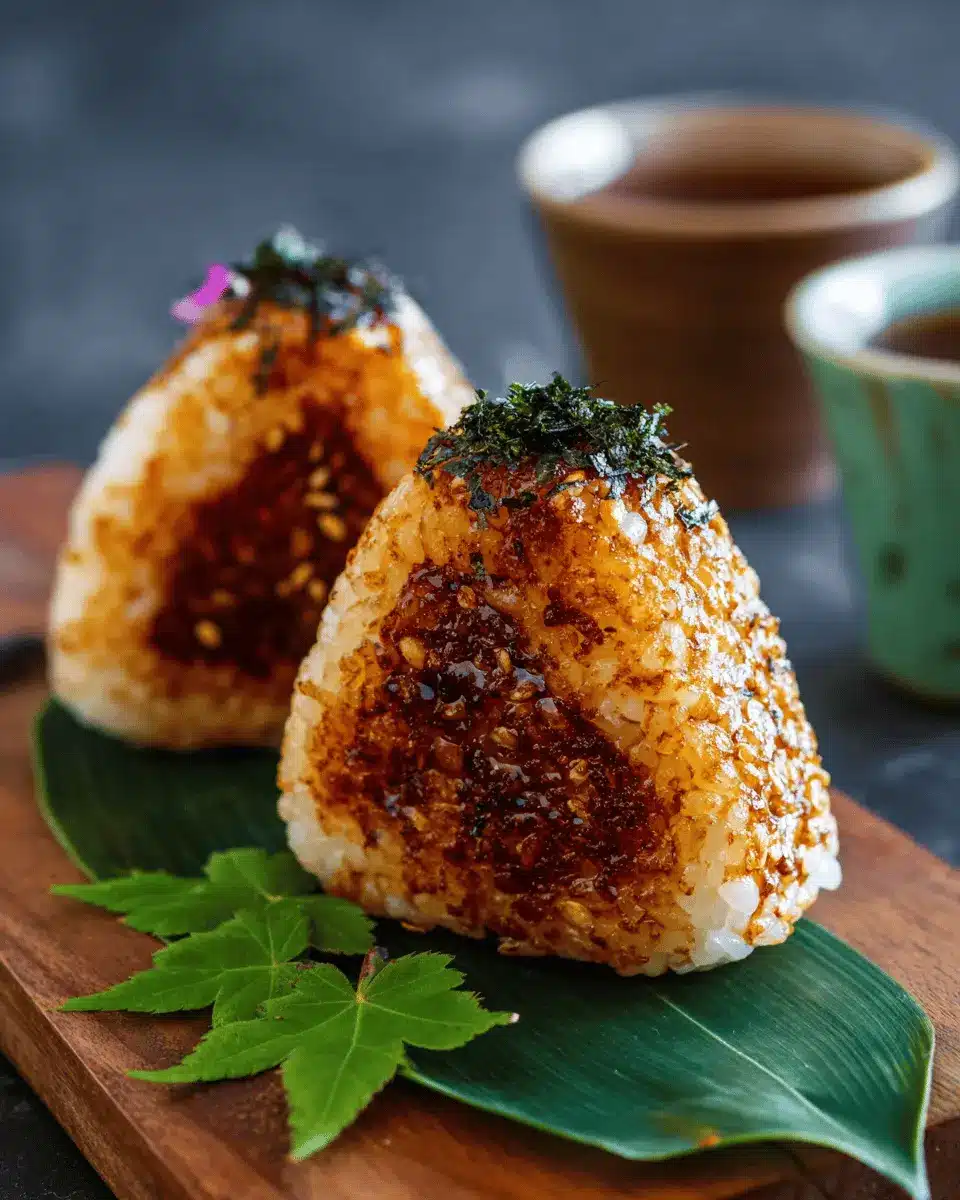
If you’re looking for a quick, delicious, and satisfying meal, Yaki Onigiri is your go-to choice! These delightful grilled rice balls are not just a staple in Japanese cuisine; they’re also perfect for busy young professionals seeking a flavorful, nutritious option. Made primarily from short-grain rice, Yaki Onigiri is both easy to prepare and incredibly customizable.
What’s more, they easily adapt to different dietary preferences, making them suitable for both pescatarians and vegetarians. You can enjoy them as an appetizer, snack, or even a light main dish. The combination of crispy, golden-brown exteriors and fluffy, seasoned rice within is simply irresistible. Imagine biting into one that’s been perfectly grilled, with a hint of butter and soy sauce elevating each bite to a new level of umami goodness.
Not only are they delicious, but Yaki Onigiri can also be prepared in bulk, making them ideal for meal prep or as lunchbox treats. Plus, they pack wonderfully with complementary sides like pickled vegetables or a refreshing salad. For more on the nutritional aspects of this dish, check out Healthline for insightful tips on balanced eating. Get ready to embrace this fantastic homemade meal; it's bound to become a favorite in your kitchen!
Ingredients for Yaki Onigiri
Yaki Onigiri, or grilled rice balls, are surprisingly simple to make! Here's a guide to the essential and optional ingredients you’ll need for this delightful dish.
Essential ingredients for Yaki Onigiri
To achieve the perfect flavor and texture, you'll definitely want to gather these key ingredients:
- 160 grams of Japanese short-grain rice: This rice is crucial for achieving that sticky, fluffy consistency.
- 1 cup of water: Pure and simple, to cook your rice to perfection.
- 2 tablespoons of soy sauce: This savory touch is essential for flavoring the rice.
- 1 teaspoon of potato starch: It helps achieve that irresistible crispy crust.
- 1 tablespoon of vegetable oil: Use this for frying the onigiri until golden brown.
- 1 tablespoon of cultured unsalted butter: A delicious finishing touch for added richness.
- Optional wrapping materials like Shiso leaves or Nori sheets: These add flavor and a fun presentation!
Optional ingredients for a personal touch
Feel free to customize your Yaki Onigiri! Consider adding:
- Fillings like salmon, beef, or pickled vegetables: These additions can truly elevate your rice balls.
- Sesame seeds or green onions: For a bit of crunch and added flavor.
- A sprinkle of furikake: This Japanese seasoning blend can put your onigiri over the top!
With these ingredients in your arsenal, you’ll be one step closer to creating your own delicious Yaki Onigiri that will impress family and friends alike! If you're curious about rice types, check out this article on Japanese rice varieties.
Step-by-Step Preparation of Yaki Onigiri
Creating Yaki Onigiri at home can be a delightful culinary adventure! Follow these simple steps to craft your own delicious grilled rice balls, perfect for a quick meal or a fun addition to your next bento box.
Cooking the rice
Start by preparing the essential base for your onigiri—the rice. If you have a rice cooker, simply measure 160 grams of Japanese short-grain rice (equivalent to 1 rice cooker cup) and add 1 cup of water. Set it to cook and relax while it works its magic. If you prefer the stovetop method, rinse the rice several times until the water runs mostly clear, then drain it. Place it in a pot with the same amount of water, cover, and bring it to a boil over high heat. Once boiling, reduce the heat and let it simmer for about 13 minutes. Remember to keep the lid on to trap the steam! After the timer goes off, turn off the heat and let it steam for another 10-15 minutes. This method ensures fluffy rice every time.
Seasoning the rice
Once your rice has finished steaming, it’s time to infuse it with flavor. Drizzle 2 tablespoons of soy sauce over the warm rice. Using a spatula or paddle, gently fold and cut through the rice until the soy sauce is evenly distributed, giving it a beautiful golden hue. This step not only enhances the flavor but also adds a delightful richness to your Yaki Onigiri.
Shaping the onigiri
Now, you’re ready to shape your rice balls! Level off the seasoned rice and divide it into thirds. If using a mold, wet it lightly, fill each section with the rice, press firmly to hold its shape, and gently remove the onigiri. If you prefer the hand-formed method, simply shape the rice into triangular or oval forms by wetting your hands and pressing gently. This part is as fun as it is crucial, as well-shaped rice balls will grill beautifully!
Preparing for grilling
Before you grill, dust your onigiri with a light coating of potato starch. Using a fine-mesh sieve, sprinkle the starch on all sides. This will help create the perfect crispy crust when you fry.
Frying to perfection
Heat a non-stick frying pan over medium-low heat and add half of the vegetable oil. Gently place the onigiri in the pan, letting them fry undisturbed for about 7-10 minutes until they’re golden brown. Flip them over and add the remaining oil if needed, frying the second side until accurately crispy. For the finishing touch, melt some cultured unsalted butter directly onto the browned surfaces, enhancing the flavor further. Serve your Yaki Onigiri hot, wrapped in shiso leaves or nori sheets for an authentic experience.
Making Yaki Onigiri is not just about the prep—it’s about enjoying the process. So why not invite a friend over for a cooking night? That way, you can share tips, and tricks, and enjoy these tasty treats together. Happy cooking!
Variations of Yaki Onigiri
Yaki Onigiri is a wonderfully versatile dish that you can customize to suit your taste buds. Here are two delicious variations to bring some excitement to your meal.
Spicy Yaki Onigiri with Sriracha
For a kick of heat, try incorporating Sriracha into your Yaki Onigiri. Simply mix a tablespoon of Sriracha into the rice before shaping your onigiri, and adjust the heat level to your liking. The creamy blend of butter and spicy sauce creates a mouthwatering contrast that will make these rice balls a new favorite!
Savory Yaki Onigiri with Tuna
If you’re in the mood for something savory, consider adding canned tuna mixed with a touch of mayonnaise and soy sauce. This will create a filling that pairs beautifully with the crispy exterior of the onigiri. Simply stash the tuna mixture in the center when shaping your rice balls, and enjoy a hearty and satisfying meal.
For more ideas, check out these creative onigiri variations to inspire your next culinary adventure!
Cooking Tips and Notes for Yaki Onigiri
How to Achieve the Perfect Crisp
For irresistibly crispy Yaki Onigiri, always start with properly cooked short-grain rice, as it has the right sticky texture. After shaping, let them rest in the fridge for about 15 minutes to firm up. This resting time helps them retain their shape while frying. When it’s time to cook, use a non-stick pan and a moderate heat to allow them to brown without burning. A touch of butter adds flavor and enhances the crispiness, giving them a golden crust that’s simply scrumptious.
Common Mistakes to Avoid
One common mistake is overloading on oil. It’s important to use just enough for frying and to avoid greasy onigiri. Additionally, be sure not to overcrowd the pan, as this can cause the rice balls to steam instead of fry. Lastly, remember to avoid using too little potato starch, as it’s key for that desired crispy exterior. For a deeper dive into the art of making perfect rice balls, check out this informative guide on Japanese rice types.
Serving Suggestions for Yaki Onigiri
Creative Plating Ideas
When serving Yaki Onigiri, presentation is key! Try arranging the rice balls on a bamboo platter with colorful pickled vegetables, like tsukemono, for a visually appealing contrast. Garnish with fresh shiso leaves or sesame seeds for texture and flavor. A drizzle of sesame oil can elevate both taste and aesthetics. Using an elegant serving board also adds a rustic charm that complements this Japanese classic nicely.
Ideal Side Dishes
To create a well-rounded meal, serve your Yaki Onigiri with light accompaniments. Think about pairing them with:
- Miso Soup: A comforting and traditional choice that balances the saltiness of the rice balls.
- Edamame: These protein-packed snacks offer a satisfying crunch.
- Tempura Veggies: Lightly battered and fried vegetables can add a delightful contrast to the grilled rice.
- Pickled Ginger: This tangy side can cleanse your palate, enhancing your overall experience.
These suggestions not only enhance the flavors of your Yaki Onigiri but also add variety to your meal. Enjoy! For more inspiration, check out Japanese cuisine articles and get creative!
Time Breakdown for Yaki Onigiri
Preparation time
In just 5 minutes, you can prep the ingredients for your Yaki Onigiri. This includes rinsing the rice and gathering everything you'll need.
Cooking time
The cooking process takes about 40 minutes. With patience, your rice will transform into a perfectly fluffy base for these delicious rice balls.
Total time
Overall, you'll spend about 45 minutes from start to finish, creating a delightful dish that’s worth the wait! For more Japanese-inspired recipes, check out this article on sushi-making for a fun culinary adventure.
Nutritional Facts for Yaki Onigiri
Calories
A serving of Yaki Onigiri contains about 274 calories, making it a satisfying option for those looking for a quick meal without overindulging.
Protein
Each rice ball offers approximately 5 grams of protein. While not a complete protein source, it contributes to your daily intake, especially when combined with other ingredients in your meal!
Sodium
The Yaki Onigiri comes in at around 676 mg of sodium per serving, primarily from the soy sauce used. This is an important consideration for anyone monitoring their sodium intake. For healthier alternatives, consider using low-sodium soy sauce or adjusting portion sizes.
For further reading on maintaining a balanced diet, check out Harvard Health's Nutrition Basics.
FAQ about Yaki Onigiri
How can I ensure my Yaki Onigiri holds its shape?
To keep your Yaki Onigiri from falling apart, it’s crucial to use Japanese short-grain rice as it has the right starch content for stickiness. Using an onigiri mold can help create perfectly shaped rice balls. Don't forget to press the rice firmly, as this will ensure that your rice holds together during frying.
Can I make Yaki Onigiri ahead of time?
Yes, you can! Preparing Yaki Onigiri ahead of time is a great option for meal prep. Simply shape the rice balls and store them in an airtight container in the fridge. When you're ready to eat, just grill or pan-fry them as directed in the recipe. This method not only saves time but also allows the flavors to meld beautifully.
What are some popular fillings for Yaki Onigiri?
When it comes to fillings, the possibilities are endless! Common choices include:
- Grilled Salmon or Chicken Ham for a hearty bite.
- Pickled Plum (Umeboshi) for a tangy surprise.
- Miso Paste mixed with Sesame Seeds for umami richness.
- Vegetables like sautéed mushrooms or spinach for a healthy twist.
Feel free to get creative! Think about flavors you enjoy and experiment to make your own signature Yaki Onigiri. For more inspiration, check out some Japanese cooking blogs like Just One Cookbook or Umami Insider.
Conclusion on Yaki Onigiri
In summary, Yaki Onigiri is a delightful choice for a quick meal or snack. These grilled rice balls offer a satisfying blend of flavors and textures, making them perfect for any occasion. Enjoy experimenting with fillings and seasonings to make this Japanese favorite truly your own!
Yaki Onigiri
Equipment
- rice cooker
- Pot
- Non-stick frying pan
- fine-mesh sieve
- spatula or paddle
- onigiri mold
Ingredients
For rice
- 160 grams Japanese short-grain rice 1 rice cooker cup or ¾ US cup
- 1 cup water
For onigiri
- 2 tablespoons soy sauce
- 1 teaspoon potato starch
- 1 tablespoon vegetable oil
- 1 tablespoon cultured unsalted butter
- Shiso leaves for wrapping
- Nori sheets for wrapping
Instructions
Cooking Rice
- Use the measuring cup and water lines on the cooker bowl to cook 1 rice cooker cup of rice.
- If you're doing it on the stove, wash the rice in a few changes of water until it runs mostly clear. Drain it then add to a tall pot with water. Cover, bring to boil over high heat, then reduce and simmer for 13 minutes. Let it steam for another 10-15 minutes.
- Once it's done steaming, pour the soy sauce evenly over the rice and use a folding motion with a spatula to distribute.
Shaping & Frying
- Level off the rice mixture and divide it into thirds. Shape into yaki onigiri using hands or an onigiri mold.
- Dust each onigiri with potato starch, flipping to coat both sides.
- Heat oil in a non-stick frying pan over medium-low heat. Add onigiri to fry until golden brown on one side, about 7-10 minutes.
- Flip and add more oil to fry the other side until crisp. Melt cultured unsalted butter on each side and roll on its edges.
- Serve wrapped in Shiso leaves or Nori sheets.


Leave a Reply