
Introduction to Scalloped Corn
The charm of scalloped corn: A nostalgic side dish
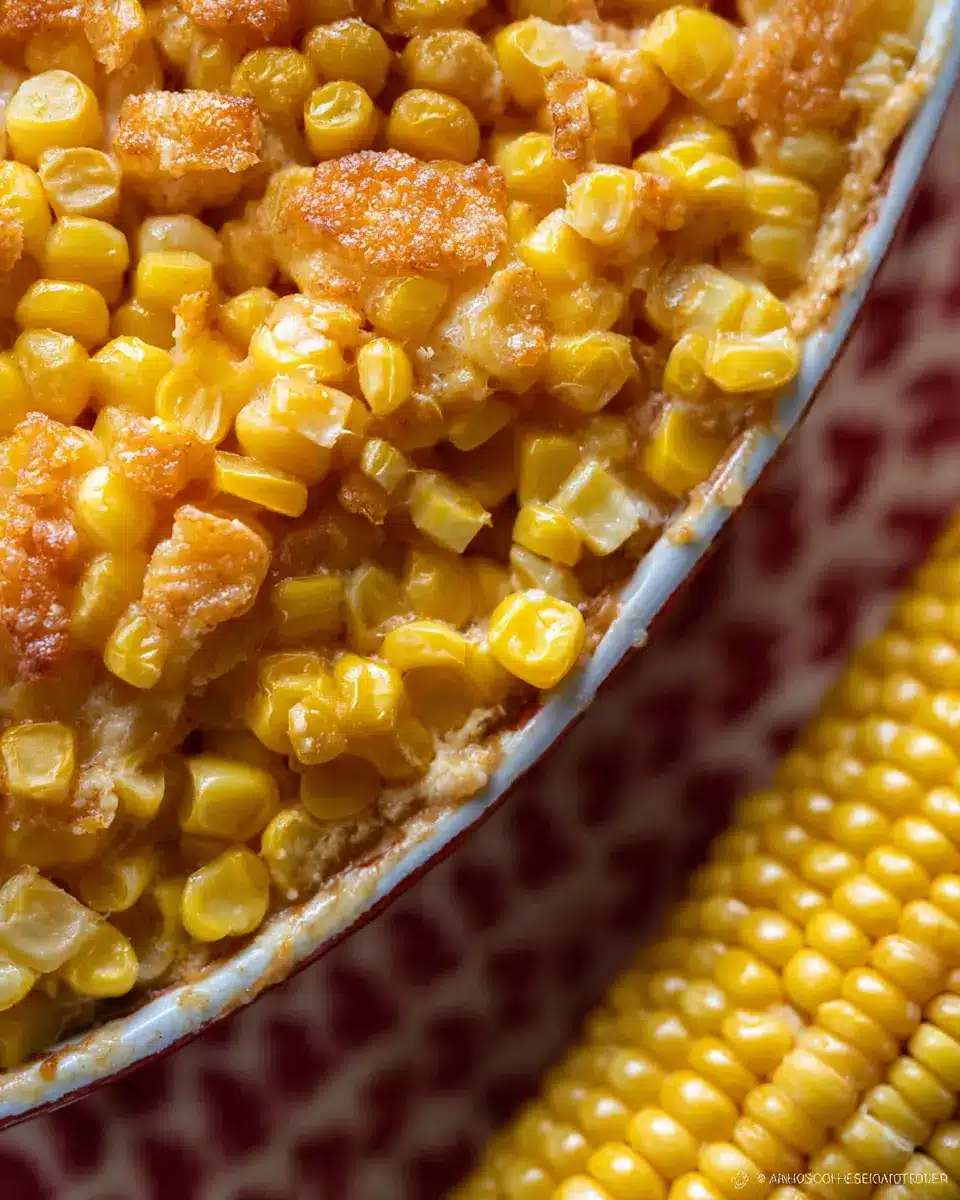
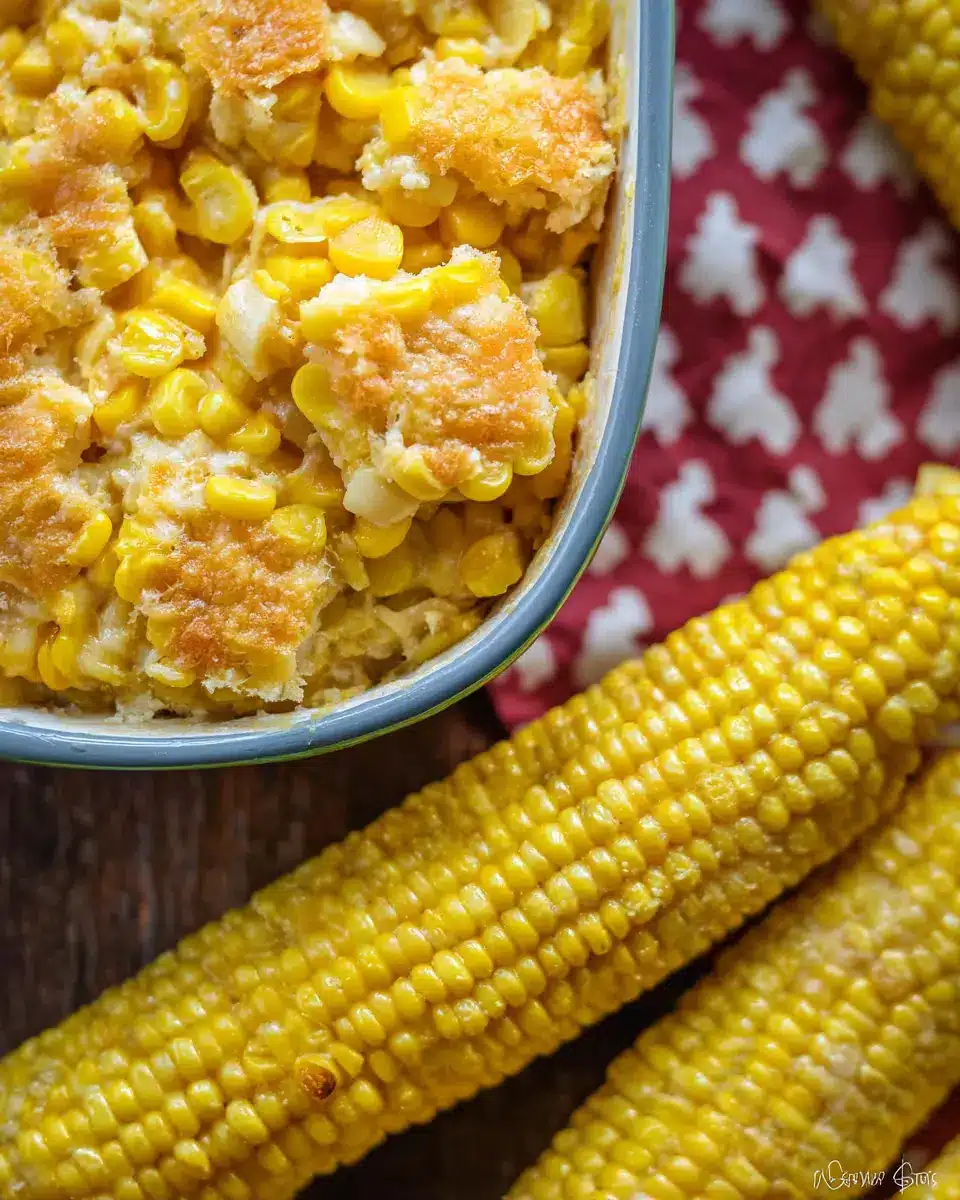
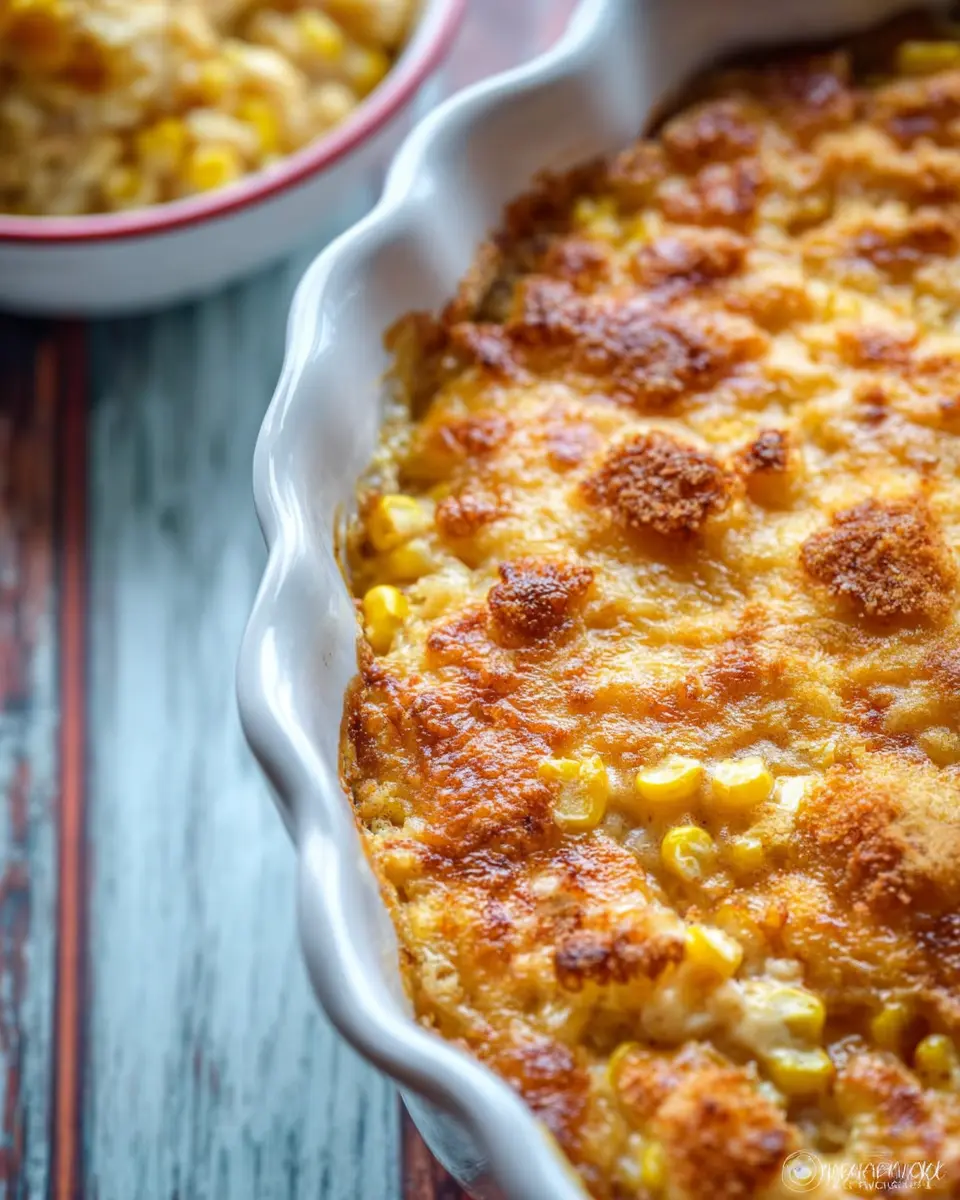
Scalloped corn has a special place in many hearts, evoking memories of family gatherings and holiday feasts. This delightful dish, often made with sweet corn, butter, and a creamy custard-like filling, is a blend of flavors that brings warmth and comfort to any table. Picture this: golden kernels nestled in a velvety mixture, topped with a crispy layer of buttery cracker crumbs—it’s not just food; it’s an experience.
Whether you’re hosting a dinner party or simply looking to elevate your weeknight meal, scalloped corn is an easy but impressive side that pairs beautifully with a variety of main dishes. It's versatile enough to complement everything from roasted turkey or chicken ham to grilled steak. Plus, with the addition of simple ingredients like eggs and half-and-half, it’s a recipe that appeals to both novice cooks and seasoned chefs alike.
Curious to dive deeper? This dish has roots in American culinary traditions and reflects the heartwarming simplicity of home cooking. So, why not try making it yourself? You’ll soon see why scalloped corn continues to delight generations.
To get started, check out the full recipe below!
Ingredients for Scalloped Corn
Essential ingredients for a delicious scalloped corn
Creating a mouthwatering scalloped corn dish is easy when you gather the right essentials. Here's what you need:
- 3 eggs: These form the custard base.
- ⅓ cup half-and-half (or milk): Adds creaminess.
- 1 (16-ounce) bag of frozen corn: Thawed and drained for texture and flavor.
- 1 (15-ounce) can of creamed corn: Enhances the sweet corn flavor.
- ½ teaspoon salt: Adjust to taste for seasoning.
- Freshly ground black pepper: Just a pinch brings warmth.
- 6 tablespoons unsalted butter: Melted and cooled, it enriches the dish.
- 1 ½ cups crushed saltine or butter cracker crumbs: This is key to achieving that crispy topping.
Optional ingredients for added flavor
Want to elevate your scalloped corn further? Consider adding:
- 1 tablespoon sugar: It balances the savory elements.
- Onions or garlic: Sautéed first to deepen the flavor profile.
- Chopped green chiles: For a hint of spice.
- Shredded cheese: Mix in or sprinkle on top for extra creaminess.
These ingredients can be adapted to match your taste preferences; don’t be afraid to experiment!
Step-by-step Preparation of Scalloped Corn
Making scalloped corn is not only fun but also a rewarding experience that fills your kitchen with delightful aromas. This versatile dish pairs beautifully with a variety of main courses, making it the perfect side for any occasion—from holiday feasts to casual family dinners. Let’s break down the steps for a smooth and enjoyable cooking process.
Gather your ingredients
Before diving into the cooking, it's essential to gather all your ingredients. Here’s what you need:
- 3 eggs
- ⅓ cup of half-and-half or milk
- 1 (16-ounce) bag of frozen corn, thawed and drained
- 1 (15-ounce) can of creamed corn
- 1 tablespoon of sugar (optional)
- ½ teaspoon of salt (or more to taste)
- Freshly ground black pepper
- 6 tablespoons of unsalted butter, melted and cooled
- 1 ½ cups of crushed saltine or butter cracker crumbs (divided)
Having everything ready will streamline the entire process!
Preheat your oven
With your ingredients on the counter, it's time to preheat your oven to 350°F. This ensures even cooking once you place your dish inside. Don’t forget to position the rack in the center of the oven for the best results.
Whisk the eggs and mix the custard filling
In a large bowl, start by whisking the eggs together with the half-and-half. You’re looking for a smooth mixture here. Once combined, add in the thawed corn, creamed corn, sugar, salt, and pepper. Mix everything until it’s nicely blended. This custard filling will be the heart of your scalloped corn!
Combine corn and seasonings
Next, stir half of the melted butter (about 3 tablespoons) into the mixture, along with ¾ cup of your cracker crumbs. This will provide a lovely texture to the filling. Once combined, transfer this mixture to your prepared baking dish, smoothing out the top to ensure even cooking.
Prepare the baking dish and transfer the mixture
Don’t forget to grease your baking dish! Whether you use butter or a nonstick cooking spray, it helps in preventing sticking later. Carefully pour your corn mixture into the dish, leveling it off for a uniform cook.
Add the crumb topping
Now for the crowning glory of your scalloped corn: the crumb topping! In a small bowl, combine the remaining melted butter with the rest of the cracker crumbs (that’s another ¾ cup). Sprinkle this generously over the top of the corn mixture. This will create that irresistible golden, crispy crust during baking.
Bake to perfection
Finally, place your dish in the oven and bake for about 30 to 45 minutes or until the corn is bubbly and the top is beautifully golden brown. This is where the magic happens! The custard sets, and the flavors meld into a wonderful dish that everyone will want seconds of.
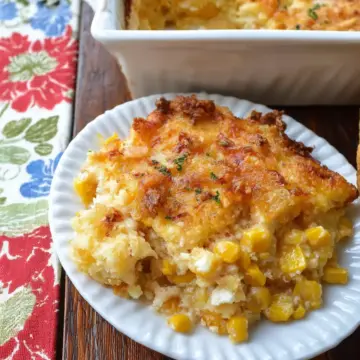
Serve hot and enjoy! You’ll find that this delicious scalloped corn is sure to become a favorite in your home.
By following these steps, you’ll not only impress your guests but also create a comforting side dish that’s both easy and satisfying. Happy cooking!
Variations on Scalloped Corn
Adding Fresh Herbs for a Gourmet Touch
To elevate your scalloped corn game, consider adding fresh herbs like thyme, chives, or parsley. A sprinkle of herbs not only enhances the flavor but also adds a pop of color. Just a tablespoon of finely chopped herbs mixed in before baking will infuse the dish with a remarkable freshness that your guests will love. Did you know that fresh herbs are a great source of antioxidants? Incorporating them into your meals is a healthy, delicious way to boost flavor.
Incorporating Cheese for Creaminess
If you’re a cheese lover, try mixing in a cup of shredded cheese—like sharp cheddar or parmesan—into your scalloped corn mixture. The creaminess from the cheese melts beautifully, making every spoonful richer and more satisfying. For an extra indulgence, top the dish with a sprinkle of cheese and broil the last few minutes of baking for a golden, bubbly crust. Cheese not only makes the dish more enjoyable but also adds protein, giving you a more filling side dish perfect for any meal.
Cooking Tips and Notes for Scalloped Corn
Ensuring the Right Texture
To achieve the perfect scalloped corn, you want a custard-like consistency that is both creamy and hearty. If you find your mixture is too thick, a splash of milk can help loosen it up. Conversely, if it seems too watery, consider adding an extra egg or some more crushed crackers to thicken it. A golden, bubbly top is a sign of deliciousness waiting to happen!
Substitutions for Dietary Preferences
Don't worry if you have specific dietary needs—this dish can easily adapt! If you're looking to make it gluten-free, swap in gluten-free crackers for a delightful crunch. For a dairy-free option, coconut milk can replace half-and-half. You might even sprinkle in some fresh herbs like thyme or parsley for added flavor! Explore more variations to suit your tastes!
Serving Suggestions for Scalloped Corn
Pairing with Main Dishes
When serving scalloped corn, consider pairing it with savory main dishes like roast chicken, grilled turkey, or even barbecued beef. The creamy, buttery layers of corn complement the flavors of seasoned meats beautifully. For a vegetarian option, serve it alongside stuffed bell peppers or a hearty salad, which can balance the richness of the dish.
Creative Presentation Ideas
To make your scalloped corn stand out, try presenting it in individual ramekins for a personal touch. Alternatively, sprinkle some freshly chopped herbs, such as parsley or chives, on top just before serving for a pop of color. Serving it in a cast-iron skillet can add a rustic charm to your table setting. Want to make it even more appealing? Consider adding a side of homemade cornbread or a refreshing cucumber salad to round out the meal.
Time Breakdown for Scalloped Corn
Preparation Time
Getting ready to make scalloped corn is a breeze! Set aside just 10 minutes to gather your ingredients, whisk the eggs, and mix everything together. You’ll love how quick and easy this step is!
Cooking Time
Once your mixture is ready, pop it in the oven for about 35 minutes. This is when the magic happens—your dish transforms into a warm, bubbly delight with a golden crust on top!
Total Time
In just 45 minutes, you’ll have a delicious side dish that’s perfect for any occasion. Imagine the smiles at the dinner table as everyone digs into your homemade scalloped corn. It's a fantastic addition to holidays or casual weeknight dinners alike!
Want to learn more about cooking corn dishes? Check out these fantastic resources on food science or creative corn recipes!
Nutritional Facts for Scalloped Corn
Calories
One serving of scalloped corn contains approximately 214 calories, making it a comforting yet moderate option as a side dish. This hearty number allows you to indulge without overwhelming your daily caloric intake.
Protein
In every serving, you get about 5 grams of protein. While it may not be a protein powerhouse like meat, this amount can help complement your meal, particularly when paired with your favorite protein source, such as grilled chicken or turkey bacon.
Carbohydrates
For those watching their carb intake, each serving boasts around 28 grams of carbohydrates. Most of these carbs come from the corn, which provides not just energy but also essential nutrients. It's a satisfying addition to any meal, so enjoy a scoop of this delicious scalloped corn at your next dinner!
FAQs about Scalloped Corn
Can I use fresh corn instead of frozen?
Absolutely! You can replace frozen corn with fresh corn for your scalloped corn dish. If you have 3 cups of fresh, roasted corn, simply substitute it in. Fresh corn can add a delightful sweetness and flavor that frozen varieties may not achieve.
How do I store leftovers?
Leftover scalloped corn can be easily stored in the fridge for up to five days. Make sure to place it in an airtight container to keep it fresh. When you're ready to enjoy it again, simply reheat in the oven or microwave until warmed through.
Can this recipe be made in advance?
Yes, you can prepare scalloped corn ahead of time! Mix all the ingredients and transfer them to the baking dish, but skip the baking step. Cover tightly and refrigerate for up to 24 hours. When you're ready to eat, just pop it in the oven and bake as directed. This makes it a perfect dish for busy days or special occasions!
For additional tips on storing and reheating, check out the USDA guidelines.
Conclusion on Scalloped Corn
Scalloped corn is a delightful addition to any meal, bringing warmth and comfort to the table. With its creamy texture and crunchy topping, this dish is perfect for gatherings or cozy family dinners. Don’t hesitate to customize it with your favorite ingredients and enjoy!
Scalloped Corn
Equipment
- 2.5-quart baking dish
Ingredients
- 3 eggs
- ⅓ cup half-and-half or milk
- 1 (16-ounce) bag frozen corn, thawed & drained
- 1 (15-ounce) can creamed corn
- 1 tablespoon sugar optional
- ½ teaspoon salt or more to taste
- Freshly ground black pepper
- 6 tablespoons unsalted butter, melted & cooled DIVIDED
- 1 ½ cups crushed saltine or butter cracker crumbs DIVIDED
Instructions
- With rack in center position, preheat oven to 350°F. Grease a 2.5-quart baking dish or spray with nonstick cooking spray.
- In a large bowl, whisk the eggs with the half-and-half, and then add the thawed corn, creamed corn, sugar, salt, and pepper. Mix together until well combined.
- Stir in half of the melted butter (3 tablespoons) and half of the cracker crumbs (¾ cup). Transfer the corn mixture to the prepared baking dish and smooth the top.
- In a small bowl, combine the remaining 3 tablespoons melted butter and ¾ cup cracker crumbs. Evenly sprinkle over the top of the corn mixture in the dish.
- Bake for 30 to 45 minutes or until the corn is bubbly and the top is golden brown; serve hot. Store any leftovers tightly covered in the fridge for up to 5 days.


Leave a Reply