
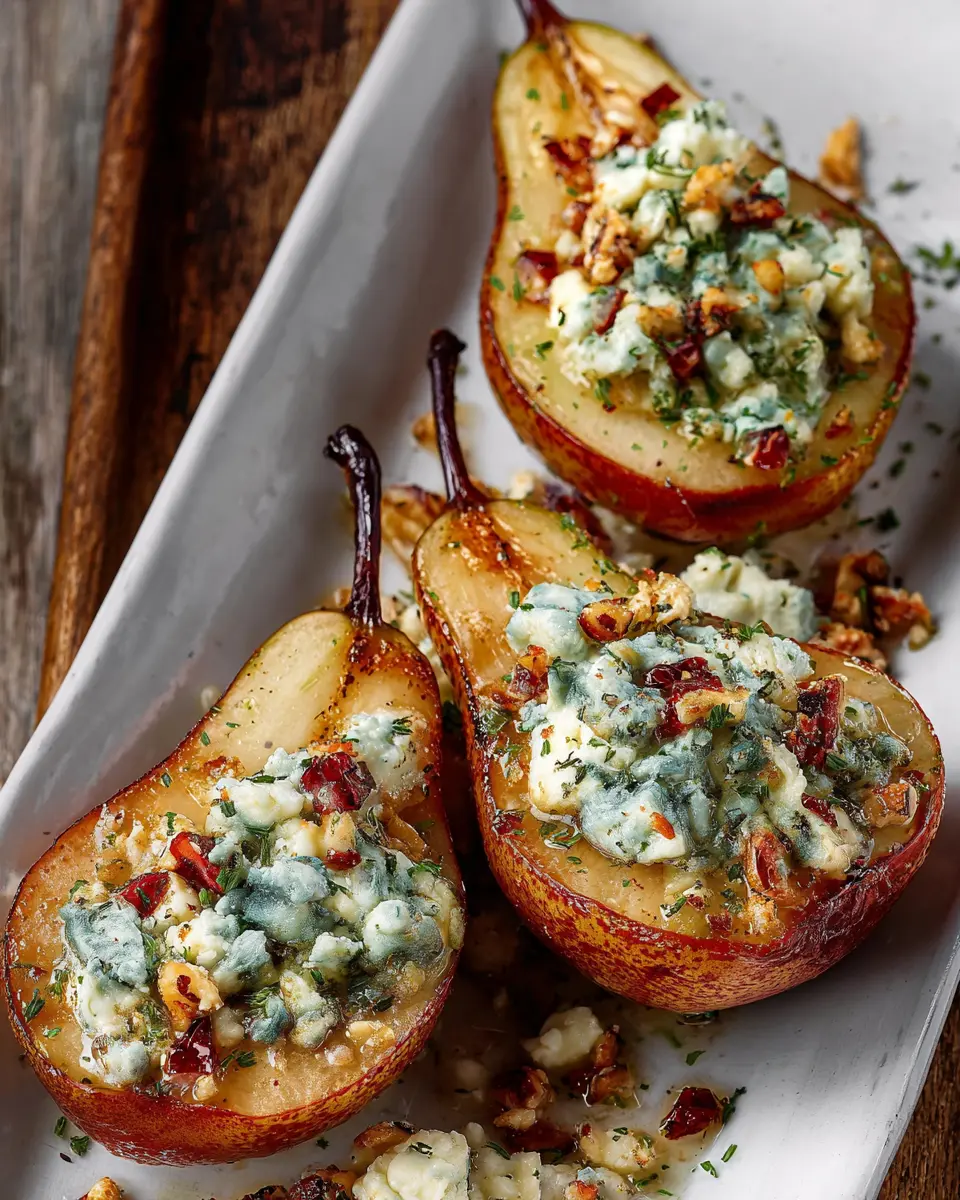
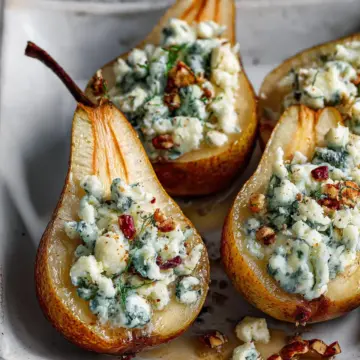
Introduction to Blue Cheese Stuffed Pears
Blue cheese stuffed pears are not just a delightful appetizer; they’re a true game-changer for young professionals looking to impress at gatherings or simply elevate their home-cooking game. Combining the rich, tangy flavors of blue cheese with the natural sweetness of ripe pears, this dish strikes the perfect balance between savory and sweet. Plus, it’s quick to prepare, making it ideal for busy weeknights or last-minute dinner parties.
Have you ever found yourself in need of a dish that wows but doesn’t eat up your entire evening? Blue cheese stuffed pears come to the rescue! The process is as straightforward as it is satisfying—slice, stuff, and bake—and the results are elegantly gourmet.
To sweeten the deal, this dish pairs beautifully with a variety of non-alcoholic beverages like sparkling water with a splash of lemon, making it suitable for any occasion. Serve these alongside grilled meats or a fresh salad, and you’ll create a meal that feels indulgent yet effortless.
For those looking to expand their culinary repertoire, check out resources like Food52 or Serious Eats for tips on ingredient pairings and variations to make this dish your own.
Ingredients for Blue Cheese Stuffed Pears
Making blue cheese stuffed pears is easier than you might think! This elegant appetizer combines sweet, juicy pears with rich blue cheese, creating a delightful contrast that’s perfect for impressing guests or enjoying a cozy night in. Here's what you’ll need:
- 3 large Bosc pears: These pears are preferred for their firm texture and sweetness. You can substitute with Anjou or Bartlett, but Bosc really shines here.
- 1–2 teaspoon olive oil: To enhance the flavors and allow the pears to roast beautifully.
- 2 ½ oz blue cheese: Look for Danish blue cheese, crumbled for easy stuffing. If you're a fan of a stronger flavor, opt for a more pungent variety.
- ⅓ cup walnuts, chopped: These add a fantastic crunch and nutty flavor; feel free to use pecans if you prefer.
- 3 sprigs fresh thyme: Fresh herbs elevate the dish, giving a fragrant touch.
- 1–2 tbsps honey: A drizzle of sweetness to balance the savory cheese.
- ½ teaspoon flaky sea salt: For that extra touch of flavor right before serving!
Gather these ingredients, and you’re ready to create a stunning dish that’s sure to impress. For some inspiration, check out this guide on pairing cheeses with fruit to take your blue cheese stuffed pears even further!
Preparing Blue Cheese Stuffed Pears
Making blue cheese stuffed pears is a delightful way to impress your guests with a sophisticated appetizer that’s surprisingly easy to prepare. Follow these simple steps to create a delicious dish that's perfect for gatherings or a cozy night in.
Preheat and Prepare the Pears
Start by preheating your oven to 400°F. While that’s heating up, grab your three large Bosc pears. These pears not only taste great, but they also hold their shape well during baking. Slice each pear in half lengthwise and carefully remove the core and seeds. This is where the magic happens! Place your pear halves cut side up in a cast iron skillet or a baking dish. Drizzle with olive oil — about a teaspoon per pear half should do — and season lightly with salt and pepper. For an extra layer of flavor, you might want to consider adding a pinch of cinnamon. It nicely complements the sweetness of the pears and the richness of the blue cheese.
Bake the Pears to Perfection
Once your pears are prepped, it’s time to bake them. Place the skillet in the preheated oven and let them roast for 15 minutes. This initial baking step will soften the pears while enhancing their natural sweetness. When you take them out of the oven, be sure to flip the pears cut side up; this will create a perfect little bowl for your blue cheese filling.
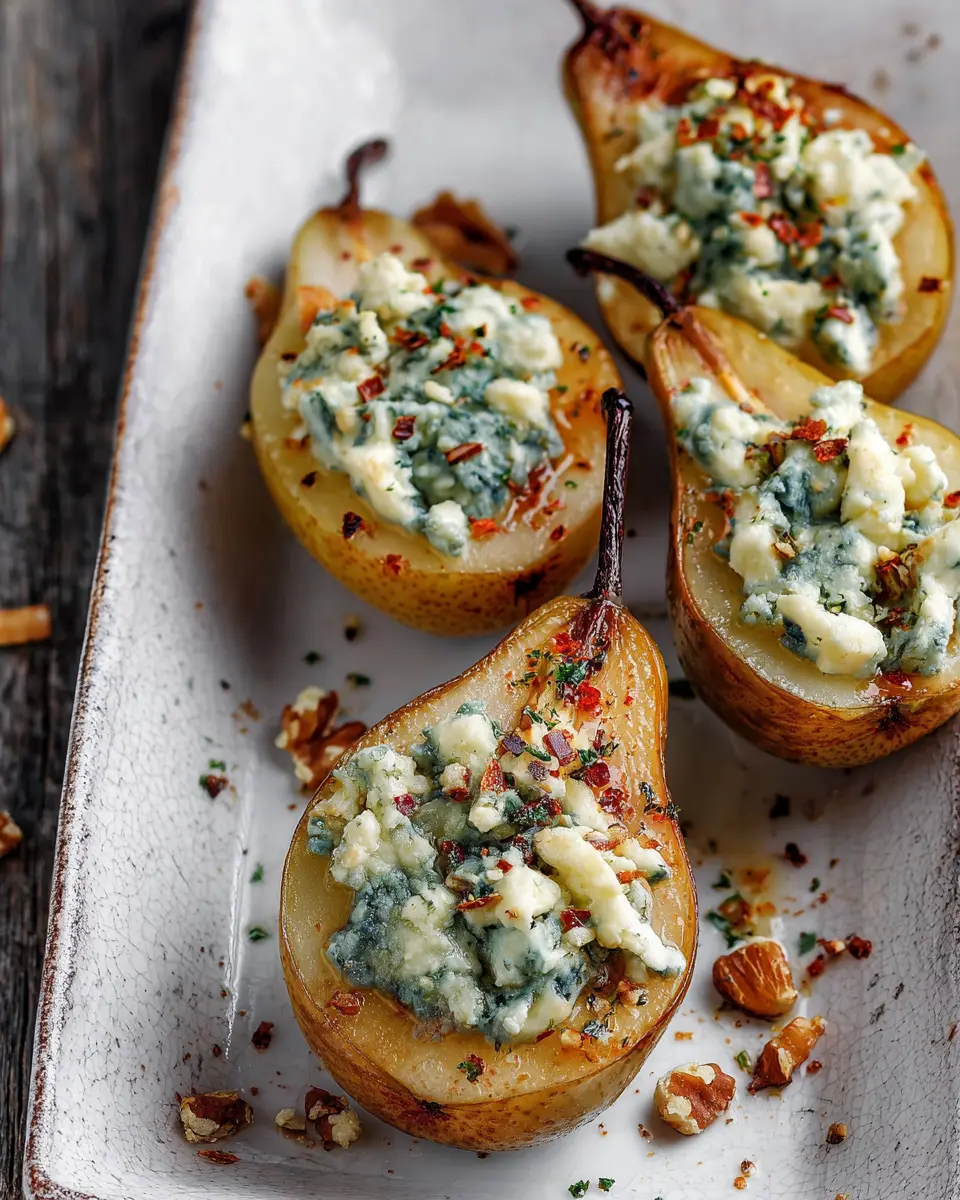
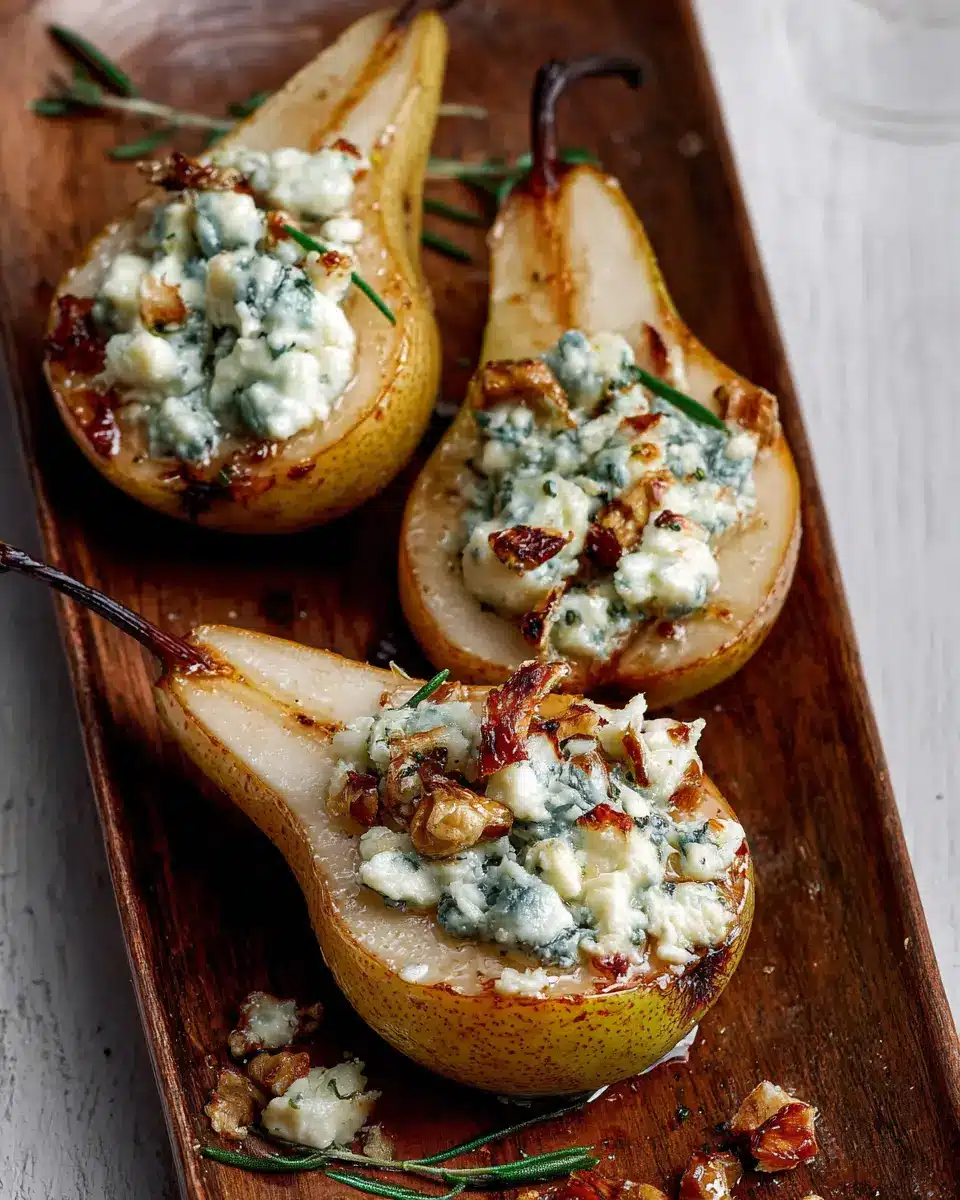
Stuff with Blue Cheese and Toppings
Now for the fun part! In a mixing bowl, combine your 2.5 oz of crumbled blue cheese, ⅓ cup of chopped walnuts, and a few sprigs of thyme that you've removed from the stem. This mixture is not only flavorful but also adds a lovely crunch. Don't shy away from experimenting; different types of nuts can lend their unique textures and tastes. Gently stuff each pear half with this delicious filling, allowing it to overflow just a bit for that rustic look. Return the pears to the oven for another 8 to 10 minutes. The goal is for the cheese to melt slightly while the walnuts toast, giving you a delightful contrast in textures.
Drizzle with Honey and Serve
To finish off your blue cheese stuffed pears, mix one to two tablespoons of honey with a pinch of Aleppo pepper in a small bowl. This will add a touch of sweetness and a hint of warmth to your dish. Once your pears are out of the oven and looking irresistible, transfer them to a serving platter. Drizzle the honey mixture generously over the stuffed pears, and consider adding a sprinkle of flaky salt and extra thyme on top for that gourmet touch.
There you have it! A simple yet elegant dish that’s bound to be a hit. Serve these delicious blue cheese stuffed pears warm for a delightful culinary experience that highlights both sweet and savory flavors. Enjoy your culinary adventure, and don't forget to share this recipe with friends!
Variations on Blue Cheese Stuffed Pears
Blue Cheese Stuffed Pears with Prosciutto
Elevate your blue cheese stuffed pears by wrapping them in crispy prosciutto. This delightful twist adds a savory crunch that contrasts beautifully with the sweetness of the pears. Simply lay the prosciutto over the stuffed pears before baking. The fat from the prosciutto will caramelize as it cooks, creating a wonderfully rich flavor profile. This combination is perfect for a party appetizer or an elegant start to a dinner.
Sweet and Spicy Blue Cheese Stuffed Pears
For those who crave a zestier experience, try adding a touch of spice. Mix crushed red pepper flakes or chopped jalapeños into the blue cheese stuffing to create a sweet and spicy flavor explosion. Pair your stuffed pears with a drizzle of balsamic reduction for a sophisticated finish. This variation is sure to tantalize taste buds and bring an unexpected kick to your appetizer spread!
Cooking Tips and Notes for Blue Cheese Stuffed Pears
When making blue cheese stuffed pears, consider the ripeness of your pears. Choose Bosc pears that yield slightly to pressure for the best texture after baking. To enhance the flavor, try toasting the walnuts beforehand—this small step maximizes their nuttiness.
Don't be shy with the honey! A generous drizzle adds a delightful sweetness that perfectly balances the tanginess of the blue cheese. If you're feeling adventurous, swap out the olive oil for a flavored oil like walnut oil to add an extra layer of taste.
As a finishing touch, a sprinkle of flaky salt elevates the dish, making every bite simply unforgettable. For more tips on pairing cheeses with fruits, check out this article for expert insights!
Enjoy your culinary adventure with this delightful dish!
Serving Suggestions for Blue Cheese Stuffed Pears
When it comes to enjoying blue cheese stuffed pears, the possibilities are as exciting as the flavors themselves! Here are a few serving suggestions:
-
Appetizer Delight: Present these stuffed pears on a platter with a variety of crackers and some sliced turkey bacon. The salty crunch of turkey bacon creates a perfect contrast to the creamy cheese.
-
Salad Boost: Add the warm pears to a mixed greens salad topped with candied walnuts and a balsamic vinaigrette. The sweetness of the pears ties beautifully with the tangy dressing.
-
Cheese Board Addition: Include these tasty bites on a cheese board, pairing them with cured meats like chicken ham for a stunning spread that's sure to impress your guests.
Found these tips helpful? For even more creative twists, check out this article on unique appetizer ideas for inspiration!
Time Breakdown for Blue Cheese Stuffed Pears
Preparation Time
Getting started doesn’t take long! You’ll need roughly 10 minutes to wash, slice, and prep your ingredients for these delightful blue cheese stuffed pears.
Cooking Time
Once they’re in the oven, the cooking takes about 25 minutes. This includes baking the pears and allowing the blue cheese to melt – the perfect way to enhance that flavor.
Total Time
In total, you’re looking at around 35 minutes from start to finish. A quick, gourmet treat that’s sure to impress! If you're curious about more time-saving cooking tips, check out this kitchen efficiency guide.
With this simple breakdown, you’ll find that whipping up these elegant appetizers is both easy and satisfying. Perfect for a cozy night in or an unexpected gathering!
Nutritional Facts for Blue Cheese Stuffed Pears
When you indulge in these blue cheese stuffed pears, it's essential to know what you're adding to your body. Here's a quick overview of their nutritional profile:
Calories
Each serving boasts approximately 200 calories, making it a delightful yet guilt-free treat to enjoy as an appetizer or light dessert.
Protein
Packed with around 5 grams of protein, thanks to the rich blue cheese and walnuts, these pears provide a satisfying boost that can keep you feeling full longer.
Sodium
With about 250 mg of sodium per serving, these blue cheese stuffed pears are moderate in salt, making them a tasty option without overwhelming your palate.
Overall, this delicious recipe combines flavor and nutrition beautifully, allowing you to savor each bite while keeping your health top of mind! For more information on nutrition, consider checking resources like the USDA FoodData Central for detailed dietary insights.
FAQs about Blue Cheese Stuffed Pears
Can I make Blue Cheese Stuffed Pears ahead of time?
Absolutely! Blue cheese stuffed pears make for a great make-ahead dish. You can prepare the pears and fill them with the cheese mixture up to a day in advance. Just store them in an airtight container in the refrigerator. When you're ready to serve, simply bake them until warmed through. This will save you valuable time, especially if you're entertaining guests.
What can I use instead of blue cheese?
If blue cheese isn't your thing, don't worry! You can try alternatives like feta or goat cheese. These cheeses will pair nicely with the sweetness of the pears. For a richer flavor, consider Gorgonzola or even cream cheese mixed with herbs for a different twist.
Are there any dietary restrictions to consider?
While blue cheese stuffed pears are generally gluten-free and vegetarian, it's essential to be aware of dairy allergies. Vegan alternatives can also be explored by replacing cheese with cashew cheese or another plant-based option. For more on accommodating dietary needs, visit health-oriented resources like Verywell Fit.
Enjoy crafting this delicious dish!
Conclusion on Blue Cheese Stuffed Pears
In summary, blue cheese stuffed pears are a delightful and easy-to-make appetizer that blend sweet and savory perfectly. Their creaminess, crunch, and aromatic herbs create an unforgettable dish. Whether you’re hosting friends or indulging yourself, this recipe is sure to impress. Enjoy every luscious bite!
For more inspiration and ideas, check out Food Network’s appetizer suggestions or explore Epicurious for creative pairings.
Blue Cheese Stuffed Pears
Equipment
- oven
- Cast Iron Skillet
Ingredients
Pears and Filling
- 3 large Bosc pears
- 2.5 oz blue cheese (Danish, crumbled)
- ⅓ cup walnuts, chopped
- 3 sprigs fresh thyme removed from the stem
- 1 tablespoon honey to taste
- 1 teaspoon olive oil for drizzling
- 1 pinch salt to taste
- 1 pinch pepper to taste
Instructions
Cooking Instructions
- Preheat the oven to 400℉.
- Slice the pears in half lengthwise and remove the core and seeds. Place in a cast iron skillet (or a baking dish), cut side up. Drizzle with the olive oil and season lightly with salt and pepper. Turn the pears cut side down.
- Transfer the pears to the oven and bake for 15 minutes.
- Remove the pears, turn them cut side up and stuff with the blue cheese, walnuts and thyme. Place back in the oven for eight to ten minutes, until the cheese has melted a little.
- Mix the honey with Aleppo pepper in a small bowl.
- Once the pears are done cooking, transfer to a platter (or plates) and drizzle with the honey and garnish with flaky salt and extra thyme (if desired). Enjoy!


Leave a Reply