
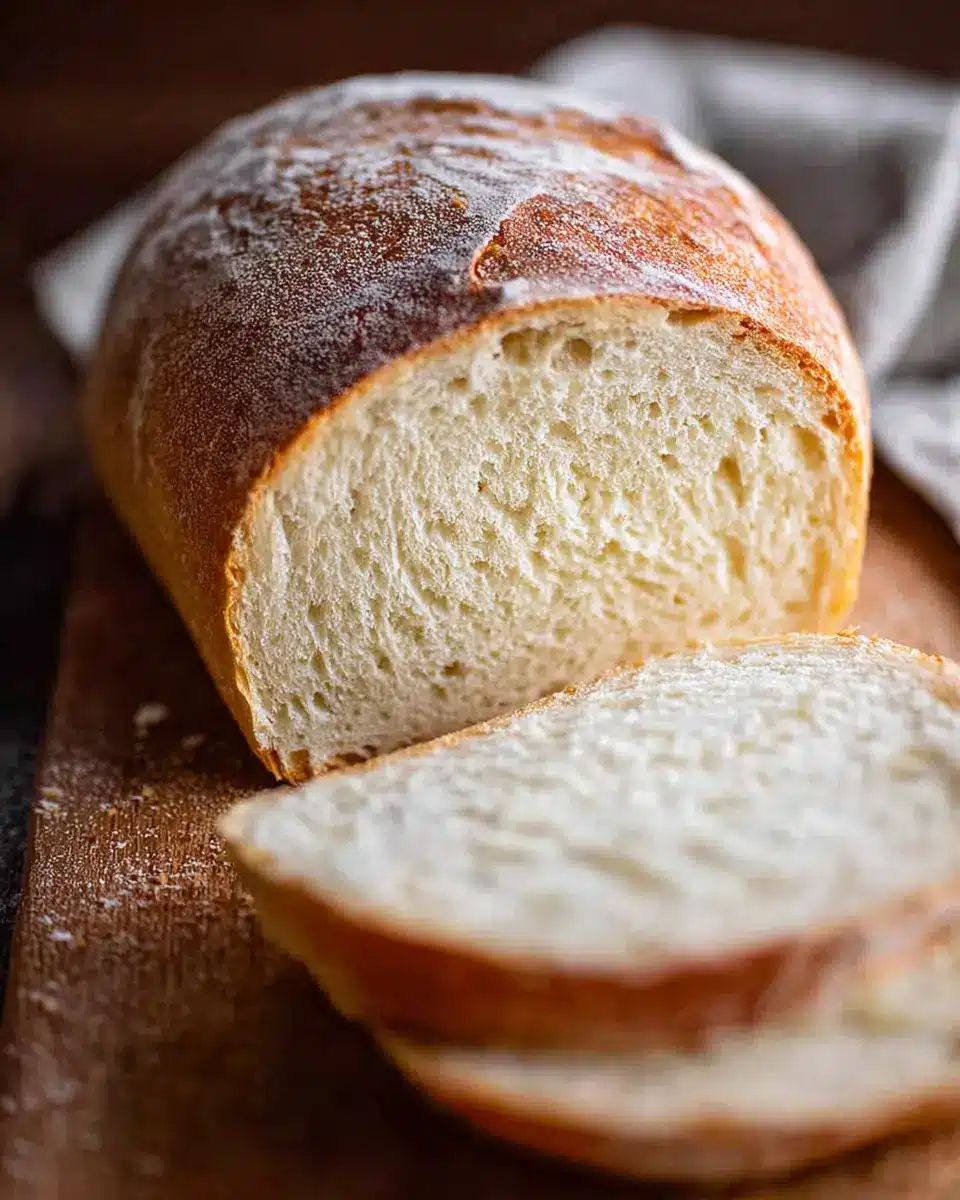
Introduction to Homemade Bread
Baking your own bread at home is not only a rewarding experience but also a delightful journey into the world of culinary creativity. Many people wonder, "Why choose homemade bread over store-bought?" The answer lies in the simple joys of freshness, flavor, and nutrition.
Why Choose Homemade Bread Over Store-Bought?
-
Freshness and Flavor: Nothing compares to the aroma of freshly baked bread wafting through your kitchen. Store-bought varieties often contain preservatives to extend shelf life, detracting from that fresh-bread experience.
-
Control Over Ingredients: When you make homemade bread, you have full control over the ingredients. This way, you can choose high-quality flour and natural sweeteners, promoting a healthier lifestyle. You can easily adapt the recipe to suit your dietary needs or preferences.
-
Cost-Effective: Surprisingly, baking your own bread can be more economical than buying it. If you're feeding a household or simply love bread, you’ll save money in the long run.
-
Satisfaction and Creativity: There’s something incredibly satisfying about creating something from scratch. Each loaf is an opportunity to experiment with flavors and techniques, personalizing your baking experience.
If you’re intrigued and ready to get started, check out our Homemade Bread recipe that uses just six pantry ingredients. Let’s dive in and create something delicious!
Ingredients for Homemade Bread
Essential Ingredients You Need
To make a simple yet delicious homemade bread, you’ll need a few staple pantry items. Gather the following:
- 2 cups warm water (between 105-115°F)
- 1 tablespoon active dry yeast
- ¼ cup honey or sugar (both work wonders as sweeteners)
- 2 teaspoons salt
- 2 tablespoons oil (canola or vegetable)
- 4 to 5 ½ cups all-purpose or bread flour
These ingredients form the foundation of your bread! Yeast plays a crucial role in fermentation, giving your bread that lovely rise and texture.
Optional Ingredients for Flavor Variations
Want to take your homemade bread to the next level? Consider adding some optional ingredients for extra flavor and flair:
- Herbs and spices: A teaspoon of rosemary or garlic powder can add a fragrant twist.
- Seeds: Sunflower, sesame, or poppy seeds sprinkled on top add crunch and flavor.
- Cheese: Crumbled feta or shredded cheddar can create a savory delight.
Feel free to mix and match these additions based on your mood or the occasion! For more tips on customizing your bread, check out King Arthur Baking.
Preparing Homemade Bread
Making homemade bread can seem daunting, but with a few simple steps, you’ll find it’s not only manageable but also incredibly rewarding. Here’s a friendly guide to help you through the process, ensuring you have a delicious loaf waiting to be enjoyed!
Step 1: Gather and Measure the Ingredients
Before diving into bread-making, take a moment to gather your ingredients. Here's what you'll need:
- 2 cups warm water (105-115 degrees)
- 1 tablespoon active dry yeast
- ¼ cup honey or sugar
- 2 teaspoons salt
- 2 tablespoons oil (canola or vegetable)
- 4 to 5 ½ cups all-purpose or bread flour
Measuring precisely will set you up for success, so don’t rush through this step. Ensure your water is at the right temperature—too hot can kill the yeast, while too cold won’t activate it properly.
Step 2: Activate the Yeast
In a large bowl or mixer, combine the warm water with a pinch of your sweetener and the yeast. Let this sit for about 5-10 minutes. You want the mix to become foamy and bubbly, indicating that your yeast is alive and ready to work its magic. If it doesn’t foam, you might need fresh yeast.
Step 3: Combine Ingredients and Form the Dough
Once your yeast is activated, add the rest of your ingredients—the sweetener, salt, oil, and flour. Mix them until well combined. Start with 3 cups of flour and gradually add more until the dough pulls away from the sides of the bowl.
Step 4: Knead the Dough
Now comes the fun part—kneading! You can either use a stand mixer on medium speed for about 4-5 minutes or get your hands into it. If kneading by hand, make sure to sprinkle a little flour to avoid sticking. Kneading develops the gluten, giving your bread that wonderful chewy texture.
Step 5: Allow the Dough to Rise
Transfer your dough to a greased bowl, covering it with a cloth or plastic wrap. Find a warm spot for it to rise until it doubles in size—this usually takes about 1.5 hours. If you’re in a hurry, you can preheat your oven to 180°F, turn it off, and let your dough rise inside.
Step 6: Shape the Loaves
After your dough has risen, punch it down gently to release the air. Divide it into two equal pieces and shape each into a log, placing them in greased loaf pans.
Step 7: Second Rise Before Baking
Cover the pans with a towel or lightly greased plastic wrap. Let them rise for an additional 45 minutes to an hour, until they’ve risen about an inch above the pans.
Step 8: Bake the Bread
Preheat your oven to 350°F. Bake your loaves for about 30-33 minutes until they’re golden brown on top and sound hollow when tapped. Let them cool on a wire rack before slicing.
And just like that, you have freshly made homemade bread! Enjoy it fresh or store it to share with friends and family. For more tips and tricks on bread-making, check out resources like King Arthur Baking. Happy baking!

Variations on Homemade Bread
Whole Wheat Homemade Bread
If you're looking to boost your nutrition without sacrificing flavor, try making whole wheat homemade bread. Substituting part or all of the all-purpose flour for whole wheat flour adds fiber and nutrients to your loaf. Just remember to adjust the liquid slightly, as whole wheat flour absorbs more moisture. Your bread will have a hearty texture that's perfect for sandwiches or toast!
Herb and Garlic-Infused Bread
For a savory twist, consider herb and garlic-infused bread. Simply add minced garlic and your favorite herbs—like rosemary or thyme—to the dough during the mixing phase. Not only does this create a fragrant aroma while baking, but it also results in a deliciously flavorful loaf that pairs wonderfully with soups and salads. You can even experiment with adding grated cheese or sun-dried tomatoes for an extra kick!
These variations are just a few examples of how you can customize your homemade bread to suit your palate. Feel free to explore and combine flavors, creating a loaf that's entirely your own! For more ideas, check out sources about baking techniques and flavor pairings.
Baking Notes for Homemade Bread
Tips for perfect results
Creating homemade bread is easier than you think! Start by ensuring that your yeast is fresh — if it doesn't foam during proofing, it's time to buy a new batch. Measure ingredients accurately; too much flour can lead to dense bread. Pro tip: for an ideal rise, place your dough in a warm, draft-free spot. If you're short on time, try a quick-rise method by warming your oven slightly before letting the dough rise inside.
Common mistakes to avoid
A common pitfall is inadequate kneading; under-kneaded dough won't develop proper gluten, resulting in a dense loaf. Don’t forget to punch down your dough after the first rise — this helps redistribute the yeast for better flavor. Also, avoid opening the oven door frequently while baking; this can affect the temperature and result in uneven baking. For a beautifully golden crust, brush the top with melted butter right after baking.
For more tips on homemade bread, visit King Arthur Baking. Happy baking!
Serving Suggestions for Homemade Bread
Ideal Pairings for Homemade Bread
Nothing beats a warm slice of homemade bread fresh from the oven! Enjoy it with classic toppings like:
- Butter and Jam: Spread a pat of butter followed by your favorite fruit jam for a delightful breakfast.
- Turkey Bacon & Avocado: Elevate your sandwiches with crispy turkey bacon and creamy avocado for that perfect brunch.
- Chicken Ham & Cheese: Layer slices of chicken ham with your choice of cheese for a satisfying snack or light lunch.
- Soups & Salads: Use your bread as a side for comforting soups or fresh salads; the combination enhances the meal’s overall flavors.
Creative Uses for Leftover Bread
Don’t let your homemade bread go to waste! Here are some fun ways to repurpose those remnants:
- Breadcrumbs: Turn stale bread into breadcrumbs for breading chicken or topping casseroles.
- Bread Pudding: Combine cubed leftover bread with milk, eggs, and spices to create a delicious dessert.
- Croutons: Pizza your leftover bread into cubes, season them, and bake for homemade croutons that add crunch to your salads.
- French Toast: Transform old slices into an indulgent breakfast favorite with a simple custard mixture.
Revamping your bread means less waste and more deliciousness! For more tips on food safety, check out the USDA guidelines.
Tips for Making Perfect Homemade Bread
Storage and Freezing Tips
To keep your homemade bread fresh, store it in an airtight container or resealable bag at room temperature for 2-3 days. If you won’t eat it within that time, consider freezing it. Wrap the cooled loaf tightly in plastic wrap, then place it in a freezer-safe bag. It can last up to three months—just remember to thaw it at room temperature before enjoying!
How to Refresh Stale Bread
Don’t toss out stale homemade bread! Simply spritz it lightly with water and place it in a preheated oven at 350°F for about 10 minutes. This will bring back moisture and make your bread taste fresh again. Perfect for those late-night cravings or last-minute sandwiches!
Time details for Homemade Bread
Preparation time
Getting started on your homemade bread is quick and easy! Just 15 minutes to mix the ingredients and prepare the dough.
Rising time
Patience is key for bread making. You'll need about 3 hours total for the dough to rise twice—first for 1.5 hours and then again for about 45 minutes to an hour.
Baking time
Once your dough has risen beautifully, pop it in the oven for 30-33 minutes. This is the moment your kitchen will fill with the warm aroma of baked bread!
Total time
All in all, expect to dedicate about 3 hours and 45 minutes from start to finish. Trust me, the delicious results are well worth the wait!
For more insights on homemade bread, consider checking resources like King Arthur Baking or The Fresh Loaf.
Nutritional Information for Homemade Bread
Caloric Content
A slice of this homemade bread contains approximately 202 calories. This makes it a delightful choice for sandwiches or toast, all while being mindful of your dietary preferences!
Macronutrient Breakdown
In each slice, you’ll find a balanced blend:
- Carbohydrates: 41g
- Protein: 5g
- Fat: 2g (with just 1g of saturated fat)
This balance can be great for fueling your day, whether you're heading to the gym or need an energy boost for work! Plus, you can enhance this bread with nutritious toppings or fillings. Want to learn more about the benefits of whole grains? Check out the Whole Grains Council.
Remember, nourishing your body doesn’t have to be complicated; it can simply start at home with a loaf you made yourself!
FAQs about Homemade Bread
Can I use different types of flour?
Absolutely! While this homemade bread recipe works beautifully with all-purpose or bread flour, you can also experiment. Whole wheat flour is an excellent choice for a hearty loaf, though it requires some adjustments due to its lower gluten content. Start by substituting about half the all-purpose flour with whole wheat flour. If you want to maintain a soft texture, consider adding vital wheat gluten to boost elasticity. For more insights on different flour types, check out resources from the King Arthur Baking Company.
What should I do if my bread doesn’t rise?
If your bread fails to rise, don’t worry! There are common culprits, like inactive yeast or a cool rising environment. First, ensure your yeast is fresh. If it didn't foam during proofing, it might be dead. Also, try moving the dough to a warmer spot, or using the quick-rise tip mentioned in our instructions to boost rising time.
How can I tell when my bread is done baking?
A perfectly baked loaf will have a golden-brown crust and a hollow sound when you gently tap the top. You can also use a kitchen thermometer—aim for an internal temperature of about 190°F (88°C). This ensures your homemade bread is cooked evenly and has a fluffy texture. Want to dive deeper into bread baking tips? Visit Bakepedia for expert guidance.
Conclusion on Homemade Bread
The joy of baking bread at home
There's something truly special about homemade bread. The aroma fills your kitchen, bringing comfort and warmth. Plus, it's a fantastic way to impress your friends and family with your baking skills! Take this opportunity to experiment with flavors and ingredients. You’ll find that every loaf you bake brings a unique sense of achievement. So, roll up your sleeves, and enjoy the delightful process of making your own bread! For more tips and techniques on enhancing your bread-making journey, check out resources like King Arthur Baking or The Bread Lab.
Homemade Bread
Equipment
- Loaf pan
- Bosch Mixer
Ingredients
- 2 cups warm water (105-115 degrees)
- 1 Tablespoon active dry yeast *
- ¼ cup honey or sugar (85g honey, 50g sugar)
- 2 teaspoons salt
- 2 Tablespoons oil (canola or vegetable; 30 ml)
- 4 - 5 ½ cups all-purpose or bread flour (500g-688g)
Instructions
Prepare the dough
- In a large bowl or stand mixer add the yeast, water and a pinch of the sugar or honey. Allow to rest for 5-10 minutes until foaming and bubbly.
- Add remaining sugar or honey, salt, oil, and 3 cups of flour. Mix to combine.
- Add another cup of flour and mix to combine. With the mixer running add more flour, ½ cup at a time, until the dough begins to pull away from the sides of the bowl.
Knead the dough
- Mix the dough for 4-5 minutes on medium speed or knead with your hands on a lightly floured surface for 5-8 minutes.
First Rise
- Grease a large bowl with oil or cooking spray and place the dough inside, turning to coat. Cover with a dish towel or plastic wrap and allow to rise in a warm place until doubled in size, about 1 ½ hours.
Prepare for second rise
- Spray two 9x5'' bread pans generously with cooking spray on all sides.
- Punch the dough down well to remove air bubbles. Divide into two equal portions. Shape each ball into long logs and place into greased loaf pans.
Second rise
- Cover pans with a lightweight, dry dish towel or plastic wrap. Allow dough to rise again for about 45 minutes to one hour, or until risen about 1 inch above the loaf pans.
Bake
- Preheat oven to 350 F. Bake bread for about 30-33 minutes, or until golden brown on top.
- Invert the loaves onto a wire cooling rack. Brush the tops with butter and allow to cool for at least 10 minutes before slicing.


Leave a Reply