
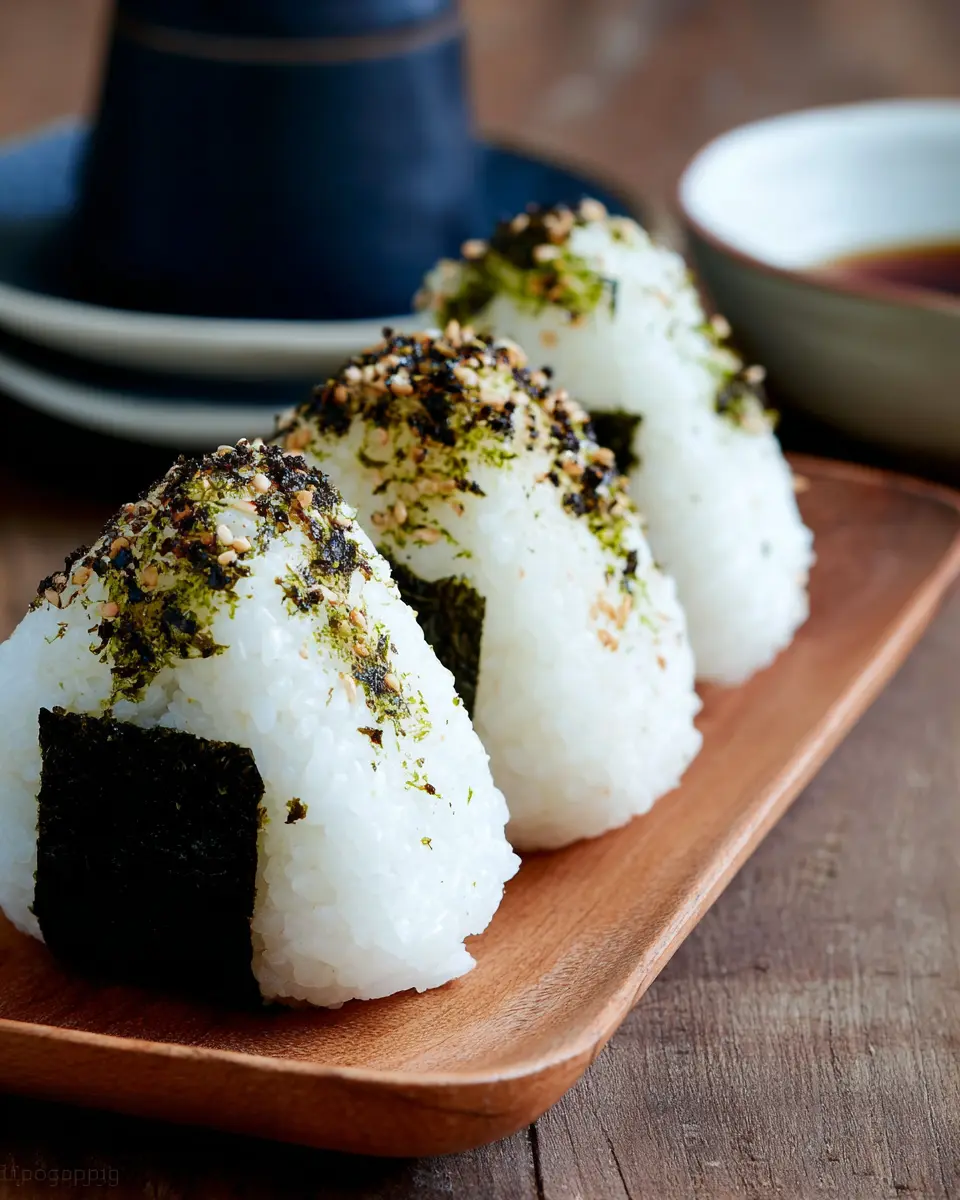
Introduction to Onigiri Japanese Rice Balls
If you’re a young professional looking for quick, nutritious, and fun snacks, Onigiri Japanese Rice Balls are an excellent choice! These delightful rice balls are not only easy to make but also incredibly versatile. You can stuff them with a variety of fillings like tuna mayo, salmon, or even umeboshi (pickled plum) to suit your taste. They are perfect for a busy lifestyle, offering a satisfying and healthy alternative to heavier lunch options like sandwiches.
Imagine prepping your meals for the week in just an hour. With a little practice, you can whip up a batch of onigiri in advance, making it simple to grab and go during a hectic workday. Plus, these rice balls are great for desk lunches or even quick snacks between meetings. Did you know that you can make about 9 onigiri with just over 2 cups of rice? That’s a surprisingly high yield for minimal effort!
Onigiri also offer a playful aspect to your meals — you can customize their shapes and fillings, making it a fun culinary project to share with friends. For more inspiration, check out this detailed guide on the history and cultural significance of onigiri over on NHK World. Get ready to explore the magical world of Onigiri!

Ingredients for Onigiri Japanese Rice Balls
Essential ingredients for the rice
When it comes to crafting the perfect Onigiri Japanese Rice Balls, the rice is your star ingredient. You'll need 2¼ cups of uncooked Japanese short-grain white rice, which becomes wonderfully sticky when cooked, allowing the rice balls to hold their shape. Combine this with 2½ cups of water for the cooking process. Remember, a well-cooked rice is the foundation of delicious onigiri, so pay attention to the rice-to-water ratio!
Popular fillings for onigiri
The fillings for your onigiri open up a world of flavor! Some popular options include:
- Japanese Salted Salmon: Flaky, salted salmon adds a savory touch.
- Okaka: Dried bonito flakes mixed with soy sauce provides a umami flavor explosion.
- Tuna Mayo: Creamy albacore tuna combined with Japanese Kewpie mayonnaise makes for a rich filling.
- Umeboshi: These tangy pickled plums give a refreshing kick.
- Mentaiko: Spicy salted pollock roe adds an exciting taste.
With these ingredients, you can customize each rice ball to your liking, ensuring every bite is a delightful experience! For more tips on selecting your fillings, check out resources like Just One Cookbook for inspiration!
Preparing Onigiri Japanese Rice Balls
Making Onigiri, or Japanese rice balls, is an enjoyable and rewarding experience, perfect for anyone looking to add a delicious twist to their snack or lunch options. Let’s dive into how to prepare these delightful treats!
Cook the Steamed Rice
The first step in creating perfect Onigiri is to cook your rice. For this, you will want to use Japanese short-grain rice—this type of rice is sticky and holds together well, making it ideal for Onigiri.
- Rinse 2¼ cups of uncooked rice under cold water until the water runs clear. This removes excess starch for fluffier rice.
- Cook it in your preferred method—using a rice cooker, stovetop, or Instant Pot. For stovetop cooking, combine the rinsed rice with 2½ cups of water and let it soak for about 20–30 minutes. After soaking, bring to a boil and then simmer on low for about 15 minutes.
- Once cooked, let it rest covered for another 10 minutes. This helps achieve that desired sticky texture.
Prepare the Fillings
While your rice is steaming, it’s time to think about the delicious fillings! Traditional options give your Onigiri character and flavor:
- Japanese Salted Salmon: Salt your salmon fillet, then broil or bake it until flaky. Shred it into bite-sized pieces.
- Okaka (Bonito Flakes): Mix katsuobushi with soy sauce for a savory surprise.
- Tuna Mayo: Combine canned tuna, Japanese Kewpie mayonnaise, and soy sauce for a creamy filling.
You can also get creative! Try ingredients like umeboshi (pickled plum), spicy salted cod roe, or even furikake (rice seasoning) for extra flavor.
Shape the Onigiri Using Different Methods
Shaping your Onigiri can be an art form in itself! You can use a mold for uniform shapes, or go freehand for a rustic feel.
-
Using an Onigiri Mold: Wet the mold and sprinkle some salt inside. Fill it halfway with rice, add your chosen filling, then top with more rice. Firmly press down the lid and release your Onigiri onto a plate.
-
By Hand: Wet your hands and sprinkle salt in your palms. Take a handful of rice and create a small indent for the filling. Press the rice together gently, forming a triangle, keeping the density just right.
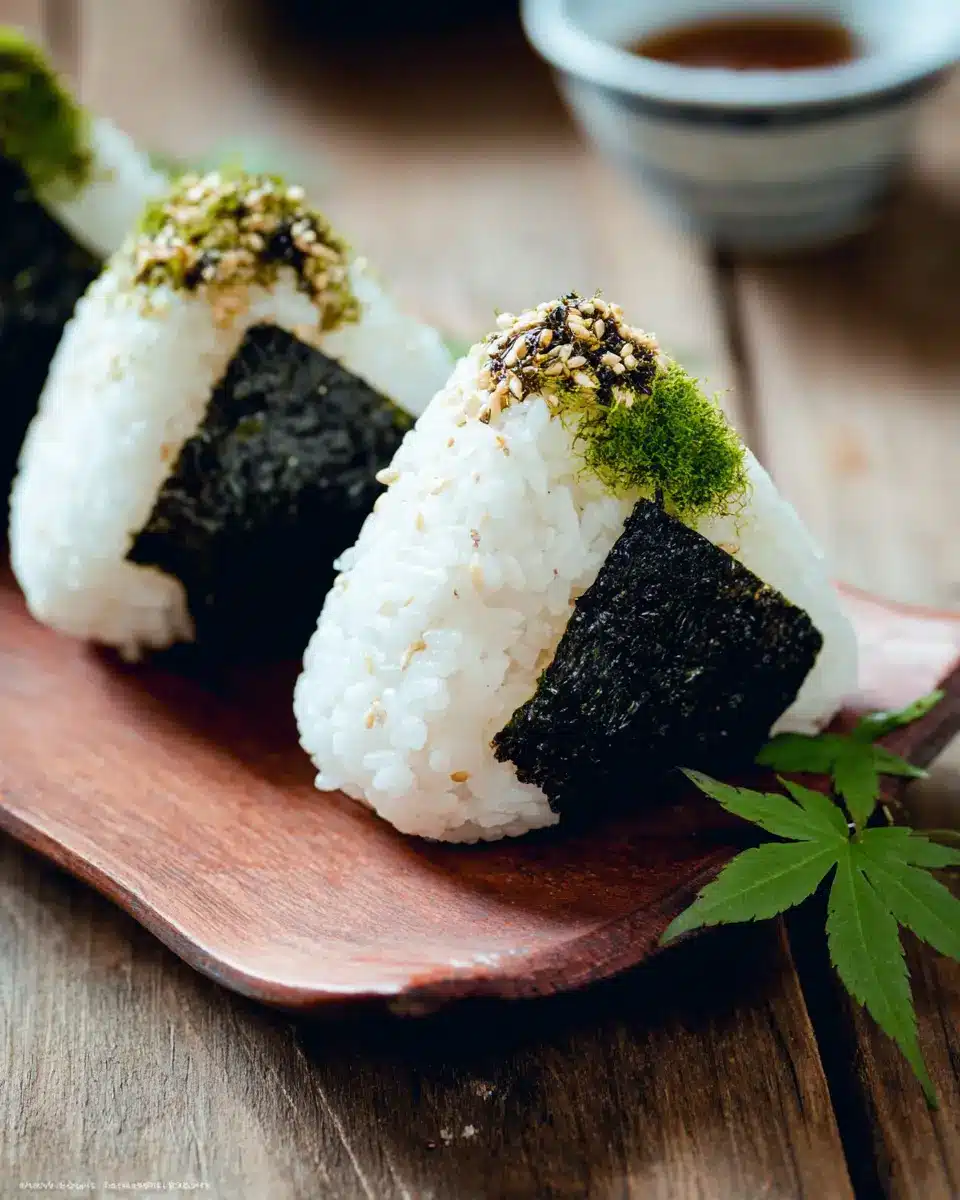
Wrap and Season the Onigiri
Last but not least, it’s time to wrap and season your Onigiri. Here’s how:
- Furikake: Roll the Onigiri in furikake for an added crunch and flavor.
- Nori: Toast some nori sheets lightly over an open flame, then cut them into strips. Wrap a piece around your Onigiri just before serving for the best texture.
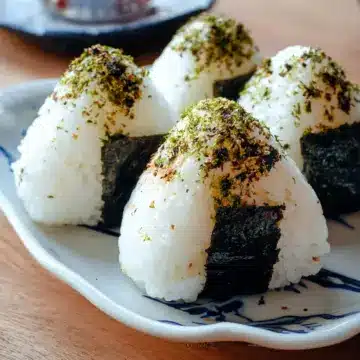
Serving your Onigiri warm adds to the overall appeal, but they’re also delightful at room temperature. And don’t forget—labeling each Onigiri with its filling helps you and your friends dig in without surprise!
With these steps, you're well on your way to creating your own delightful Onigiri Japanese Rice Balls, a perfect snack for work, school, or any occasion. Enjoy the process!
Variations on Onigiri Japanese Rice Balls
When it comes to Onigiri Japanese Rice Balls, the potential for creative fillings is nearly endless! Here are a couple of popular variations that cater to different tastes.
Classic Tuna Mayo Onigiri
For a delightful and savory option, try the classic tuna mayo filling. Combine a can of albacore tuna (preferably in olive oil) with Japanese Kewpie mayonnaise and a dash of soy sauce. The creaminess of the mayo beautifully complements the protein-packed tuna, making it a satisfying treat. Pack these for lunch, and you’ll have a delicious meal that never disappoints!
Vegetarian Onigiri Options
If you prefer something plant-based, consider fillings like umeboshi (pickled plum) or seasoned shio kombu (kelp). Both options bring unique flavors and are easily accessible. Umeboshi adds a tangy punch, while shio kombu brings umami depth. Additionally, don’t overlook furikake – a tasty rice seasoning that can elevate your onigiri without any complications.
Exploring these variations will open a world of flavors to your onigiri-making adventures! For a deeper dive into the delightful world of Japanese cuisine, check out more on Just One Cookbook.
Cooking tips and notes for Onigiri (Japanese Rice Balls)
Avoiding common pitfalls
Making perfect Onigiri requires some practice. Avoid overcooking the rice, as it can make shaping difficult and affect texture. Always use short-grain rice for the right stickiness. When forming your onigiri, wet your hands to prevent the rice from sticking. If you're using a mold, ensure it’s moistened beforehand to help release the rice without tearing it.
Ensuring flavors shine through
To make your Onigiri (Japanese Rice Balls) truly flavorful, don’t skimp on seasoning. A sprinkle of kosher salt on the rice adds depth, while mixing your fillings well can enhance their taste. Fresh ingredients are key—use quality fish or fresh umeboshi when possible. Lastly, experiment with various fillings to find your favorites and keep your onigiri exciting!
For more inspiration on fillings, check out Just One Cookbook for a variety of ideas.
Serving Suggestions for Onigiri Japanese Rice Balls
Pairing with Sides and Dips
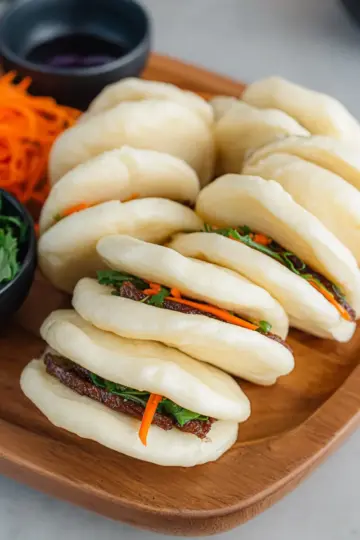
Onigiri Japanese Rice Balls shine brightly when paired with flavorful sides. Consider serving them with pickled vegetables like tsukemono for a tangy kick or a light miso soup for warmth on a chilly day. You might also enjoy them alongside tempura for a textural variety. And don't forget dipping sauces! A light soy sauce or a spicy mayo can elevate your onigiri experience. For a personalized touch, make a homemade dipping sauce with soy sauce and sesame oil — the flavors are a perfect match!
Best Ways to Pack for Lunch
If you're packing onigiri for lunch, it's wise to keep them fresh! Use bamboo or stainless-steel containers to maintain their shape. Wrap each rice ball in a sheet of nori just before eating to keep it crisp. For a fun twist, you could even use colorful bento paper for wrapping. Want them to stay moist? A damp paper towel in your lunchbox will do wonders! For a fun lunch idea, consider arranging your onigiri with sliced veggies and fruit for a vibrant, nutritious meal.
Time Breakdown for Onigiri Japanese Rice Balls
Preparation Time
The prep for these delicious Onigiri Japanese Rice Balls takes about 30 minutes. This includes measuring and rinsing the rice, as well as getting your fillings ready.
Cooking Time
You'll need roughly 30 minutes to cook the rice. Using a rice cooker can simplify this and allow you to multitask with your fillings while the rice cooks.
Total Time
All in all, you’re looking at around 1 hour from start to enjoying your flavorful onigiri. Perfect for a satisfying snack or a fresh lunch option!
For great tips on making rice, check out this comprehensive guide to perfect rice cooking for extra insights.
Nutritional Facts for Onigiri Japanese Rice Balls
When it comes to Onigiri Japanese Rice Balls, there's more than just taste that makes them special. Let’s break down their nutritional profile to see how they can fit into your diet.
Calories
In one serving of Onigiri, you can expect around 174 calories, making them a hearty yet manageable snack option that won't derail your meal plan.
Protein Content
Each onigiri packs in about 7g of protein. This protein boost can help refuel your energy, making them a great pick-me-up post-workout or while on-the-go.
Sodium Levels
With around 341mg of sodium per serving, it's advisable to enjoy this treat in moderation, especially if you're watching your sodium intake. Pair your onigiri with a serving of veggies or a light salad for a balanced meal!
Incorporating Onigiri into your diet not only satisfies hunger but offers a delightful taste of Japanese culture. Remember, the fillings you choose can also add to the nutritional value! For more on healthy eating, consider checking out this guide on balanced meals.
FAQs about Onigiri Japanese Rice Balls
Can onigiri be made in advance?
Definitely! You can prepare onigiri in advance, making them perfect for meal prep or lunch boxes. Just keep in mind that to maintain freshness, it's best to consume them within 6 hours if left at room temperature. If you need to store them longer, wrap them with a kitchen towel and refrigerate them. This helps prevent them from getting too hard.
How can I customize my fillings?
The beauty of onigiri Japanese rice balls is their versatility! Feel free to get creative with your fillings. Common options include Japanese salted salmon, tuna mayo, or even spicy cod roe. You can also use leftovers or anything you love—just remember to keep a balance of flavors and textures, and don’t shy away from experimenting!
What’s the best way to store leftover onigiri?
If you have leftover onigiri, wrap them tightly in plastic wrap or store them in an airtight container. If refrigerated, try to consume them within a couple of days for the best flavor and texture. For a delightful treat, you can grill your leftover onigiri in a pan and baste them with soy sauce, transforming them into yaki onigiri for a crunchy twist!
Conclusion on Onigiri Japanese Rice Balls
Onigiri Japanese Rice Balls are a delightful, versatile snack perfect for any meal! With endless filling options and a fun shape, they cater to diverse tastes. Whether enjoyed immediately or packed for lunch, they're a delicious, satisfying meal that brings a taste of Japan into your kitchen. Try them today!
Onigiri (Japanese Rice Balls)
Equipment
- rice cooker
- oven
- Mixing bowl
- onigiri mold
- toaster oven
- Pot
Ingredients
For the Steamed Rice
- 2.25 cups uncooked Japanese short-grain white rice 3 rice cooker cups; 540 ml
- 2.5 cups water 600 ml
For the Onigiri
- Diamond Crystal kosher salt
- 3 sheets nori (dried laver seaweed)
For the Japanese Salted Salmon Filling (quick version)
- 1-2 fillet salmon
- Diamond Crystal kosher salt
For the Okaka Filling
- 1 packet katsuobushi (dried bonito flakes) one packet is typically 3 g or 5 g
- 1 tablespoon soy sauce
For the Tuna Mayo Filling
- 1 (5-ounce) can albacore tuna (preferably packed in olive oil)
- 2 tablespoon Japanese Kewpie mayonnaise
- 0.5 tablespoon soy sauce
For the Other Fillings
- 2 umeboshi (Japanese pickled plum)
- 2 sacs spicy salted pollock roe or cod roe (karashi mentaiko)
- shio kombu prepared
- furikake (rice seasoning)
Instructions
To Prepare the Steamed Rice
- Measure 2¼ cups uncooked Japanese short-grain white rice and rinse it.
- Cook the rice with a rice cooker, adding 2½ cups of water.
To Prepare the Onigiri Fillings
- Prepare the fillings while the rice is cooking, including the Japanese salted salmon, okaka, tuna mayo, umeboshi, and mentaiko fillings.
To Shape the Onigiri
- Gather ingredients and cool the cooked rice slightly.
- Method 1: With an Onigiri Mold - Fill the mold with rice and a spoonful of filling, then shape it.
- Method 2: With Your Hands - Wet your hands, add salt, and shape the rice into a ball.
- Method 3: Using Plastic Wrap - Use plastic wrap to shape the rice.
To Coat with the Furikake
- Dip fingers in water and coat onigiri with furikake.
To Wrap with the Nori and Serve
- Toast nori sheets and wrap them around the onigiri.
To Store
- Keep onigiri cool if packing for lunch and consume within 6 hours.


Leave a Reply