
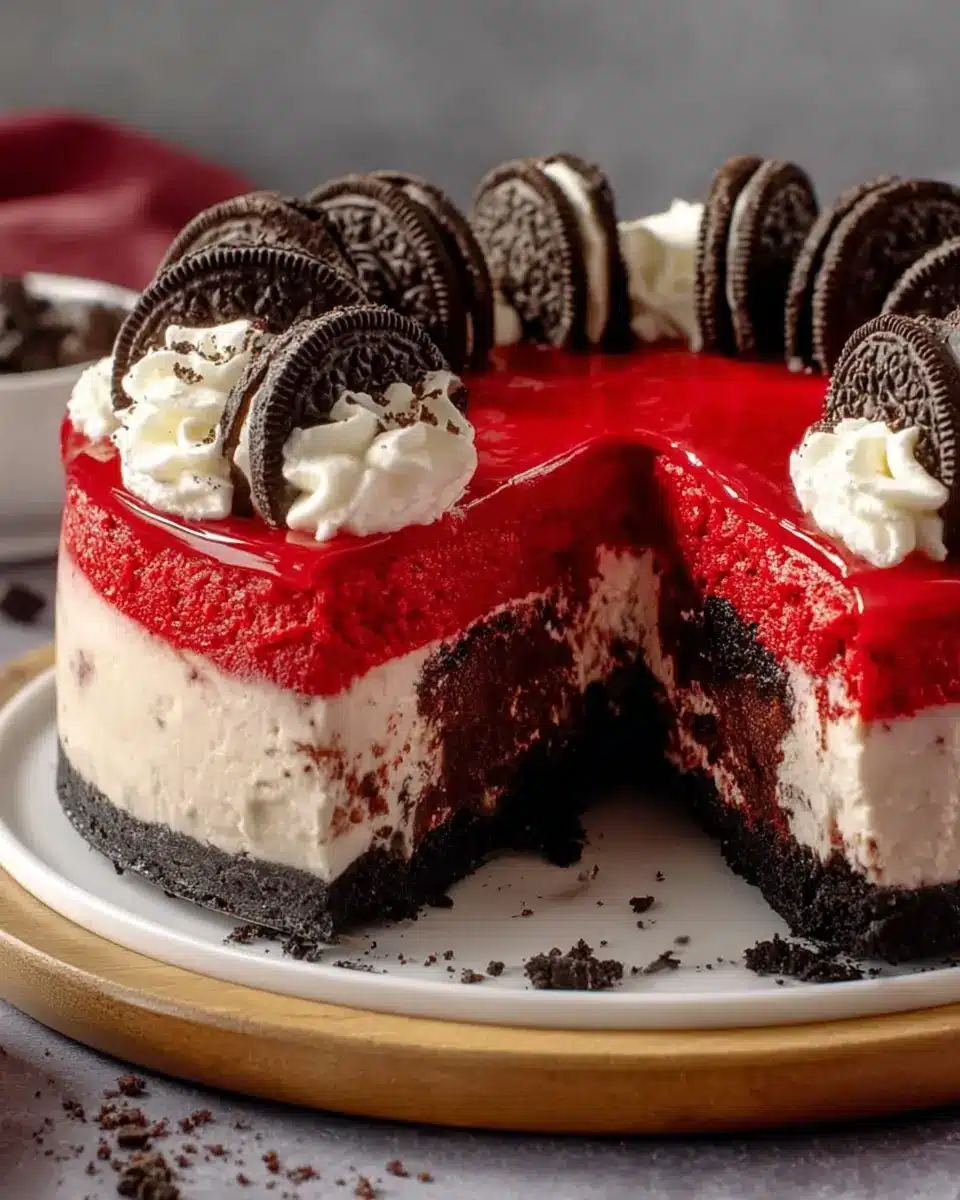
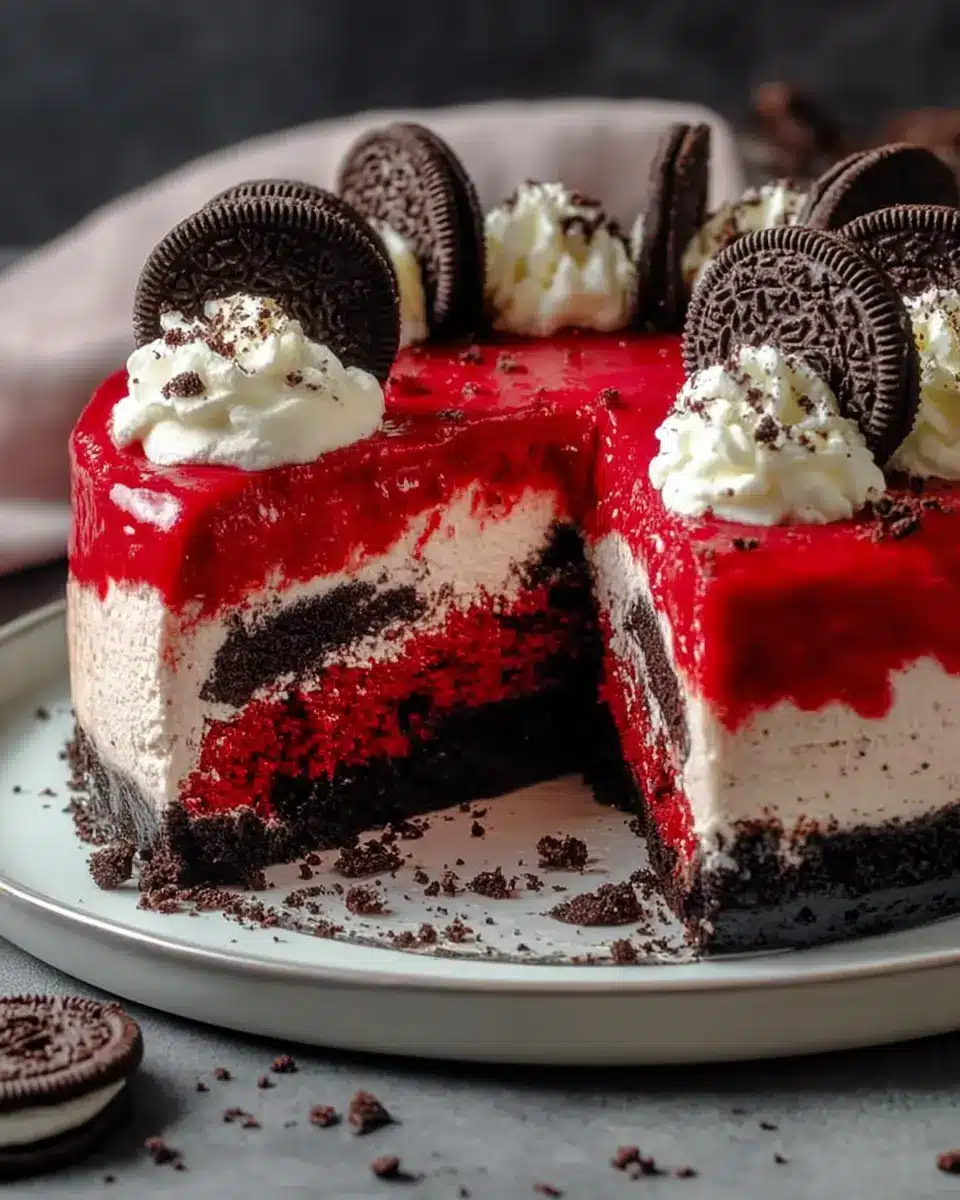
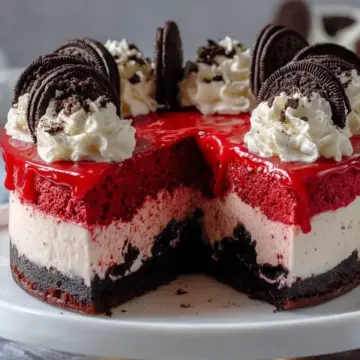
Introduction to Red Velvet Oreo Cheesecake
When it comes to indulgent desserts, few can compete with the allure of a Red Velvet Oreo Cheesecake. Imagine the rich, velvety texture of red velvet cake melding seamlessly with the creamy decadence of cheesecake, all resting atop a crunchy Oreo crust. This delightful dessert is a feast for the senses—not just in taste but also in its stunning appearance.
Why is Red Velvet Oreo Cheesecake the ultimate dessert?
The unique blend of flavors makes this treat a standout choice for any occasion, whether it’s a cozy family dinner or a festive gathering. The classic pairing of red velvet and Oreo creates a nostalgic experience that digs into our fondest memories associated with desserts.
Moreover, as the popularity of red velvet cake continues to trend, it’s no surprise that the red velvet Oreo cheesecake recipe has also gained traction among dessert enthusiasts. The splash of colors and textures makes it visually appealing, while the taste is nothing short of divine. This dessert isn’t just a treat; it’s an experience that awakens the taste buds and nurtures our inner sweet tooth.
Ready to dive into this culinary adventure? Let’s whip up this Red Velvet Oreo Cheesecake and create some memorable moments!
Ingredients for Red Velvet Oreo Cheesecake
When it comes to creating the ultimate dessert, the Red Velvet Oreo Cheesecake recipe is a showstopper that's perfect for any occasion. Gather these ingredients to get started:
Crust
- 2 cups Oreo cookies, crushed: These cookies will provide a deliciously rich base for your cheesecake. Feel free to use any flavor of Oreo for a fun twist.
- ½ cup unsalted butter, melted: The melted butter helps bind the cookies together, giving you a sturdy crust that perfectly encases the creamy filling.
Filling
- 2 (8 oz) packages cream cheese, softened: Ensure it’s at room temperature for a smooth blend—this is crucial for a creamy texture.
- 1 cup granulated sugar: This will add the perfect sweetness without overshadowing the red velvet flavor.
- 1 cup sour cream: It adds a rich tanginess that balances out the sweetness.
- 3 large eggs, room temperature: Eggs help to set the cheesecake while keeping it light and fluffy.
- 1 teaspoon vanilla extract: A splash of vanilla elevates the flavor profile.
- 1 box (15.25 oz) red velvet cake mix: This is the star of the show, lending that signature color and taste to your cheesecake.
With these ingredients on hand, you’re one step closer to indulging in a sweet and creamy delight that friends and family will rave about!
Step-by-Step Preparation of Red Velvet Oreo Cheesecake
Making a red velvet Oreo cheesecake isn’t just about mixing ingredients; it’s about embracing the baking journey. Follow these steps for a delicious dessert that’s perfect for any occasion.
Prepare the crust
Start by preheating your oven to 350°F (175°C). This ensures your cheesecake will bake evenly. In a mixing bowl, combine 2 cups of crushed Oreo cookies with ½ cup of melted unsalted butter. Stir until everything is thoroughly mixed. This mixture will become the base of your cheesecake, so it needs to be pressed firmly into the bottom of a springform pan. A firm crust will hold up beautifully for that first slice!
Make the cheesecake filling
While your crust bakes, it’s time to work on the creamy filling. Grab a large mixing bowl and beat together 2 packages (8 oz each) of softened cream cheese with 1 cup of granulated sugar. You want to mix until it’s smooth and fluffy; this makes a big difference in texture. For an extra hint of goodness, consider referring to sources like The Kitchn for expert advice on achieving the perfect creaminess.
Add eggs and flavorings
Now, let’s add some richness! Carefully add 3 large eggs to your cream cheese mixture, one at a time, beating well after each addition. Next, mix in 1 cup of sour cream and 1 teaspoon of vanilla extract. These ingredients not only enhance the flavor but also contribute significantly to the cheesecake's creamy consistency.
Combine with cake mix
It's time for the star of the show: the red velvet cake mix. Gently fold in the entire box (15.25 oz) of the cake mix into your cheesecake batter. Remember, the key here is to mix just until blended; overmixing can lead to a denser texture. A light, fluffy cheesecake is what you're aiming for!
Bake the cheesecake
Pour your delicious filling over the crust in the springform pan, smoothing the top with a spatula. Place it in your preheated oven and bake for 50-60 minutes. The center should be slightly jiggly but mostly set—this is crucial! The overall baking process transforms your mixture into a delightful cheesecake that oozes flavor with every bite.
Cool and chill
Once done, let your cheesecake cool at room temperature to stabilize. For the best results, refrigerate for at least four hours, or even better, overnight. This chilling period allows the flavors to meld beautifully and gives the red velvet Oreo cheesecake ultimate creaminess.
Before serving, consider garnishing with whipped cream or additional crushed Oreos for a decadent touch. Trust me, your guests will be impressed!

Variations on Red Velvet Oreo Cheesecake
Classic Red Velvet Variations
While this red velvet Oreo cheesecake recipe is a crowd-pleaser on its own, you can switch things up with classic variations. Consider adding a layer of cream cheese frosting on top for a traditional red velvet touch. Incorporating chocolate chips or a swirl of melted white chocolate into the filling can add an irresistible richness. Want to spice things up? A hint of espresso powder brings depth and enhances the cocoa flavor—definitely a must-try!
No-Bake Red Velvet Cheesecake
If time is tight or you’re simply not in the mood for baking, a no-bake version can be a fantastic alternative. Just replace baking the filling with chilling! Instead of the eggs and cake mix, use whipped cream and gelatin mixed with a bit of red food coloring for that vibrant hue. The result? A luscious, velvety dessert that’s just as delightful and perfect for warmer days. Don’t forget to check out some tips on how to make a no-bake cheesecake for a foolproof recipe!
Cooking Tips and Notes for Red Velvet Oreo Cheesecake
When you're tackling this delightful red velvet Oreo cheesecake recipe, a few handy tips can elevate your baking game.
-
Room Temperature Ingredients: Make sure your cream cheese and eggs are at room temperature for that velvety smooth filling. Trust me, it makes a huge difference!
-
Mix Gently: When adding the red velvet cake mix, fold it in just until combined to keep your cheesecake light and airy. Overmixing is a common pitfall!
-
Springform Pan: Always use a springform pan for easy removal. It keeps your cheesecake intact and looking fabulous for any occasion.
-
Chill for Best Results: For flavor and texture, allow your cheesecake to chill overnight. Patience pays off here!
Feel free to explore the science of baking on Serious Eats for a deeper understanding of ingredient interactions. Happy baking!
Serving Suggestions for Red Velvet Oreo Cheesecake
When it comes to enjoying your red velvet Oreo cheesecake, presentation is key! Start by slicing this decadent treat into generous wedges, revealing the rich, velvety layers. Here are some delightful serving suggestions to elevate your dessert experience:
- Garnish with Whipped Cream: A dollop of freshly whipped cream adds a light and airy touch.
- Sprinkle with Crushed Oreos: For an extra crunch, toss some crushed Oreo cookies on top.
- Serve with Fresh Berries: The acidity of raspberries or strawberries can beautifully complement the sweetness of your cheesecake.
- Beverage Pairing: Consider serving it with a steaming cup of coffee or a refreshing glass of iced tea for a delightful contrast.
Feel free to explore and customize these suggestions based on your personal taste!
Time Breakdown for Red Velvet Oreo Cheesecake
Preparation time
Get ready to dive into the deliciousness! The preparation for this red velvet Oreo cheesecake recipe takes about 30 minutes. This includes whipping up the crust and the creamy filling.
Baking time
Once the cheesecake is prepared, pop it into the oven for about 50-60 minutes. You’ll want to keep an eye on it; the center should be slightly jiggly but mostly set.
Total time
All in all, the total time will be around 4 hours and 30 minutes, factoring in the cooling and chilling time to achieve that perfect texture. Patience here pays off!
For more detailed tips on cheesecake making, check out this guide which offers great insights into baking times and temperature settings.
Nutritional Facts for Red Velvet Oreo Cheesecake
When indulging in this red velvet Oreo cheesecake recipe, it's fun to know what’s in each slice! Here’s a breakdown of the nutritional values for one generous slice (approximately 1/12 of the cheesecake):
-
Calories: About 330 calories, making it a rich treat to savor.
-
Protein: Approximately 6 grams, thanks to the cream cheese and eggs used in the filling.
-
Sugar Content: Around 25 grams, bringing that delightful sweetness to balance the flavors.
Baking treats like this cheesecake can be a joy, but it’s always good to enjoy in moderation. For more information on cheesecake nutrition, check out resources from the USDA or NutritionData. They're great for keeping your culinary explorations both delicious and balanced!
FAQs about Red Velvet Oreo Cheesecake
Can I use low-fat cream cheese?
Absolutely! You can substitute low-fat cream cheese in your red velvet Oreo cheesecake recipe without sacrificing too much flavor. Just keep in mind that the texture might be a bit different—often denser than when using regular cream cheese. If you're aiming for a lighter version, this can be a good option!
How do I store leftover cheesecake?
To keep your delicious cheesecake fresh, wrap it tightly in plastic wrap or aluminum foil. Alternatively, you can place it in an airtight container. Storing it in the refrigerator will keep it tasty for about 4 to 5 days. For best results, it’s recommended to store individual slices so they're easier to grab when those dessert cravings hit!
Can I freeze red velvet cheesecake?
Yes, you can! Freezing your red velvet Oreo cheesecake is a great way to preserve it for later. Just make sure to wrap it well (again, plastic wrap or foil works best) and store it in an airtight container. It can last in the freezer for up to 2 months. When you're ready to enjoy it, simply thaw it in the refrigerator overnight. Happy baking!
Conclusion on Red Velvet Oreo Cheesecake
Indulging in this red velvet Oreo cheesecake recipe is a delightful way to satisfy your dessert cravings. With its rich cream cheese filling and decadent Oreo crust, this cheesecake is a showstopper at any gathering. Remember to chill before serving for the best flavor and texture! Enjoy every creamy bite!
Red Velvet Oreo Cheesecake Recipe
Equipment
- oven
- Springform Pan
- Mixing bowl
- spatula
Ingredients
Crust
- 2 cups Oreo cookies, crushed
- ½ cup unsalted butter, melted
Filling
- 2 packages (8 oz) cream cheese, softened
- 1 cup granulated sugar
- 1 cup sour cream
- 3 large eggs, room temperature
- 1 teaspoon vanilla extract
- 1 box (15.25 oz) red velvet cake mix
Instructions
Preparation
- Preheat your oven to 350°F (175°C). In a bowl, mix the crushed Oreos with the melted butter until well combined. Press this mixture firmly into the bottom of a springform pan to form an even crust layer.
- In a separate large bowl, beat the softened cream cheese until smooth and creamy. Gradually add the granulated sugar, continuing to beat until the mixture is light and fluffy.
- Add the eggs one at a time to the cream cheese mixture, mixing thoroughly after each addition. Then stir in the sour cream and vanilla extract to incorporate evenly.
- Gently fold in the red velvet cake mix, being careful to mix just until combined, to maintain a light texture.
- Pour the cheesecake filling over the prepared Oreo crust and smooth the top with a spatula. Bake in the preheated oven for 50-60 minutes or until the center is slightly jiggly but mostly set.
- Allow the cheesecake to cool to room temperature. Then refrigerate for at least four hours or overnight to set completely before serving.


Leave a Reply