
Introduction to Shokupan Japanese Milk Bread
Shokupan, or Japanese milk bread, is a culinary gem that reflects the elegance and subtleties of Japanese baking traditions. Widely cherished for its cloud-like softness and rich flavor, many have found themselves enchanted by this unique bread's airy texture, perfect for everything from toasting in the morning to enjoying with a hearty meal. But what truly makes shokupan so special?
Why is Shokupan so beloved?
One reason shokupan has earned a special place in the hearts (and stomachs) of food lovers is its versatility. Whether slathered with butter, made into a sandwich with turkey bacon, or enjoyed as a standalone snack, its adaptability knows no bounds. Additionally, it boasts a delightful hint of sweetness and a beautifully soft crust, thanks to the yudane method—a technique that involves mixing flour with hot water to create a gelatinized starch that contributes to its moistness.
Curious about the technique? You can explore more about this method from sources like Serious Eats or Just One Cookbook. With just a little patience and a few simple ingredients, you can bring a piece of Japan to your kitchen and experience the magic of homemade shokupan. So, roll up your sleeves; let's dive into creating this delicious loaf!
Ingredients for Shokupan Japanese Milk Bread
Baking Shokupan, the delightful Japanese milk bread, starts with a couple of essential mixtures that bring that fluffy, soft texture we all love.
Yudane Mixture
To create the signature taste and moisture of Shokupan, you'll need to prepare the Yudane. This simple mixture will enhance the bread's texture and is critical for the overall flavor.
- 50 g Bread flour
- 40 ml boiling water (above 194°F / 90°C)
Mix these two ingredients together and let it sit overnight in the fridge. This preparation brings out the best in your bread!
Main Bread Ingredients
Now, let’s move on to the core ingredients that will help you create the perfect loaf of Japanese milk bread:
- 150 ml milk (room temperature)
- 15 g sugar
- 3 g dry instant yeast
- 10 g unsalted butter (room temperature)
- 200 g bread flour
- 5 g salt
Each of these components plays a vital role in creating a soft, slightly sweet flavor that’s synonymous with Shokupan. Curious about variations or tips? You might want to explore alternatives for the milk or discover more about ingredient sourcing here.
With this list in hand, you’re ready to embark on your Shokupan baking adventure!
Step-by-step Preparation of Shokupan
Making Shokupan, a delightful Japanese milk bread, may seem daunting, but follow these simple steps, and you'll be rewarded with a soft, fluffy loaf that’s perfect for breakfast or toast. Let’s get started!
Prepare the Yudane
The foundation of this bread’s incredible texture lies in a method called Yudane. This involves mixing bread flour with boiling water. Here’s how to do it:
- In a bowl, combine 50 g of bread flour with 40 ml of boiling water (above 194°F or 90°C).
- Stir until there are no dry spots.
- Cover with cling wrap and let it rest either overnight in the refrigerator or at room temperature for a few hours if you're short on time. This helps create that signature chewiness!
Mix the Dough Ingredients
Next, take the prepared Yudane and blend in the remaining ingredients.
- In a stand mixer bowl, pour in 150 ml of room temperature milk, then add 15 g of sugar, 10 g of softened unsalted butter, and 3 g of dry instant yeast.
- Tear the Yudane into small pieces and add it to the bowl.
- Finally, mix in 200 g of bread flour and 5 g of salt.
Knead the Dough
Once everything is in the bowl, it’s time for a workout—kneading!
- Attach the kneading hook to your stand mixer and start at a low speed (1) to combine the ingredients.
- Once mixed, increase the speed to about 5-6 and knead for 20 minutes, or until the dough is smooth and elastic.
First Rise
Now, let’s allow the dough to rise.
- Shape it into a ball and place it in a lightly greased bowl. Cover with cling wrap and set it in a warm spot (around 86°F or 30°C).
- Allow the dough to rise for about 45 minutes to an hour, or until it has doubled in size. Test its readiness by poking it with a floured finger; if the hole remains, it’s ready to proceed!
Shape the Dough
After the first rise, it’s time to shape your dough.
- Punch it down gently to release the air, then divide it into two equal pieces using a scraper.
- Roll each piece into a ball, cover them with a damp cloth, and let them rest for 20 minutes.
Second Rise
Let’s give the dough a second chance to rise!
- Roll out each piece into a rectangle (about 5.9 x 7.8 inches). Fold tightly to eliminate air and roll it up from one end.
- Place the rolled dough into a lightly greased loaf pan, cover with a damp cloth, and let it rise until it reaches the top of the tin. This will take about 30 minutes.
Bake the Shokupan
Your delicious Shokupan is almost ready!
- Preheat your oven to 365°F (185°C).
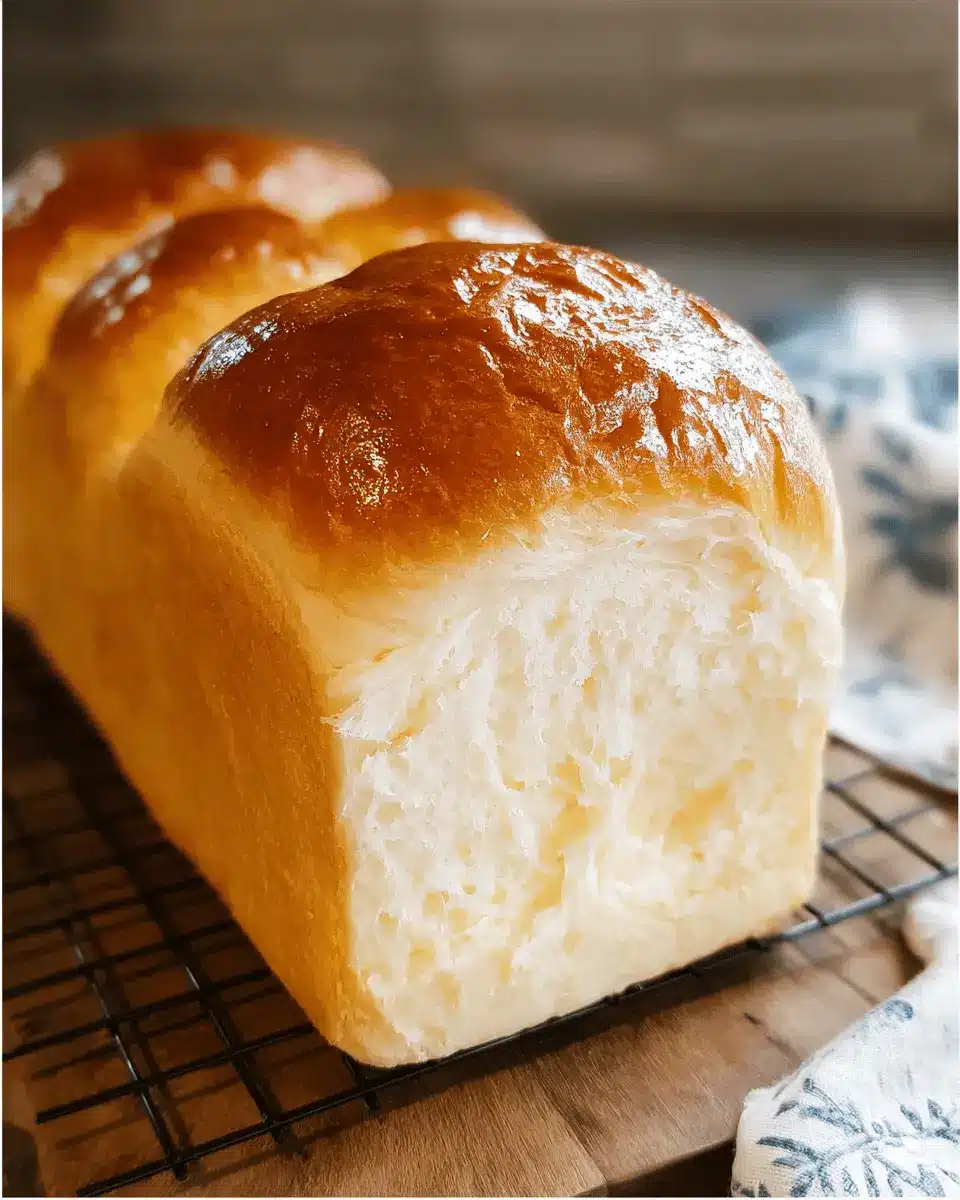
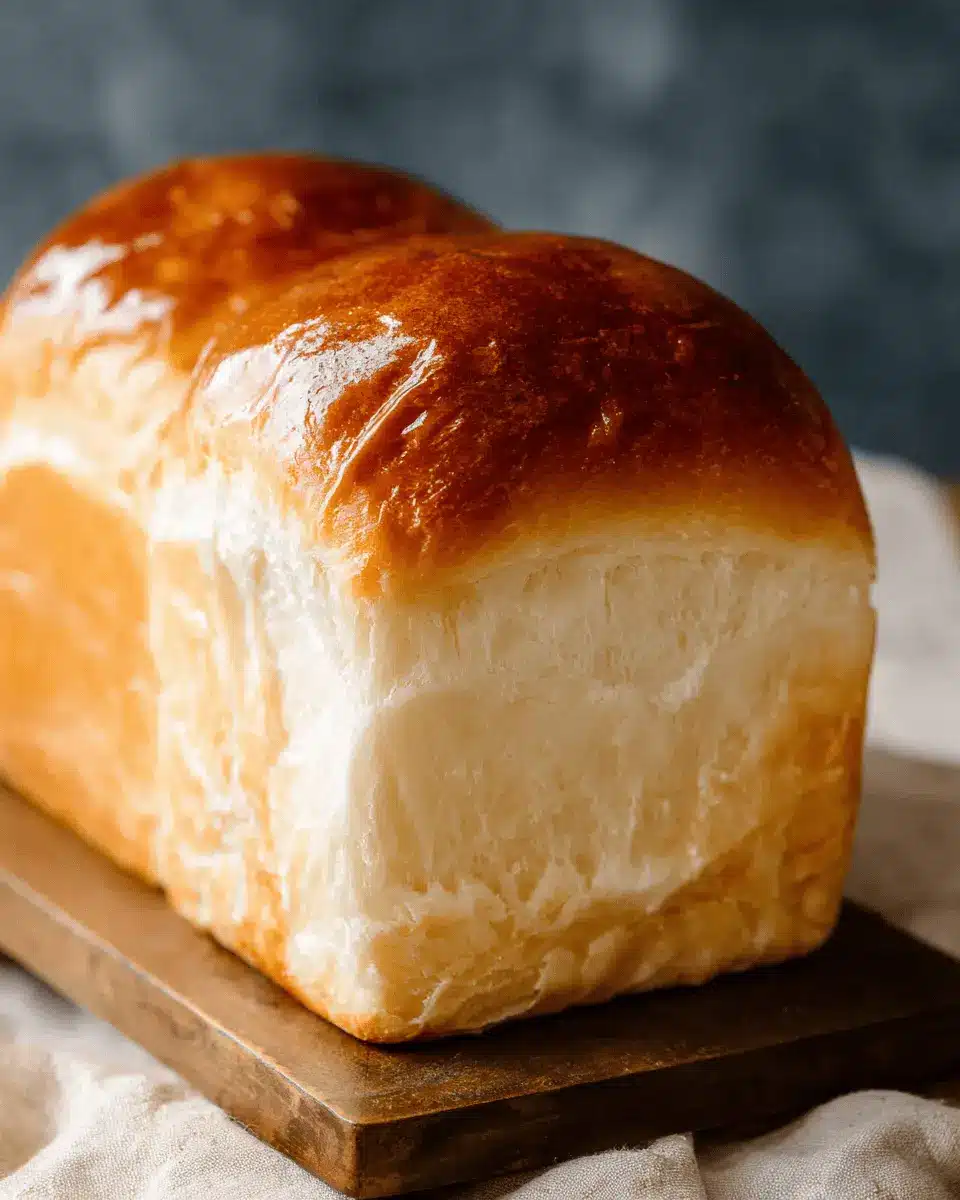
- When the dough has risen, bake for 25-30 minutes. The loaf should have a lovely golden-brown crust.
- Once baked, allow it to cool on a wire rack. Enjoy the heavenly aroma filling your kitchen!
Making Shokupan is a rewarding experience—perfect for impressing friends or simply enjoying a slice of heaven on a quiet morning. Share your experience or check out additional tips on baking at resources like King Arthur Baking to enhance your culinary adventures!
Variations on Shokupan Japanese Milk Bread
Sweet fillings
Shokupan, or Japanese milk bread, lends itself beautifully to sweet variations. Imagine your favorite fillings, such as
- Red bean paste for a traditional twist
- Chocolate spread for a decadent treat
- Cinnamon and sugar to create a cozy, comforting loaf
You can even experiment with fruits like bananas or berries for added sweetness. These options turn your shokupan into delightful snacks or desserts, perfect for any occasion.
Savory flavors
Turning your shokupan savory is just as fun! Consider adding:
- Turkey bacon and cheese for a hearty breakfast
- Chicken ham and avocado for a delicious sandwich
- Spinach and feta for a Mediterranean flair
These variations can easily elevate your Japanese milk bread from simple loaf to gourmet creation. The soft texture pairs well with almost any flavor combo, making every bite a joy!
Cooking Tips and Notes for Shokupan
Common mistakes to avoid
When making shokupan, it’s easy to overlook details that could affect the final loaf. A common mistake is not allowing the Yudane to cool properly before mixing it with other ingredients; this can kill the yeast's effectiveness. Additionally, over-kneading can lead to a dense texture, so keep an eye on your dough as you’re mixing!
Importance of ingredients
Each ingredient plays a crucial role in achieving that signature softness of shokupan. Use high-quality bread flour, ideally with around 12% protein, for the best structure and crumb. Don't skip on using fresh milk—its richness helps create that delightful fluffiness. For more insights on ingredient selection, check out this resource on baking essentials.

Serving Suggestions for Shokupan
Breakfast Ideas
Kickstart your day with a delightful breakfast featuring shokupan Japanese milk bread. Whether it's a hearty slice of toast topped with avocado and soft-boiled eggs, or a comforting breakfast sandwich made with turkey bacon and a drizzle of sriracha mayonnaise, the possibilities are endless. For a sweeter option, try spreading cream cheese and a layer of your favorite jam, or simply enjoy it with a pat of butter and a sprinkle of cinnamon sugar.
Snack Pairings
Shokupan is also a fantastic choice for a mid-afternoon snack. Pair it with a warm bowl of miso soup for a cozy treat. Alternatively, serve it alongside hummus or a variety of cheeses for a delightful cheese board. You can also create mini sandwiches using chicken ham and fresh veggies, perfect for satisfying those snack cravings while keeping things light.
For more inspiration on creative shokupan pairings, check out this excellent guide on bread pairings!
Time Breakdown for Shokupan
When it comes to making Shokupan, planning is key for achieving that perfect, fluffy loaf. Here’s a detailed breakdown to guide your baking journey:
Preparation Time
You'll need about 2 hours for preparing the dough, including mixing and initial rising. It's essential to allow time for your ingredients to come together smoothly.
Cooking Time
The actual baking time is around 30 minutes. This is when your kitchen will fill with that irresistible aroma of freshly baked bread—definitely a highlight!
Total Time
In total, you should set aside approximately 2 hours and 30 minutes. Keep in mind that the Yudane resting time requires 8 hours, so consider making that the night before for best results. This method is crucial for achieving the softness characteristic of Shokupan.
Planning ahead makes this process not only manageable but also enjoyable! If you’re eager to dive deeper into the world of Shokupan and capitalize on the stunning flavors of Japanese bread, check out more expert tips here!
Nutritional Facts for Shokupan
When enjoying Shokupan, the delightful Japanese milk bread, it's helpful to know its nutritional profile. Each slice contains approximately:
- Calories: 150
- Carbohydrates: 28g
Shokupan is a fantastic option for those seeking a comforting yet manageable indulgence. Its soft texture makes it perfect for toasting, sandwiches, or simply savoring with some butter. For more health insights, you can explore resources like the USDA Nutrition Database for further details on various dietary guidelines.
FAQs about Shokupan Japanese Milk Bread
What is the best way to store Shokupan?
To keep your shokupan Japanese milk bread fresh, wrap it in plastic wrap or place it in an airtight container. Storing it at room temperature is best for a couple of days. If you want to extend its life, consider refrigerating it in a sealed bag to prevent staleness. However, refrigeration may change the bread's texture slightly.
Can I freeze Shokupan?
Absolutely! Freezing is a great way to preserve your shokupan. Slice the bread first, then wrap each slice in plastic wrap and place them in a freezer bag. When you’re ready to enjoy, simply thaw the slices at room temperature or toast them directly from the freezer for a delicious, warm treat.
What can I use Shokupan for?
The versatility of shokupan Japanese milk bread is delightful! It’s perfect for creating gourmet sandwiches, French toast, or even fluffy bread puddings. You can also enjoy it toasted with butter or jam for a quick and satisfying breakfast. The options are endless, making it a fantastic staple in your kitchen!
Conclusion on Shokupan Japanese Milk Bread
In summary, Shokupan Japanese milk bread is a delightful treat that's not only easy to make but also incredibly satisfying. Its soft, fluffy texture makes it perfect for sandwiches or toast. Whether you enjoy it plain or dressed up with your favorite spread, you'll love this comforting, versatile bread!

Shokupan (Japanese Milk Bread Loaf)
Equipment
- Stand Mixer
- Loaf bread tin
- rolling pin
Ingredients
Yudane
- 50 g Bread flour Choose flour with around 12% protein.
- 40 ml Boiling water Above 194°F (90°C)
Bread
- 150 ml Milk Room temperature; can use plant-based milk.
- 15 g Sugar
- 3 g Dry instant yeast Can be substituted with 15g of fresh yeast.
- 10 g Unsalted butter Room temperature.
- 200 g Bread flour
- 5 g Salt
Instructions
Preparation
- Make Yudane the night before. Place bread flour in a bowl and add boiling water and mix well. Put cling wrap and refrigerate overnight.
- Pour the room temperature milk into a stand mixer bowl.
- Add sugar, butter and yeast to the bowl then add the yudane as you tear it into small pieces.
- Add the bread flour and salt.
- Attach the kneading hook onto the stand mixer and combine all ingredients on low speed.
- When all ingredients are combined, turn the speed up to 5 or 6 and knead the dough for 20 min.
- Roll the dough round and place it into a greased bowl. Wrap with cling wrap to rise for about 45 min to 1 hour at about 86°F (30°C) or until doubled in size.
- Use your finger, dusted with flour, to test if the dough has risen. If it doesn't bounce back, it's ready.
- Punch the dough down and cut it into two equal parts with a scraper and roll them.
- Cover the rolled doughs with a wet cloth and let stand for 20 minutes.
- Roll each dough into a rectangle approximately 5.9x7.8 inch (15 x 20 cm).
- Fold the dough tightly towards the center from the left and right, not allowing air in.
- Rotate the dough 90 degrees and roll it from one end.
- Spray a loaf bread tin lightly and place the rolled dough in the end of the tin facing the center.
- Cover with a wet cloth and let the dough rise for a second time until it rises to the size of the bread tin, about 30 min.
- Preheat the oven to 365 °F (185°C).
- When the dough has risen to be level with the tin, it's ready to bake.
- Bake the dough for about 25 -30 minutes in the preheated oven.
- Remove the bread from the tin and cool it down on a rack.
- Whisk an egg and brush it over the bread dough (Optional).


Leave a Reply