
Introduction to Takoyaki Recipe
What is Takoyaki and Why Should You Try It?
If you haven't encountered takoyaki, you're in for a treat! Originating from Osaka, this beloved Japanese street food showcases a delightful blend of savory flavors and unique textures. At its core, takoyaki is a ball-shaped snack made primarily from a batter filled with chopped octopus, green onions, and crunchy tempura bits, all cooked to golden perfection in a specially designed pan.
Why should you give this takoyaki recipe a shot? It's not just about the taste—though you're bound to fall in love with that crispy exterior and tender, gooey interior. Making takoyaki also offers a fun, interactive cooking experience that’s perfect for gatherings with friends or family. Imagine the excitement as you watch the balls sizzle away while you flip them into perfectly rounded delights!
With the popularity of Japanese cuisine on the rise, mastering this dish can impress your culinary skills among peers while broadening your cooking repertoire. Plus, the ability to customize your fillings and toppings means everyone can enjoy their own unique twist on this classic treat. So, gather your ingredients and let’s dive into this takoyaki recipe journey together!
Ingredients for Takoyaki
Essential Takoyaki batter ingredients
To kick off your delightful takoyaki recipe, you'll need a few key ingredients for the batter. Here’s what you’ll need:
- Dashi powder: This umami-packed ingredient is crucial for that authentic taste. It’s available online or at Asian grocery stores.
- Warm water: Ensuring your water is between 100-110 °F helps to dissolve the dashi powder perfectly.
- Eggs: Two large eggs add richness and help bind the batter.
- Soy sauce: Just a splash can elevate the flavor profile of your batter.
- All-purpose flour & rice flour: These flour types, combined, give the takoyaki its signature texture and crispiness.
- Baking powder: This will help your batter rise and become fluffy.
Fillings and toppings to elevate your Takoyaki
Let’s talk about what makes takoyaki irresistible! The fillings are where you can really get creative. Traditional choices include:
- Cooked octopus: This is the star of the dish—make sure it's tender!
- Pickled ginger: Adds a zesty kick that complements the octopus beautifully.
- Green onions: Fresh and vibrant, they bring a nice crunch.
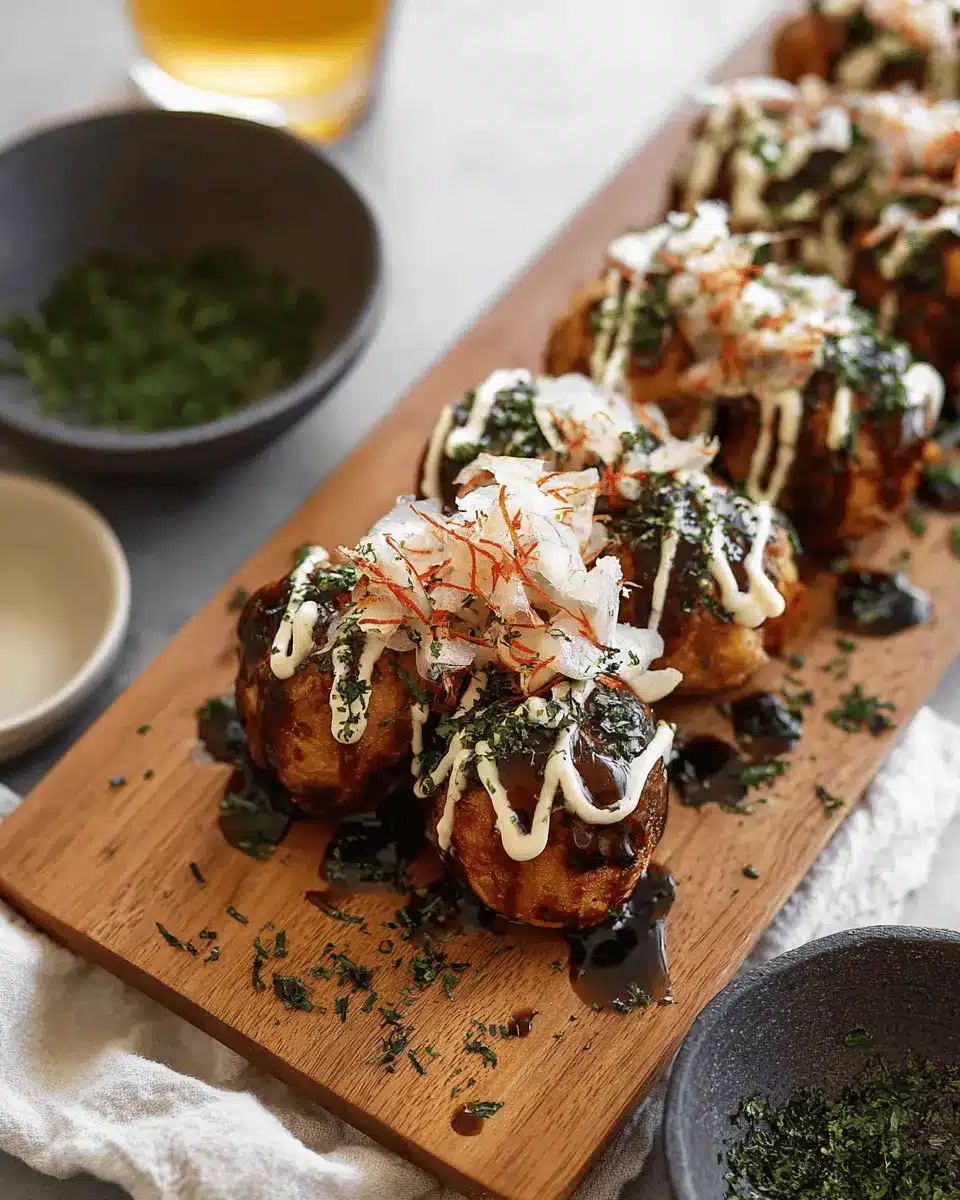
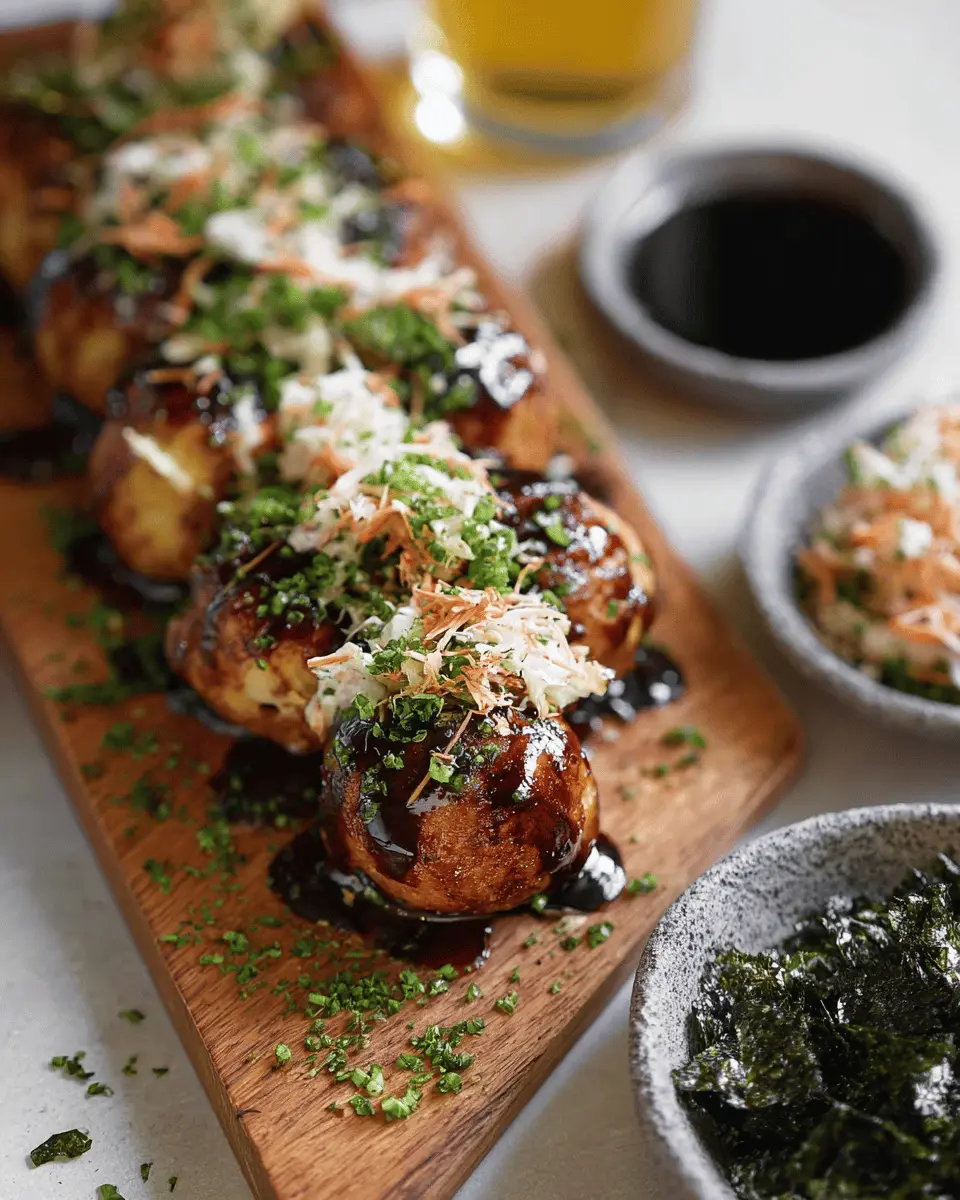
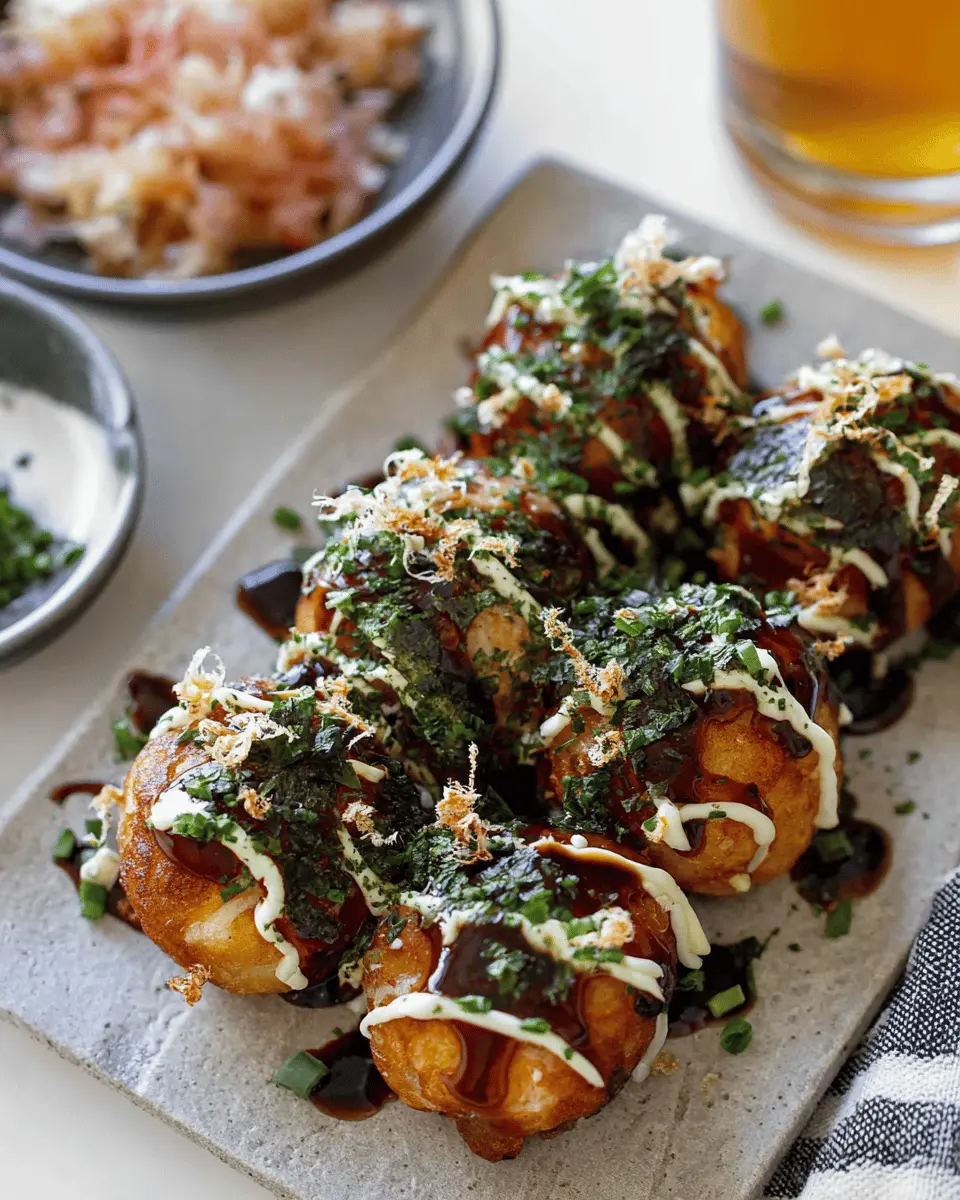
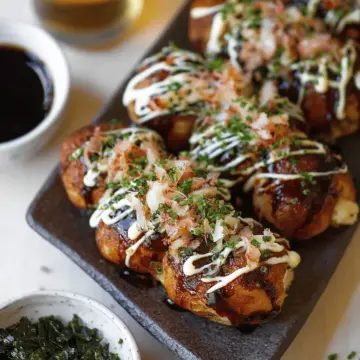
And don't forget the toppings! Drizzle on some takoyaki sauce, sprinkle with aonori (dried seaweed), and finish it off with Japanese mayonnaise (preferably Kewpie). Top with bonito flakes for an extra touch of umami that your friends and family will rave about!
Try experimenting with your favorite fillings and toppings—the sky's the limit!
Step-by-Step Preparation of Takoyaki
Making takoyaki at home is an incredibly rewarding experience. Follow these simple steps, and you'll be able to impress your friends with your newfound cooking skills. Let’s dive right in!
Preparing the dashi base
Start by creating the essential dashi base, which gives your takoyaki its umami flavor. Heat 10 fl oz of water to between 100 °F and 110 °F. This is warm enough to dissolve the dashi powder without cooking the eggs prematurely.
- In a bowl, combine 2 g of dashi powder and the warm water. Whisk until completely dissolved.
- Next, add 2 large eggs and ½ fl oz of soy sauce, whisking everything together until smooth.
Dashi is a cornerstone of Japanese cuisine; you might enjoy learning more about it by checking this dashi guide.
Mixing the batter
In a separate bowl, mix the flours and leavening agent. You’ll need:
- 60 g of all-purpose flour
- 56 g of rice flour
- 5 g of baking powder
Sift these dry ingredients into your wet dashi mixture and gently whisk them together. You want a smooth batter without lumps—this ensures that your takoyaki balls are light and fluffy.
Consider using a squeeze bottle for ease of pouring. It will help control the batter’s flow and minimize mess.
Cooking the Takoyaki in the pan
Heat your takoyaki pan over medium heat. Brush some vegetable oil into each dip to prevent sticking. Once the pan is sufficiently heated, fill each dip about 80% of the way with batter.
Here’s a tip: let the batter bubble slightly before adding the fillings. This helps keep the fillings in place while cooking.
Adding fillings to the Takoyaki
After a minute or two, the edges should start to cook. That's your cue to add the delicious fillings! Use:
- 3 oz cooked octopus, chopped into ¼ inch pieces
- 10 g minced pickled ginger
- 2 stalks of thinly sliced green onion
- 13.5 g tenkasu
Each filling adds its own flavor, making the takoyaki recipe quite versatile. Feel free to get creative based on what you have on hand!
Finishing and plating the Takoyaki
To create that signature shape, turn the balls ¾ of the way around using a takoyaki stick. Fill any gaps with more batter and continue cooking until golden brown and crispy on the outside.
For a beautiful finish, top your takoyaki with the following:
- Takoyaki sauce (for that sweet umami kick)
- A sprinkle of aonori (seaweed)
- A drizzle of Japanese mayonnaise (preferably Kewpie)
- Bonito flakes and kizami nori for garnish
Serve them hot, and watch as your guests can’t resist magically devouring these scrumptious balls!
Variations on Takoyaki
Unique fillings for your Takoyaki
While the classic takoyaki recipe features octopus, there are plenty of unique fillings to explore! Consider using:
- Shrimp or scallops for a seafood twist
- Chicken ham or turkey bacon for a savory option
- Cheese for a gooey, melt-in-your-mouth experience
- Vegetables like mushrooms, corn, or bell peppers for a hearty vegetarian alternative
Let your creativity shine!
Alternative toppings to try
Toppings also offer a fantastic way to customize your takoyaki. Some delicious options include:
- Sriracha or wasabi for a spicy kick
- Chili mayo for a creamy yet fiery addition
- Sesame seeds or nori for an umami boost
- Fresh herbs like cilantro or green onions for a pop of freshness
Experiment with these ideas to make your very own signature takoyaki!
Cooking Tips and Notes for Takoyaki
Common mistakes to avoid
When making your takoyaki recipe, one common mistake is overfilling the batter in the molds. You should only fill them about 80%, allowing space for expansion. Another pitfall is cooking them at the wrong temperature—medium heat is ideal for achieving that golden-brown crust without burning. Lastly, resist the temptation to turn them too soon; allow them to bubble slightly first for even cooking.
How to achieve the perfect crispiness
To ensure your takoyaki has that perfect crispy exterior, be sure to use a good amount of vegetable oil to grease the pan before pouring in the batter. Additionally, turning them at strategic intervals helps create that lovely crust. Some chefs even recommend adding a little extra batter around the edges while cooking, as this creates a crispy “lid.” Want more tips? Check out this resource for detailed techniques and variations.
Serving Suggestions for Takoyaki
Best accompaniments to your Takoyaki
Nothing elevates your takoyaki recipe quite like a variety of delicious toppings and sides. Traditionally, drizzle takoyaki sauce and Japanese mayonnaise over the warm balls, then sprinkle with aonori and bonito flakes for that perfect umami kick. You can also serve with pickled ginger or a side of takuan (pickled radish) to balance the rich flavors. For an extra zing, try pairing with spicy dipping sauces or soy sauce infused with a bit of wasabi.
Ideal occasions for serving Takoyaki
Takoyaki is fantastic for casual get-togethers and parties. Its fun, bite-sized nature makes it a great appetizer for gatherings or karaoke nights with friends. Want to level up game day snacks? Serve your homemade takoyaki alongside refreshing non-alcoholic drinks or Asian-inspired mocktails. Also, consider whipping up a batch during family movie nights for a treat that everyone will enjoy. The versatility and interactive cooking involved make takoyaki a memorable experience for both you and your guests!
For more insights on pairing and serving takoyaki, check out resources like BBC Good Food for ideas and inspiration.
Time Breakdown for Making Takoyaki
Preparation Time
Get started with 20 minutes of preparation. This time will allow you to gather ingredients, prepare the batter, and chop your fillings like octopus and green onion. Be sure to have everything ready to go, as it helps the cooking process flow smoothly.
Cooking Time
Once you’re all set, the cooking will take about 30 minutes. This includes the time it takes to fill and flip the takoyaki balls until they're golden brown and crispy. Remember, patience is key to achieving that perfect texture!
Total Time
In just 50 minutes, you’ll have delicious homemade takoyaki ready to serve. Trust me, it's worth every minute for that crispy and flavorful bite! For an even smoother experience, check out this tutorial on griddle cooking techniques. Happy cooking!
Nutritional Facts for Takoyaki
Calories per ball
Each delicious takoyaki ball contains approximately 45 calories, making them a guilt-free snack or appetizer to enjoy. Their crispy exterior and soft center offer a delightful eating experience without compromising your diet.
Nutritional breakdown of key ingredients
The key components of this takoyaki recipe contribute various nutrients:
- Octopus: Rich in protein and omega-3 fatty acids, promoting heart health.
- Flours: Provide essential carbohydrates, giving you energy.
- Green onions and pickled ginger: Contain antioxidants, aiding digestion and adding flavor.
With their bite-sized portions, takoyaki balls combine taste and nutrition seamlessly, offering a satisfying treat that's fun to share! For more insights on the health benefits of seafood, check out this resource from the USDA.
FAQs about Takoyaki
Can I make Takoyaki without a special pan?
Absolutely! If you don't have a takoyaki pan, you can use a muffin tin or even a non-stick frying pan. The shape might differ, but the flavors will remain authentic. Just make sure to flip the balls carefully to ensure they cook evenly.
How do I store leftover Takoyaki?
Storing leftover takoyaki is easy! Allow them to cool first, then place them in an airtight container in your refrigerator. They should last for about 2-3 days. To reheat, simply pop them in an air fryer or a hot skillet to regain that crispy exterior. Just like the first bite, they’ll be delicious!
What are good substitutes for octopus?
If octopus isn’t available, don’t worry! You can substitute with cooked shrimp, imitation crab, or even diced chicken for a tasty twist. For a vegetarian option, consider using diced tofu or mushrooms, which will soak up the wonderful flavors of your takoyaki recipe.
Conclusion on Takoyaki
Why you should give this recipe a try!
If you’re looking to impress friends or explore new flavors, this takoyaki recipe is a must-try! With its crispy exterior and delectable octopus filling, these delightful bites bring a taste of Japan right to your kitchen. Easy to make and perfect for gatherings, why not dive in and give it a whirl?
Takoyaki Recipe (Japanese Octopus Balls)
Equipment
- takoyaki pan
- chopsticks or takoyaki pin stick
- brush
- squeeze bottle, optional
Ingredients
Takoyaki batter
- 2 g dashi powder
- 10 fl oz warm water 100-110 °F
- 2 large eggs
- ½ fl oz soy sauce
- 60 g all purpose flour
- 56 g rice flour
- 5 g baking powder
Fillings
- vegetable oil to grease the pan
- 3 oz cooked octopus cut into ¼ inch pieces
- 10 g pickled ginger minced
- 2 stalks green onion sliced thinly
- 13.5 g tenkasu
Toppings
- takoyaki sauce
- aonori dried seaweed powder
- Japanese mayonnaise preferably Kewpie brand
- kizami nori shreds
- bonito flakes
Instructions
Preparation
- Heat the water at least 100 °F and no more than 110 °F, then add the dashi powder and stir until it's completely dissolved. Add the eggs and soy sauce into the dashi and whisk until it's combined.
- In a bowl combine the all-purpose flour, rice flour, and baking soda. Sift the dry ingredients into the wet ingredients and whisk until there are no more lumps.
- Add the batter into a squeeze bottle if you prefer. This can make adding batter to the pan cleaner, without dripping.
- Preheat the takoyaki pan over the stove on medium heat. Brush on some vegetable oil on each dip in the pan.
- Pour the batter into each dip at about 80% of the way up—do not add too much because it will expand.
- Cook for about one or two minutes, or until the batter begins to slightly bubble. This will ensure the fillings stay in the center and don't sink to the bottom. Add a little bit of each of the fillings into each takoyaki.
- After you've filled each ball, go to the first takoyaki and use the takoyaki stick to release it from the sides to turn the ball in ¾ of the way around. Leave a little opening (about ⅛ inch) in the takoyaki so it is not completely covered. This is the opening where you will later fill in with more crispy, cooked batter.
- Pour more batter over the entire pan and into the opened spaces and continue to cook until the batter bubbles. Carefully watch the takoyaki at this time, adjusting the heat if it's burning too hot or too low.
- Use the takoyaki stick to begin to turn the takoyaki around when the batter bubbles. Use the stick to move the batter around the edges of each semi-circle and fold them into each takoyaki ball as you are turning them.
- Cook the balls until each are golden brown and crispy on the edges. All the takoyaki should measure at 200 °F internally.
- Remove the balls with the stick and top them with takoyaki sauce, sprinkle aonori, squeeze some mayonnaise, add some seaweed strips, and bonito flakes on top. Serve immediately.


Leave a Reply