
Introduction to Preserving Apples
Preserving apples not only extends their shelf life but also adds a delightful twist to your meals. With the season's bounty often overwhelming, it’s the perfect opportunity to create something delicious and useful. You might wonder, why go through the effort of preserving? Homemade products, like apple cider vinegar, are healthier, tastier, and more sustainable.
Additionally, preserving apples helps to minimize food waste. Picture this: you’ve made a delightful apple pie, but what do you do with the leftover cores and skins? Instead of tossing them in the trash, you can transform those scraps into a tangy, probiotic-rich apple cider vinegar, perfect for salad dressings or a zesty drink. According to the USDA, nearly 31% of the food supply is wasted, which is where your preservation efforts shine.
Incorporating methods for preserving apples into your routine can also become a fun bonding experience with friends or family. Plus, experimenting with flavors and fermentation processes keeps your culinary skills sharp. If you’re ready to dive into this rewarding project, let’s get started with a detailed guide on making your very own homemade apple cider vinegar!

Ingredients for Homemade Apple Cider Vinegar
Crafting your own Apple Cider Vinegar is fun and rewarding—especially when you can use those delicious apples from your local orchard or even scraps from previous cooking adventures! Ready to dive into the ingredients? Let’s break it down.
Essential ingredients
To kick off your apple cider vinegar journey, you’ll need the following staples:
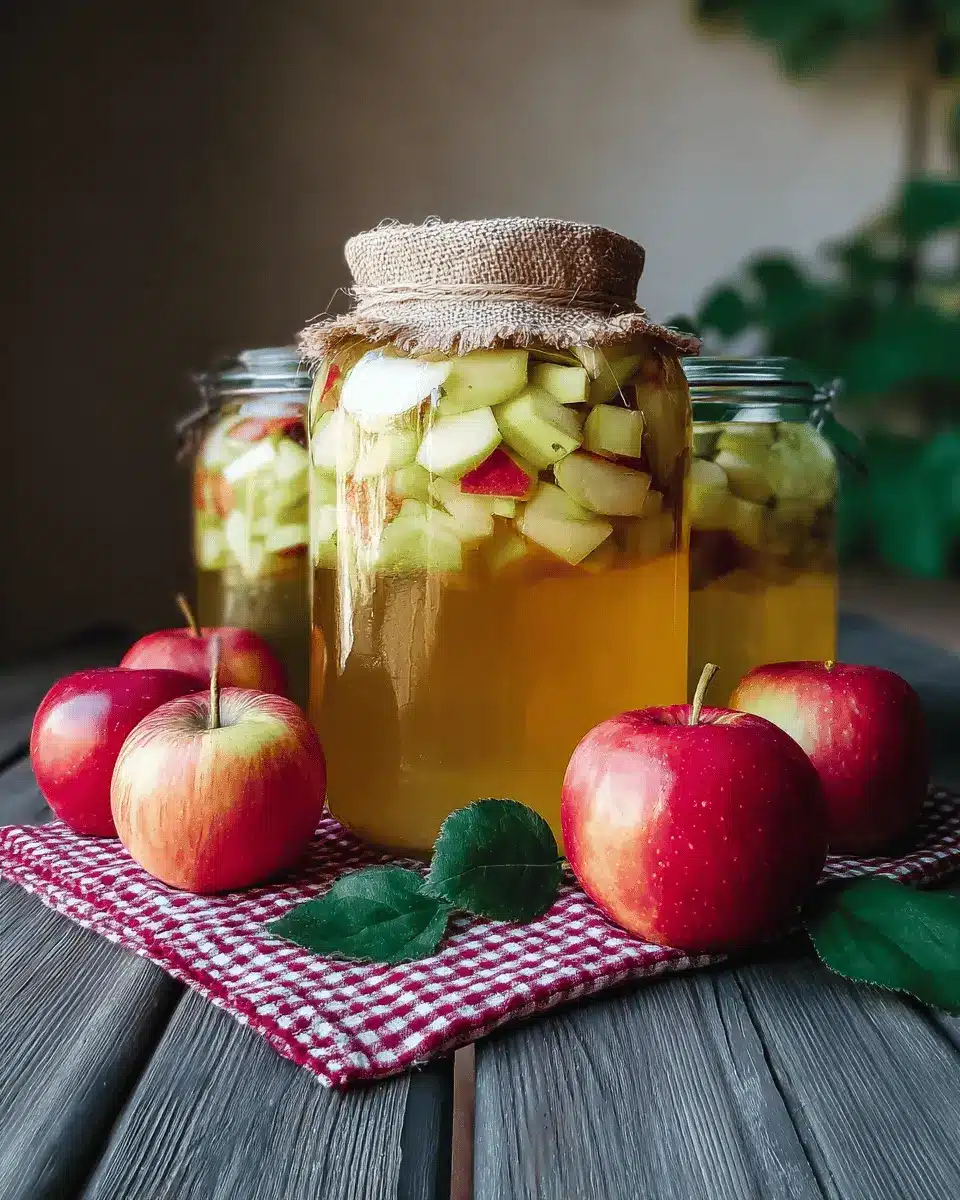
- Diced apple chunks or apple scraps (skins and cores): Fill your chosen fermenting vessel (like a quart jar or crock) about halfway.
- Filtered water: Use lukewarm filtered water to ensure a healthy fermentation.
- Sugar: This is crucial for the fermentation process! Aim for 1 tablespoon of sugar per cup of water or 1 cup per gallon for larger batches.
Optional additions
Want to amplify your vinegar's flavor? Consider adding these ingredients:
- A splash of organic apple cider vinegar (like from your favorite brand) to help kickstart the fermentation process.
- Spices such as cinnamon, or even some herbs, to give your vinegar a unique twist.
For more inspiration on preserving apples, the options are limitless! Whether you're looking for creative uses for apple scraps or tips on maintaining your newfound apple cider vinegar, this is a delightful project worth exploring. Plus, check out resources like The Spruce Eats for expert advice on fermentation and preservation nuts and bolts!
Step-by-Step Preparation for Homemade Apple Cider Vinegar
Crafting your own apple cider vinegar is not only a fun way to enjoy your harvest but also a fantastic method for preserving apples. Whether you have a bounty of apples or just some scraps, the process is straightforward and rewarding. Let’s dive into the steps to create your own tangy concoction.
Gather and Prepare Your Apples
Before anything else, you’ll want to gather your apples. You can use:
- Fresh apple chunks
- Apple scraps (like skins and cores)
Make sure to wash them thoroughly. If your apples are organic, even better! Chop them into chunks, or if you’re opting for scraps, have them ready to fill your fermentation vessel halfway.
Combine Ingredients in Your Fermentation Vessel
The next step is about blending your apples with the right ingredients:
- Place your apple chunks or scraps into a clean fermenting jar—a quart jar, a half-gallon jar, or even a one-gallon crock work well.
- Pour lukewarm filtered water into the jar until it’s nearly full, measuring how much water you use.
- Stir in the sugar: that’s 1 tablespoon of sugar per cup of water or 1 cup for every gallon. This sugar is essential for fermentation, feeding the yeast that will turn your mixture into vinegar.
For an extra starter boost, consider adding a splash of organic apple cider vinegar. According to experts, this can enhance the fermentation process.
Start the Fermentation Process
Cover your mixture with a breathable fabric—like cheesecloth or a coffee filter—and secure it with a rubber band. This allows for air circulation while keeping dust and insects out. Store your jar in a dark, warm place around 70 to 75 degrees F for two weeks.
Monitor and Stir Regularly
During the fermentation, it’s key to stir the mixture daily. This helps prevent mold from forming and keeps everything well combined. If you notice any fuzz on top, don’t panic! Just remove that layer, and your vinegar is still on track. A dark towel over the jar can help block excess light, promoting a better fermentation environment.
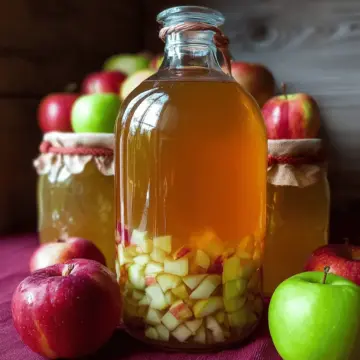
Strain and Bottle Your Vinegar
After two weeks, it’s time for the big reveal! Strain out the solids, keeping only the liquid in a new container. Make sure it’s clean and covered—this will continue fermenting. If you’re wondering how long to let it sit, about one month is a good starting point. Once it reaches that tartiness you love, transfer it to bottles with lids.
Enjoy your homemade apple cider vinegar! It not only keeps for over a year but is also a wonderful addition to salads, marinades, and wellness regimes. For more information on the health benefits of apple cider vinegar, check out Healthline.
Making vinegar at home might seem daunting, but with a little patience and care, it can become a delightful routine!

Variations of Homemade Apple Cider Vinegar
Creating your own homemade apple cider vinegar opens a world of flavor possibilities. Here are two delightful variations to try out!
Adding herbs and spices
Elevate your vinegar by incorporating fresh herbs and spices. Consider blending in rosemary, thyme, or even a pinch of cinnamon for warmth. These additions can add a unique twist, enhancing both the flavor and health benefits of your vinegar.
You might also try infusing ginger or garlic to give your vinegar a spicy kick. The experimentation never ends!
Using different apple varieties
Don’t limit yourself to just one type of apple! Mixing varieties, such as Granny Smith for tartness and Fuji for sweetness, can create a more complex and balanced flavor profile. Each apple type brings its own unique characteristics, which enriches the final product. For a deeper dive into the benefits of using different apples, explore resources like The Old Farmer’s Almanac for tips on preserving apples and utilizing their best traits.
Experiment and discover the blend that excites your taste buds!
Cooking Tips and Notes for Homemade Apple Cider Vinegar
Optimal fermentation conditions
To achieve the best results when preserving apples for homemade apple cider vinegar, ensure your fermentation environment is warm and dark. Aim for a temperature of 70 to 75 degrees Fahrenheit, which promotes healthy bacterial growth while staving off unwanted mold. Use a breathable cover—like a cheesecloth—over your fermenting jar to allow air flow but prevent dust and insects from contaminating your brew.
Troubleshooting common issues
If you notice a foul smell or visible mold on your vinegar, it may have strayed off course. Don’t despair! Removing the mold and stirring can help rejuvenate the process. If it’s still not right, consider starting over with fresh apples or scrapping the previous batch. Remember, experimenting is part of the fun, and every batch offers a new learning experience!
For more insights on fermentation, check out resources from The Fermentation Association.
Serving Suggestions for Homemade Apple Cider Vinegar
Culinary Uses
Homemade apple cider vinegar is a versatile ingredient that can elevate many dishes. Use it in salad dressings to add a delightful tang, or drizzle it over roasted vegetables for a flavor boost. It's also perfect for pickling vegetables, offering a great alternative to traditional vinegar. Feeling adventurous? Try incorporating it into marinades for chicken or turkey bacon to enhance their flavor profile.
Health Benefits in Daily Life
Beyond its culinary merits, apple cider vinegar is celebrated for its health benefits. Regular consumption may aid digestion, support weight loss, and even help regulate blood sugar levels. Just a teaspoon or two diluted in water each day could be your secret weapon for wellness. Plus, check out reputable sources like Healthline for more insights on its benefits! Incorporating apple cider vinegar into your routine can be an easy step toward a healthier lifestyle when preserving apples.
Time Breakdown for Making Homemade Apple Cider Vinegar
Preparation Time
Getting started is a breeze! You’ll need about 20 minutes to wash, chop your apples, and mix in the sugar and water. This is the fun part—think of it as a mini kitchen adventure!
Fermentation Time
Patience is key here. The fermentation process spans around 60 days. You’ll need to stir daily for the first two weeks and then let nature do its thing for the remaining time. The longer you wait, the more robust the flavor!
Total Time
In total, you're looking at around 60 days and 20 minutes. While the hands-on time is minimal, the waiting will reward you with delicious homemade apple cider vinegar perfect for all your culinary needs. Curious about storing those apples? Check out our section on preserving apples for even more tips!
For additional resources on fermentation, consider checking Fermentation Science or The Art of Fermentation. Enjoy the journey!
Nutritional Facts for Homemade Apple Cider Vinegar
When you embark on the delightful journey of preserving apples to create your own apple cider vinegar, it's good to know what’s packed in your homemade brew.
Calories
A tablespoon of homemade apple cider vinegar contains approximately 3 calories, making it a low-calorie choice for dressings or when diluting in beverages.
Probiotics
Rich in probiotics, your homemade apple cider vinegar can support gut health—potentially boosting digestion and strengthening your immune system.
Acetic Acid Content
The acetic acid in apple cider vinegar, which can range from 4-7%, provides its signature tang and is known for its potential health benefits, including blood sugar regulation and weight management.
With such a powerful blend of nutritional elements, your homemade apple cider vinegar not only elevates dishes but also contributes to a healthier lifestyle! For more insights on the benefits of fermented foods, check out this article from Healthline.
FAQs about Preserving Apples and Homemade Apple Cider Vinegar
How long does homemade apple cider vinegar last?
Once properly fermented, your homemade apple cider vinegar can last well over a year, especially if stored in a cool, dark place or in the refrigerator. Just make sure there’s no visible mold or off-putting smell. It's worth checking every few months to see how the flavor develops!
Can you use any type of apple for vinegar?
Absolutely! While preserving apples, each variety will impart different flavors to your vinegar. From sweet Fuji apples to tart Granny Smiths, feel free to experiment. Using a mix of apples enhances the complexity of your vinegar, so don’t hesitate to use up those odds and ends!
What are the health benefits of apple cider vinegar?
Apple cider vinegar is praised for its potential health benefits, including aiding digestion, lowering blood sugar levels, and even promoting heart health. It’s rich in probiotics, which can boost gut health when consumed in moderation. Always consult a healthcare professional for personalized advice!
For more insights on the benefits of apple cider vinegar, you can refer to sources like Healthline. Happy fermenting!
Conclusion on Preserving Apples
Embracing homemade solutions for a healthier lifestyle
Incorporating homemade apple cider vinegar into your pantry not only makes use of unwanted apple scraps but also promotes a zero-waste philosophy. By preserving apples in this way, you contribute to healthier living while enjoying a versatile ingredient rich in flavor and probiotics. Give it a try!
Homemade Apple Cider Vinegar
Equipment
- fermenting vessel
Ingredients
Apple Ingredients
- 1 gallon filtered water
- 1 cup sugar per gallon of water
- diced apple chunks or apple scraps (skins, cores) enough to fill half of the fermenting vessel
Instructions
Preparation Instructions
- Wash and chop the apples into chunks, or gather collected apple scraps and add them to your jar or other large fermenting vessel until it filled about halfway full.
- Pour lukewarm filtered water over the apples into the container until it is almost full, but measure/note the total amount of water added.
- Stir in sugar in ratios of 1 tablespoon of sugar per cup of water added, or for larger batches, 1 cup of sugar per gallon of water added.
- Optional: Add a splash of finished organic apple cider vinegar to inoculate the culture and encourage fermenting.
- Stir combined ingredients until thoroughly mixed, and cover with breathable material.
- Store in a dark location around 70 to 75 degrees F for two weeks to ferment, and stir every day to prevent mold from forming on top.
- After two weeks, strain and reserve the liquid into a similar sized container and cover again. Compost the spent fruit.
- Move the covered container of liquid to a location that is out of the way to continue long term fermentation. Maintain dark.
- After one month, sample the vinegar to see if it is finished fermenting and tart to your liking. If needed, allow it to continue to ferment for a total of two to three months.
- Once it is fermented to your desired flavor, transfer the apple cider vinegar into bottles with lids, and store at room temperature or in the refrigerator, and enjoy!
- Properly fermented apple cider vinegar should stay good for over a year.


Leave a Reply