
Introduction to Classic Homemade Dinner Rolls
When it comes to comfort food, few things can compare to the warm, fluffy goodness of classic homemade dinner rolls. Freshly baked rolls not only elevate any meal but also create a nostalgic atmosphere, filling your kitchen with the irresistible aroma of baked bread that beckons even the busiest of schedules. Whether you're hosting a family gathering or just winding down after a long day, these rolls are a must-try.
Why are homemade dinner rolls a must-try?
Making your own dinner rolls from scratch allows you to tailor the recipe to your taste and dietary preferences. You can adjust the ingredients to make them healthier or more indulgent based on your mood. Did you know that serving homemade rolls can make a profound impact on your dining experience? According to Food Network, warm, fresh bread can instantly elevate meals and even encourage conversations around the table.
Plus, the satisfaction of pulling a golden-brown tray of classic homemade dinner rolls out of the oven is unmatched. You’ll not only share delicious food but also create lasting memories with every bite. So roll up your sleeves and get ready to impress your friends and family with this simple yet rewarding recipe that’s bound to become a staple in your kitchen!
Ingredients for Classic Homemade Dinner Rolls
When it comes to making classic homemade dinner rolls, using the right ingredients is essential to achieving that soft, fluffy texture we all crave. Here’s what you’ll need to get started:
- ¾ cup milk: Heat in the microwave for about 45 seconds until it reaches that delightful hot chocolate temperature.
- ½ cup softened unsalted butter: You can also use shortening if you prefer.
- ¼ cup granulated sugar: This adds a touch of sweetness to balance the flavors.
- 1 teaspoon salt: Essential for enhancing the overall taste of the rolls.
- 2 packages active dry yeast: This will help our dough rise properly, about 5 teaspoon in total.
- ½ cup lukewarm water: Aim for a temperature range of 110-115°F to activate the yeast.
- 4¼ to 4¾ cups sifted all-purpose flour: The amount of flour can vary based on humidity and other factors.
- 2 large eggs: They help bind the dough and contribute to a tender crumb.
- 2 tablespoon melted salted butter: For brushing on top before serving—adds a delicious buttery finish.
For more detailed tips on these ingredients, check out resources from King Arthur Baking and The Kitchn. They have fantastic insights on baking principles that can elevate your rolls!
Step-by-step Preparation of Classic Homemade Dinner Rolls
Making classic homemade dinner rolls can be incredibly rewarding, bringing warmth and comfort to your table. Let’s walk through each step to ensure your rolls come out perfectly fluffy and golden.
Activate the yeast
To kick off, start by activating the yeast. In a small bowl, combine 2 packages of active dry yeast (around 5 teaspoons) with ½ cup of lukewarm water (aim for 110-115°F). Gently stir and let it sit for about 5-10 minutes. You'll know it's ready when the mixture becomes foamy. This step is crucial as it wakes up the dormant yeast, ensuring your rolls rise beautifully.
Prepare the milk mixture
While your yeast is bubbling away, grab a large mixing bowl. Combine ¾ cup of hot milk (microwaved for about 45 seconds until it’s just right—think hot chocolate temperature), ½ cup of softened unsalted butter, ¼ cup of granulated sugar, and 1 teaspoon of salt. Stir until the butter melts and the ingredients meld. Allow this mixture to cool, ensuring it's warm but not hot. Remember, if it's too hot, it can kill the yeast!
Combine wet and dry ingredients
Once the milk mixture has cooled, it’s time to mix. Add 1½ cups of all-purpose flour to the bowl and beat well—either by hand or using a mixer on low speed—for about one minute until smooth. Next, incorporate the 2 large eggs and the activated yeast mixture. Mix everything until fully combined.
Form the dough
Now, gradually stir in the remaining flour, about 2¾ to 3¼ cups, until you have a soft dough that pulls away from the sides of the bowl. The goal is a dough that’s neither too sticky nor too dry; feel free to adjust the flour as needed.
Knead the dough
Turn the dough onto a lightly floured surface and knead for around 8 minutes. You want the dough to become smooth and elastic, with the right texture—this kneading action helps develop gluten, crucial for that fluffy consistency we love in dinner rolls.
First rise
Place the kneaded dough in a lightly greased bowl, turning it to coat. Cover it and let it rise in a warm spot for 1 to 1½ hours, or until it doubles in size. Think about how satisfying it feels during this wait—imagine those rolls baking away later!
Shape the rolls
Once the dough has risen, punch it down gently and transfer it to a floured surface. Divide it into about 15 equal pieces. If you have a food scale, now's a good time to weigh each piece to about 3.4 oz (96 g). Shape each piece into a ball by pinching the edges underneath to create a smooth top, rolling it gently on the counter until you achieve that perfect shape.
Second rise
Now, place these rolled dough balls seam-side down on a greased baking sheet. Brush the tops lightly with melted butter, cover loosely, and let them rise again for 30-45 minutes, until they double in size again. The anticipation builds as you await the fluffy transformation!
Bake the rolls
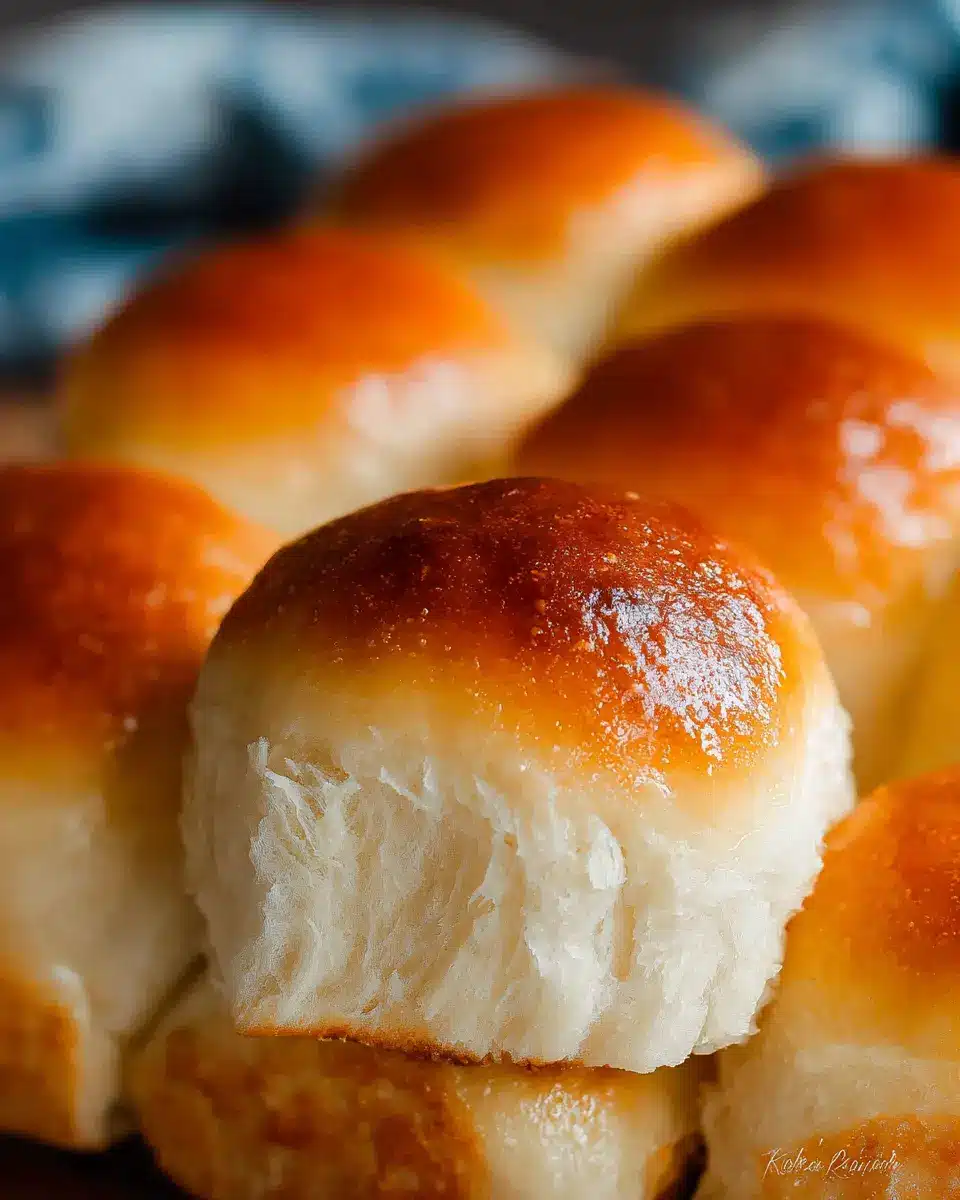
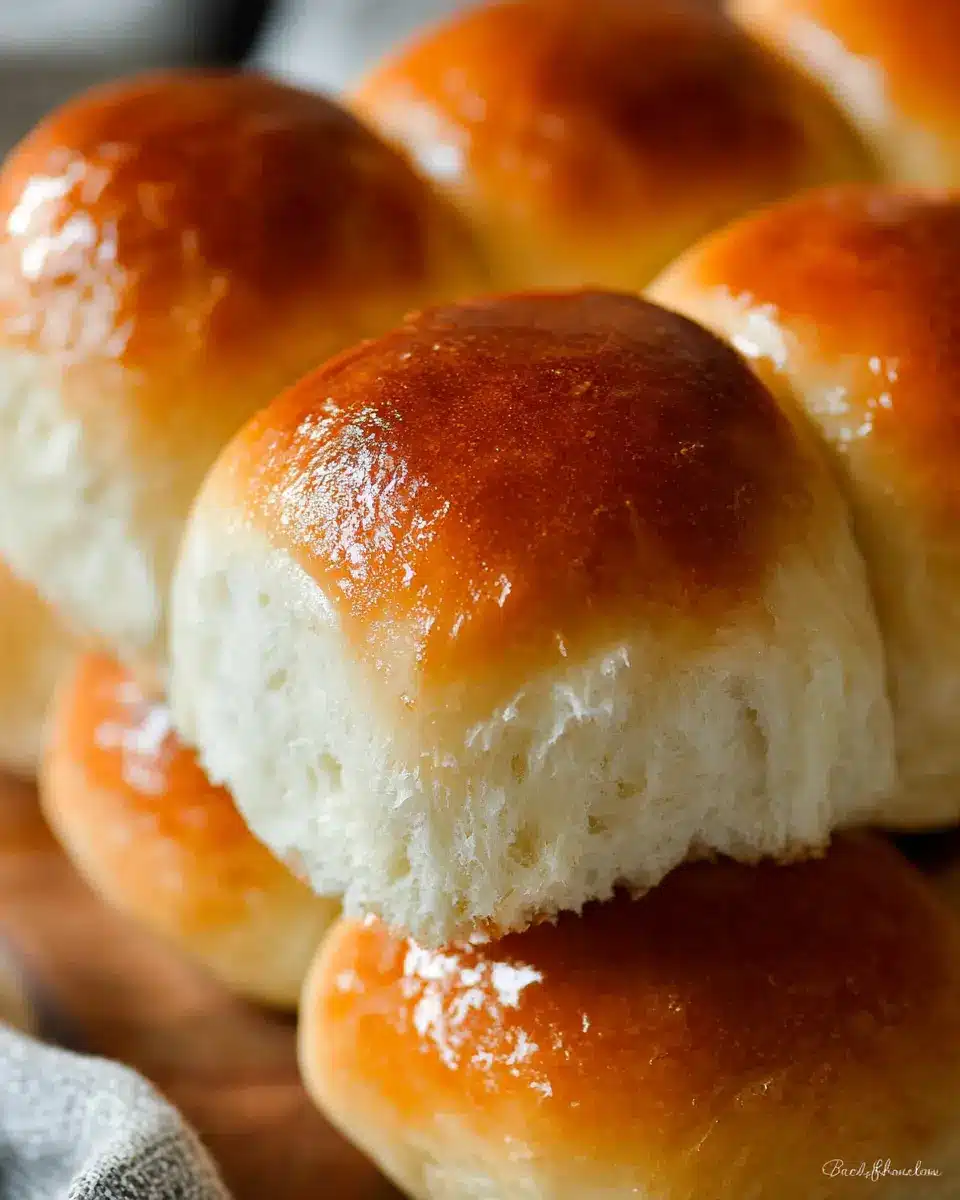
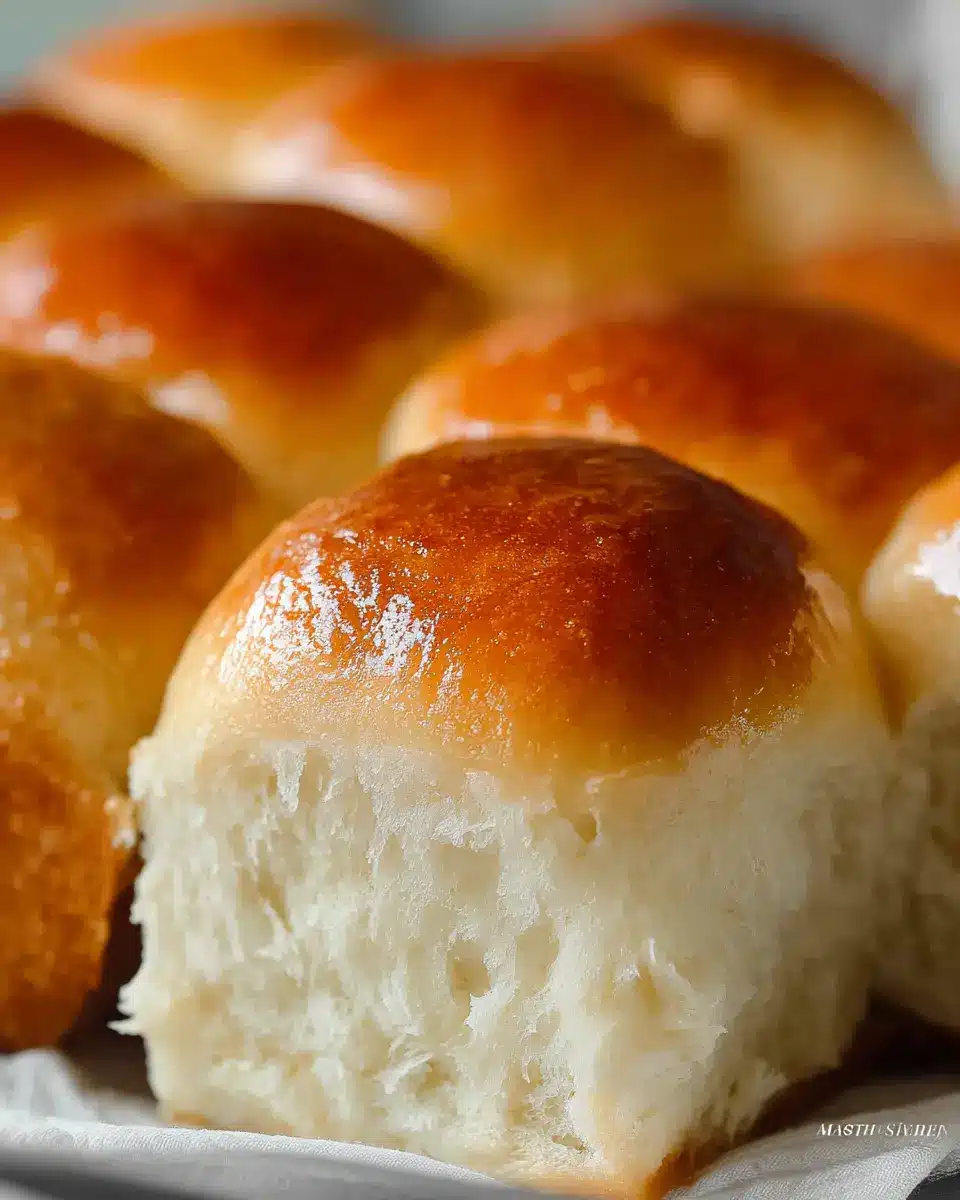
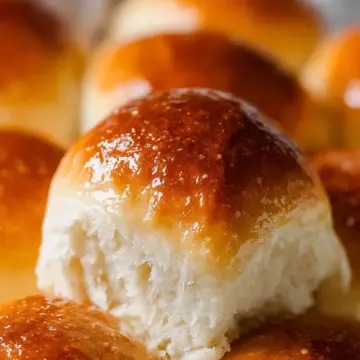
Preheat your oven to 375°F and bake the rolls for 12-15 minutes, or until their tops turn golden brown. As soon as they’re out of the oven, don’t forget to brush them again with melted butter for that added glossy touch. Enjoy the scents wafting through your kitchen—it’s the perfect teaser for what's to come!
Taking these steps will help ensure that your classic homemade dinner rolls are a hit at any meal. And trust me, the satisfaction of pulling these rolls out of the oven is unparalleled!
Variations on Classic Homemade Dinner Rolls
When it comes to customizing your classic homemade dinner rolls, the sky's the limit! Here are two delightful variations that can elevate your dinner experience.
Herb-infused Dinner Rolls
Enhance your rolls by mixing in your favorite fresh herbs, such as rosemary, thyme, or basil, during the kneading process. This simple addition gives a wonderful aroma and flavor that pairs perfectly with soups or salads, making your rolls a standout at any table. For tips on using herbs, check out this Herb Guide.
Sweet Cinnamon Rolls
If you have a sweet tooth, turn your rolls into cinnamon rolls! After dividing the dough, roll each piece into a rectangle, spread softened butter, sprinkle with sugar and cinnamon, and roll it up. Slice and bake for a delightful twist that’s perfect for brunch or dessert. Want to create the perfect frosting? Learn more about it here.
These variations are not only tasty, but they also add a personal touch to your classic homemade dinner rolls. Give them a try!
Cooking Tips and Notes for Classic Homemade Dinner Rolls
Making classic homemade dinner rolls can be a delightful experience, and here are some tips to ensure your rolls come out perfectly every time!
- Temperature Matters: Use warm water around 110-115°F to activate the yeast. This helps achieve that fluffy texture we all love.
- Milk Mixture: Allow the milk and butter mixture to cool slightly before mixing in the yeast—too hot can kill your yeast.
- Kneading Technique: Knead the dough for about 8 minutes. This builds gluten, giving your rolls that elastic quality.
- Second Rise: Don’t rush the rising process; give your dough ample time to double in size for the lightest rolls.
- Final Butter Brush: Brushing with melted butter after baking keeps those rolls soft and irresistible!
For more tips, visit sources like the King Arthur Baking Company for expert advice on bread-making.
Serving Suggestions for Classic Homemade Dinner Rolls
When it comes to enjoying your classic homemade dinner rolls, the possibilities are endless! Here are some delightful serving suggestions to elevate your homemade rolls:
-
Perfect with Soup or Stew: Serve these fluffy rolls alongside a hearty bowl of creamy tomato soup or beef stew. They’re perfect for dipping!
-
Sandwich Base: Slice the rolls in half and load them up with turkey bacon, chicken ham, or your favorite fillings for a delicious sandwich.
-
Savory Sliders: Use these rolls to create mouthwatering sliders. Fill them with pulled beef and sautéed peppers for a fun twist.
-
Brunch Delight: Create a delightful brunch by serving the rolls with fresh fruit, yogurt, and a drizzle of honey or maple syrup.
-
Dinner Side: Don't forget to serve them as a side with your favorite pasta dishes or roasted vegetables.
With these ideas, your classic homemade dinner rolls will shine at every meal! For more inspiration, check out this comprehensive guide on pairing bread with various cuisines.
Time Breakdown for Classic Homemade Dinner Rolls
Preparation time
Getting started with your classic homemade dinner rolls is quick! You’ll need about 15-20 minutes to gather your ingredients and mix them together.
Rising time
Patience is key here! Allow the dough to rise for 1 to 1.5 hours in a warm spot until it doubles in size.
Baking time
Bake these delicious rolls for 12-15 minutes until they are golden and warm.
Total time
In total, you’re looking at approximately 2 to 2.5 hours from start to finish, including all the wonderfully aromatic rising times! Enjoy the delicious scent wafting through your kitchen as you wait for these rolls to bake!
For more tips on dough rising, check out King Arthur Baking for expert advice!
Nutritional Facts for Classic Homemade Dinner Rolls
When you're whipping up a batch of classic homemade dinner rolls, it’s good to know what’s on your plate. Here’s a quick look at the nutrition:
Calories
Each roll contains approximately 104 calories, making them a delightful addition to your meal without overdoing it.
Protein
You’ll find about 1 gram of protein per roll, which, while modest, contributes to your daily intake—especially when paired with other protein-rich dishes.
Sodium
These rolls carry around 181 milligrams of sodium. This level is reasonable if you’re mindful of your overall salt intake, especially when enjoying them alongside flavorful main dishes.
For more on keeping your meals balanced, consider checking out resources from the American Heart Association to help you along your culinary journey!
FAQs about Classic Homemade Dinner Rolls
Why did my dinner rolls not rise?
If your classic homemade dinner rolls didn’t rise, it could be due to several factors:
- Yeast Activation: Make sure your yeast is fresh and properly activated. The water you use should be warm (110-115°F), but not hot.
- Temperature: A warm environment helps the dough rise. Try placing it in a cozy spot, like an oven that’s turned off but still warm.
- Time: Sometimes you might just need a bit more patience! If your kitchen is cool, the first rise might take longer than usual.
Can I freeze the unbaked dough?
Absolutely! You can freeze the classic homemade dinner rolls dough after shaping the rolls. Simply place them on a baking sheet until they’re frozen, then transfer them to an airtight bag. You can bake them directly from the freezer, adding extra time to the baking process.
What can I use instead of milk in the recipe?
If you’re looking for a non-dairy option, you can substitute milk with almond milk, soy milk, or even water in your classic homemade dinner rolls. Just ensure the substitute is at a similar temperature to the warmed milk in the recipe for best results.
For more tips on creating perfect rolls, check out King Arthur Baking.
Conclusion on Classic Homemade Dinner Rolls
In summary, making classic homemade dinner rolls is a rewarding and delicious endeavor. These rolls are perfect for any meal, whether a cozy family dinner or a festive gathering. With a little time and love, you'll create soft, buttery rolls that everyone will enjoy. Happy baking!
Classic Homemade Dinner Rolls
Equipment
- Mixing bowl
- Electric mixer
- baking sheet
- Measuring cups
- Measuring spoons
- Kitchen towel
Ingredients
- ¾ cup milk microwaved about 45 seconds until hot chocolate temperature
- ½ cup softened unsalted butter or shortening
- ¼ cup granulated sugar
- 1 teaspoon salt
- 2 packages active dry yeast about 5 teaspoon or 1 tablespoon + 2 tsp
- ½ cup lukewarm water 110-115°F
- 4 ¼ to 4 ¾ cups sifted all-purpose flour
- 2 large eggs
- 2 tablespoon melted salted butter for brushing tops
Instructions
- In a small bowl, combine 2 packages active dry yeast with ½ cup lukewarm water (110-115°F). Stir gently and let sit for 5-10 minutes until the mixture becomes foamy.
- In a large mixing bowl, combine ¾ cup hot milk, ½ cup softened unsalted butter, ¼ cup granulated sugar, and 1 teaspoon salt. Stir until the butter melts and everything is combined. Let the mixture cool until it feels warm but not hot.
- Add 1 ½ cups all-purpose flour to the milk mixture and beat well by hand or with an electric mixer on low speed for about 1 minute until smooth.
- Add the 2 large eggs and the activated yeast mixture, then mix until fully combined.
- Gradually stir in the remaining 2 ¾ to 3 ¼ cups all-purpose flour until a soft dough forms that pulls away from the sides of the bowl.
- Turn the dough onto a lightly floured surface and knead for about 8 minutes until the dough becomes smooth, elastic, and no longer sticky.
- Place the dough in a lightly greased bowl, turning once to coat the surface. Cover and let rise in a warm place for 1 to 1 ½ hours, or until the dough doubles in size.
- Punch down the dough and transfer it to a lightly floured surface. Divide the dough into about 15 rolls.
- Pinch the edges of each piece of dough underneath to create a smooth top. Roll the dough ball gently on the counter using your hand in an 'OK' shape to tighten the surface and place the seam on the bottom.
- Place the dough balls seam-side down on a greased baking sheet, brush the tops lightly with melted butter, cover loosely, and let rise for 30-45 minutes until doubled in size.
- Bake in a 375°F oven for 12-15 minutes, or until the tops are golden brown.
- Remove from the oven and immediately brush the rolls with 2 tablespoons melted butter before serving.


Leave a Reply