
Introduction to Roasted Garlic
If you haven't yet discovered the wonders of roasted garlic, let me enlighten you. This simple yet transformative ingredient can elevate your home cooking in ways you never imagined. When garlic is roasted, it becomes sweet, buttery, and incredibly mellow, turning it from a bold flavor to a luscious spread. Imagine effortlessly squeezing out creamy cloves onto warm, crusty bread or mixing it into your favorite dishes for an explosion of flavor!
So, why is roasted garlic a game-changer in home cooking?
- Versatile Ingredient: Roasted garlic can be used in various recipes — from mashed potatoes to dips, sauces, and even salad dressings.
- Healthy Boost: Garlic is renowned for its numerous health benefits, including boosting the immune system and reducing heart disease risk. Roasting it enhances these properties while making it easier to enjoy (source: Healthline).
- Culinary Creativity: Adding roasted garlic allows you to experiment and create unique flavor profiles, especially when paired with other ingredients like turkey bacon or chicken ham.
Whether you're hosting a gathering or simply cooking for yourself, roasted garlic is an effortless way to impress. So, are you ready to dive in and make this delightful ingredient a star in your culinary repertoire?
Ingredients for Roasted Garlic
Roasted garlic is a culinary treasure that transforms from pungent to sweet and creamy, enriching your dishes with flavor. To ensure your roasted garlic is a resounding success, here are the essential items you'll need:
Essential items needed for the perfect roasted garlic
-
Garlic Heads: Start with 10 medium heads of garlic. The fresher, the better! Look for heads that are firm with no soft spots.
-
Olive Oil: A rich and flavorful oil is key to enhancing the taste, so opt for 3 tablespoons of high-quality olive oil. It truly elevates the roasted garlic experience.
-
Baking Sheet: You’ll need a sturdy baking sheet for even roasting. Consider lining it with parchment paper for easy cleanup.
-
Aluminum Foil (optional): Wrapping individual garlic heads can help trap heat for more uniform cooking.
Gather these ingredients, and you're set to create a dish that's not only delicious but incredibly rewarding to enjoy. For more cooking tips, check out resources like Culinary Institute of America for expert guidance.
Isn't it fascinating how something as simple as garlic can add a gourmet touch to your meals? Happy roasting!
Step-by-step Preparation of Roasted Garlic
Roasted garlic is a kitchen essential that can elevate any dish, whether you're stirring it into a creamy pasta or simply spreading it on a slice of crusty bread. Let’s make this delectable treat together, shall we?
Gather your ingredients
Before diving into the roasting process, let’s assemble what you need. For this recipe, you’ll need:
- 10 medium heads of garlic – Fresh garlic is crucial for the best flavor.
- 3 tablespoons of olive oil – This will add richness to your roasted garlic.
Having these items on hand will ensure a seamless cooking experience. And believe me, the smell of roasting garlic will make your kitchen feel like a welcoming Italian restaurant!
Preheat the oven to the right temperature
Now that your ingredients are ready, it's time to get your oven fired up! Preheat your oven to 400°F (200°C). This temperature is ideal because it allows the garlic to roast evenly, caramelizing its natural sugars and making it soft and sweet. If you're curious about the science behind roasting garlic, check out this informative piece here.
Preparing the garlic heads
Once the oven is preheated, it’s time to prepare those garlic heads. Gently peel away any loose, papery outer layers but leave the skins of the individual cloves intact. Using a sharp knife, slice off the top quarter of each head to expose the cloves. This little step is crucial because it allows the heat and oil to penetrate, ensuring every clove gets deliciously roasted. Drizzle the exposed parts with olive oil, and don’t be shy here! This helps with flavor and prevents the garlic from drying out.
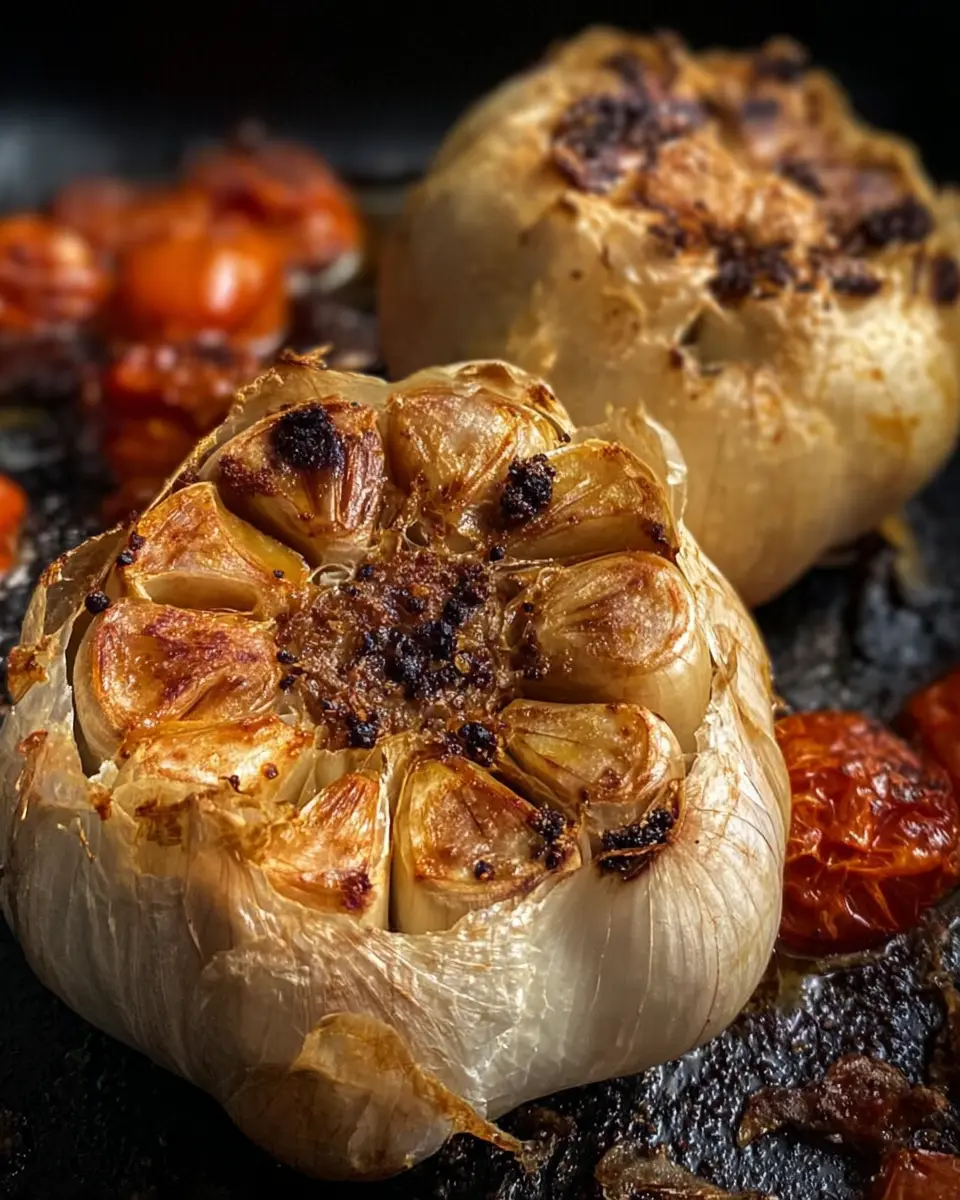
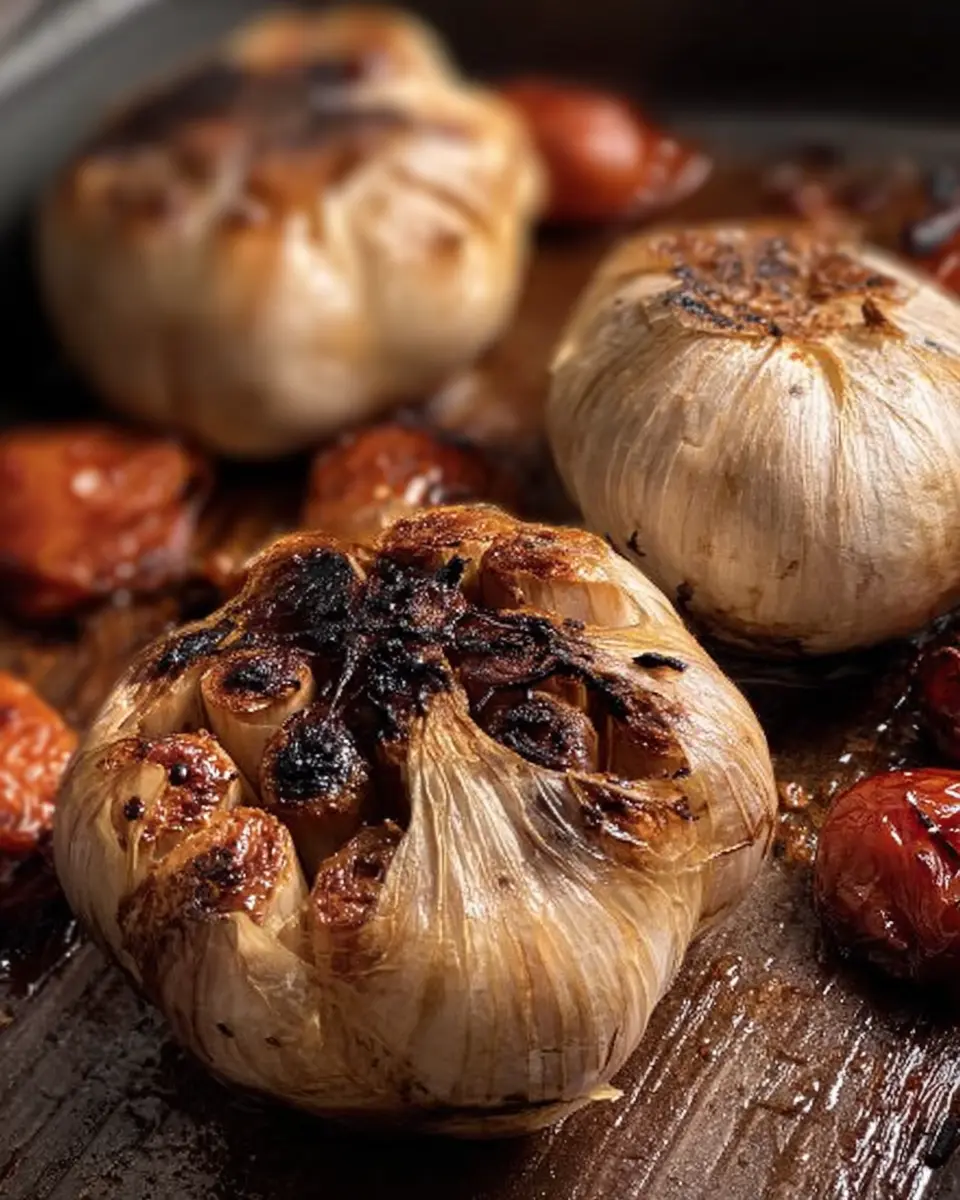
Baking the garlic to perfection
Arrange the heads of garlic on a baking sheet, cut-side up, and pop them into the preheated oven. Your garlic will need about 40 minutes to 1 hour to roast. Keep a close eye on them, and once they are soft and caramelized, you’ll know they’re ready. The beautiful transformation of these humble garlic cloves into a sweet, buttery condiment is nothing short of magical.
Cool and serve your roasted garlic
Once your roasted garlic has reached golden-brown perfection, take it out of the oven and let it cool for a bit. Waiting is tough—trust me, I know! Once they’re cool enough to handle, you can easily squeeze the cloves out of their skins. The sweet, mellow flavor of roasted garlic can be used in various dishes, paired with everything from cheese and crackers to veggies.
So there you have it! With just a few steps, you'll have a delightful batch of roasted garlic ready to impress your guests or elevate your meals. Enjoy this simply delicious treat!
Variations on Roasted Garlic
Roasted Garlic with Herbs
Transform your roasted garlic by adding fresh herbs! Simply toss in thyme, rosemary, or oregano before baking for an aromatic twist. These herbs not only enhance the flavor but also bring a delightful aroma that fills your kitchen. A touch of parsley added post-baking provides a fresh finish for your dishes.
Roasted Garlic Blended into Spreads
Take your roasted garlic to the next level by blending it into creamy dips. Mix with cream cheese or Greek yogurt for a savory spread that’s perfect on bagels or sandwiches. You can even add a splash of lemon juice or a pinch of smoked paprika to elevate the flavor further. For more ideas, check out this wonderful guide on spreading flavors in your kitchen.
Whether you’re hosting a dinner party or just enjoying a quiet night in, these variations can help you savor the versatility of roasted garlic!
Cooking Tips and Notes for Roasted Garlic
Storing roasted garlic properly
To keep your roasted garlic fresh, store it in an airtight container in the refrigerator. It should last about a week. For longer storage, consider freezing the cloves. Pop them in an ice cube tray with a splash of olive oil, and freeze. Once solid, transfer them to a freezer bag. When you're ready to use them, just defrost and enjoy! For more tips on storing garlic, check out this helpful guide.
Common mistakes to avoid
When making roasted garlic, avoid peeling the cloves before roasting. The skin protects the garlic during cooking, allowing it to caramelize beautifully. Another common error is overcrowding the baking sheet, which can lead to uneven cooking. Give each head of garlic some space to roast perfectly. Don't rush the process; letting it roast until soft will yield the best flavor!
For more culinary advice, refer to this article on cooking techniques.

Serving Suggestions for Roasted Garlic
Perfect Pairings for a Tasty Experience
When it comes to enjoying roasted garlic, think beyond the bread! Pair it with:
- Creamy cheeses like goat or brie for a delightful contrast.
- Turkey bacon or chicken ham for a savory touch to your breakfast spread.
- Fresh fruits like apples or pears, which balance the rich flavor beautifully.
Each combination opens up a world of taste, making your meal a true feast for the senses.
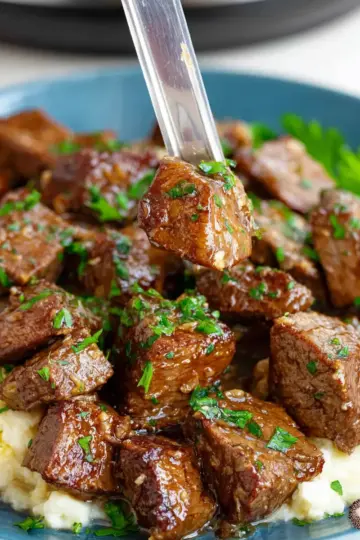
Creative Uses in Your Meals
Why just stop at spreading? Here are some fun and creative ways to incorporate roasted garlic into your meals:
- Pasta dishes: Mash it into your sauce for a rich flavor boost.
- Soups and stews: Add a few cloves to deepen the broth's savory notes.
- Dips and spreads: Blend it into hummus or cream cheese for a tasty twist.
Not only does this versatile ingredient elevate your dishes, but it also brings health benefits—roasted garlic is known for its immunity-boosting properties. Check out this healthline article for more about its potential benefits!
Time Breakdown for Roasted Garlic
Preparation Time
Preparing your roasted garlic is a breeze! You’ll need just 5 minutes to gather your ingredients and get your garlic ready for roasting.
Cooking Time
The magic happens in the oven, where your garlic will roast to perfection in 1 hour. Keep an eye on it around the 40-minute mark for that perfectly soft texture.
Total Time
In just 1 hour and 5 minutes, you can transform simple garlic into a deliciously sweet spread. It's totally worth the wait! Whether you're pairing it with bread or using it in your favorite recipes, you'll love the rich flavor it adds.
If you're looking for more tips, check out this guide on the benefits of garlic for extra inspiration!
Nutritional Facts for Roasted Garlic
Calories and Macros
Roasted garlic is not only delicious but also quite nutritious. In a serving, you’ll find about 80 calories, 3g of total fat, and a modest 2g of protein. The carbohydrates primarily come from its natural sugars, totaling around 12g, making it a flavorful addition to many meals without adding excessive calories.
Key Vitamins and Minerals
One of the best surprises about roasted garlic is its nutritional profile. It's a good source of:
- Vitamin C: 12mg, great for boosting your immune system
- Calcium: 68mg, essential for bone health
- Iron: 1mg, important for energy production
- Potassium: 150mg, supporting heart health and muscle function
Incorporating roasted garlic into your meals not only enhances flavor but also provides beneficial nutrients. To dive deeper into the benefits of garlic, check out this resource from the National Center for Complementary and Integrative Health. Enjoy the tasty health benefits of roasted garlic as you whip up your favorite dishes!
FAQs about Roasted Garlic
How long can I store roasted garlic?
You can store roasted garlic in an airtight container in the refrigerator for up to two weeks. If you're looking to keep it longer, freezing is a great option! Simply freeze the cloves in a single layer on a baking sheet, then transfer them to a freezer bag for up to a year. Having roasted garlic on hand makes adding flavor to meals super convenient.
Can I roast garlic without olive oil?
Absolutely! While olive oil adds richness, you can roast garlic without it. Just wrap your garlic heads in aluminum foil and place them directly in the oven. They’ll still turn tender and flavorful, though the texture and taste will be slightly different. For a healthier option, you can also use vegetable broth as a binding agent.
What are some health benefits of roasted garlic?
Roasted garlic is not just delicious; it also boasts various health benefits. It's known to support heart health, boost the immune system, and has anti-inflammatory properties. Additionally, it’s packed with antioxidants and vitamins. Studies suggest that the compounds in garlic may help lower blood pressure and cholesterol levels. If you want to learn more about the health benefits, check out this informative piece from Healthline.
Remember, adding roasted garlic to your meals is an easy way to enhance flavor and nutrition!
Conclusion on Roasted Garlic
In summary, roasted garlic transforms any dish into a gourmet experience. Its rich, caramelized flavor pairs beautifully with various foods, from bread to apples. Plus, the simplicity of the recipe makes it a go-to for any occasion. Treat your taste buds and bring this delightful ingredient into your kitchen!
For additional ideas on using roasted garlic, explore this helpful guide from Food Network.
Roasted Garlic
Equipment
- oven
- baking sheet
Ingredients
- 10 heads garlic medium
- 3 tablespoons olive oil
Instructions
- Preheat oven to 400 degrees F (200 degrees C).
- Arrange heads of garlic on a baking sheet. Sprinkle garlic with olive oil. Bake for 40 minutes to 1 hour, when the garlic is soft and squeezable, it is ready. Remove, let cool, and serve.

Leave a Reply